REVIEW · KATHMANDU
Manaslu Circuit Trek
Book on Viator →Operated by Touch The Himalaya Treks & Expedition · Bookable on Viator
The Manaslu Circuit feels like Nepal away from the crowd. You get big views of Mt. Manaslu and a real sense of place as the trail winds along the Budhi Gandaki River through Tibetan-influenced villages and monasteries. What I like most is that this route is designed for the long haul: you’re constantly moving through changing terrain, from forests to high-altitude passes, with solid teahouse support along the way.
I also like how the operator handles the hard admin side. You’re covered with the key permits and an expert local guide, plus airport transfers and the trek starts with a direct drive to Machha-Khola. The main drawback to weigh is the reality of altitude and remoteness: you’ll climb to Larkya La Pass (around 5,100m), so pace and acclimatization matter, and services like WiFi or hot showers are limited and not included.
In This Review
- Key highlights you’ll care about
- Why the Manaslu Circuit feels quieter and more real than the usual treks
- Permits and restricted-area rules: the “boring” part that makes the trek better
- Day-by-day route walkthrough (and what each stop really means)
- Machha-Khola to Jagat: starting in river country, then climbing toward Ganesh Himal
- Philim through Deng to Namrung: suspension bridges and rising into village views
- Namrung to Lho: permits at the ridge, plus oak and rhododendron forests
- Lho to Samagaun/Sama: Shyala viewpoints and the big Manaslu show
- Acclimatization day near Samagaun: Birendra Lake and Manaslu Base Camp options
- Samdo: Tibetan refugee camp vibes and the Manaslu angle you came for
- Dharmasala (Larkya Phedi) via Larke Bazaar: the season-market stop before the pass
- Larkya La Pass day: early start, slow climb, and then the long descent to Bhimtang
- Bhimtang down to Ghoa, then Tilje: sunrise teahouse vibes and practical WiFi
- Tilje to Dharapani to Besisahar: finishing with river confluence energy
- Price and value: what $589 really buys you (and what it doesn’t)
- The guide team factor: why the service feels smooth on this trek
- What to pack and how to prepare for 5,000m-plus trekking
- Who should book this Manaslu Circuit trek (and who might not love it)
- Should you book Touch The Himalaya Treks & Expedition for Manaslu Circuit?
- FAQ
- How long is the Manaslu Circuit Trek?
- Where does the trek start and where does it end?
- What time does the trek start on the first day?
- Is pickup included?
- What permits are included?
- Do I need a guide?
- Is food and accommodation during the trek included?
- Is there WiFi or hot shower during the trek?
- Do I need to carry my own gear?
- Is the trek private, and how many people do I need to join?
- Can I cancel for a full refund?
Key highlights you’ll care about
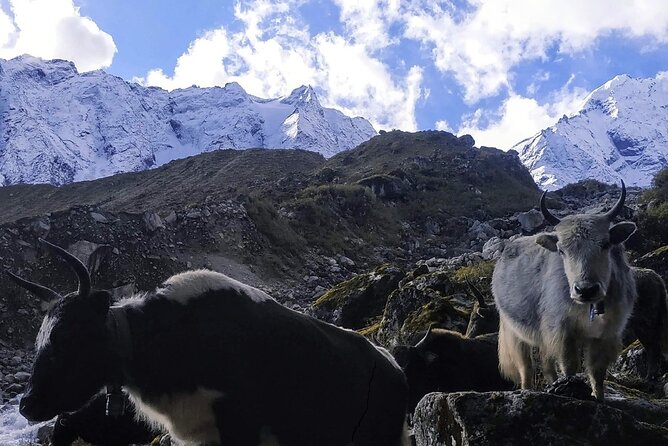
- Larkya La Pass (~5,100m): a thrilling crossing with big Himalayan panoramas
- Tibetan-influenced villages: monasteries, mani walls, and places shaped by the region’s culture
- Restricted-area trekking: special permits and a registered guide keep the route quieter and controlled
- Acclimatization built in: Samagaun/Sama days give you time to adjust before the high pass
- Teahouses that keep you going: essential lodging and meals available, even far from the main highways
- A guide team that gets praised: leaders like Roshan and support staff like Arjun, plus company manager Madan
Why the Manaslu Circuit feels quieter and more real than the usual treks
If you want the Nepal mountain experience without the busy-trail feeling, the Manaslu Circuit is a smart choice. Part of the reason is practical: it runs through the Manaslu Conservation Area and a restricted trekking zone. That combination naturally limits sprawl and helps keep villages and trail rhythms more traditional.
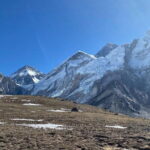
You’re also trekking through a real geographic story. The route follows the Budhi Gandaki River corridor for long stretches, then gradually lifts you into higher, colder terrain. The scenery changes so often that your brain doesn’t get bored—one day it’s forests and river crossings, the next it’s high passes and wide-open views.
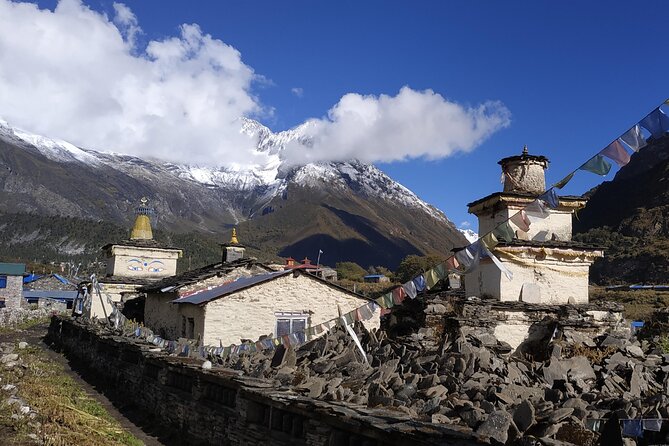
And culturally, this trek doesn’t feel like a theme park. Expect Tibetan-influenced settlements, monasteries, mani walls, and religious stonework that you actually pass by rather than just look at from a distance. Even the smaller details—like little prayer inscriptions along the trail—help you feel like you’re moving through living places.
You can also read our reviews of more tours and experiences in Kathmandu.
Permits and restricted-area rules: the “boring” part that makes the trek better
This is one of those cases where bureaucracy improves your experience. The trek runs as a restricted area, which means you need the right paperwork and a registered guide. Your plan includes the necessary permits—ACAP Permit, MCAP Permit, Manaslu Restricted Area Permit, and TIMS Card—so you’re not trying to scramble for forms once you arrive.
Why that matters in real life: it reduces uncertainty. You still hike hard, but you don’t want to spend precious altitude days dealing with paperwork problems. The permit check post is actually built into the route days, so having everything handled ahead of time is a big deal.
Day-by-day route walkthrough (and what each stop really means)
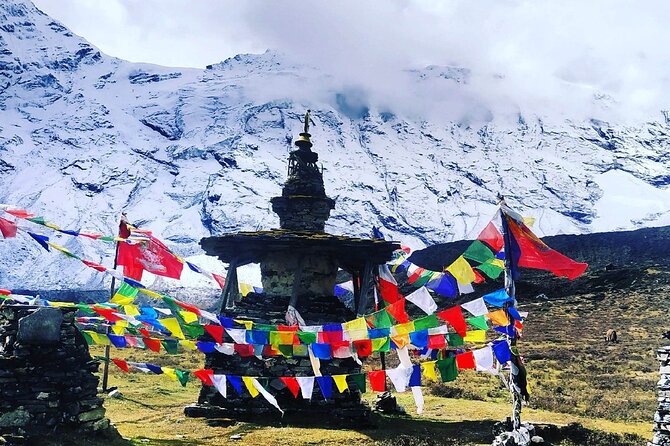
Machha-Khola to Jagat: starting in river country, then climbing toward Ganesh Himal
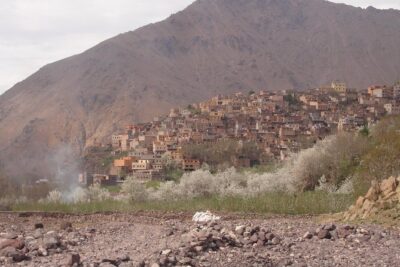
You’ll start with an early day in Kathmandu and then transfer to Machha-Khola, the trekking launch point. Machha-Khola is small, local, and set right on the Bhudhi Gandaki River. The river isn’t just scenery—it’s the thread that ties the trek together, because a lot of the route later sticks close to the Budhi Gandaki.
From Machha-Khola, the next day pushes you into forested trail. You’ll move toward Jagat (a common trek stop), passing things like mani walls and waterfalls. The trail can bring wildlife sightings too—things like monkeys, birds, and deer are specifically called out along the forest stretch. That’s a nice reminder that this trek isn’t only about mountain selfies; it’s also a nature walk.
Jagat sits at the foot of the Ganesh Himal, and it’s where the trail begins to feel like a “trek corridor” with teahouses and lodges. This is the first place where you’ll start to understand how daily life on the circuit works: eat, hike, repeat, and keep your pacing smart.
Philim through Deng to Namrung: suspension bridges and rising into village views
After Jagat, the route continues with a mix of river crossings and climbs. One notable feature is the use of suspension bridges over the Budhi Gandaki River. These crossings are simple but memorable—especially when you realize how many times you’ll be “crossing the river, then crossing into a new elevation band” over the days ahead.
You’ll go from Philim toward Deng, including another bridge crossing, then settle into Deng’s valley setting. Deng is another teahouse village stop, which matters because it keeps your evenings predictable. You’ll want that predictability when the altitude starts to sneak up.
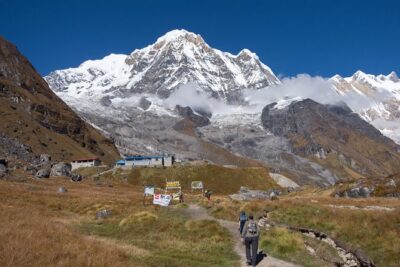
Then comes Namrung, a key viewpoint village day. The route includes descending toward the riverside, climbing up through places like Ranagoan and Bihi Phedi, and cutting through Ghap before reaching Namrung. The reason Namrung is a highlight is the view payoff: this day is described as offering clear perspectives on multiple ranges, including Ganesh Himal, Shringi Himal, and Kutang Himal.
Namrung to Lho: permits at the ridge, plus oak and rhododendron forests
The Namrung to Lho stretch brings you deeper into the “middle elevation” Nepal that many people remember most. You’ll hike through forests of oak, fir, and rhododendron, which is a welcome change after river valley days.
There’s also a practical moment: a permit check post where you need to show your trekking permit. Since this is part of the route, having your documentation handled properly is what keeps things smooth.
You’ll pass through places like Lihi Gaon and Sho Goan, then reach Lho at about 3,280m. Lho has more of that high, quiet feel. There’s lunch at a local restaurant noted in the plan and then a traditional Nepalese dinner back at your lodge. It’s a good example of how Manaslu Circuit teahouse life works: you’re not in luxury, but you’re looked after.
Lho to Samagaun/Sama: Shyala viewpoints and the big Manaslu show
As you climb toward Sama (also known as Samagaun), you start getting the “classic Himalaya” panorama effect. The plan calls out a stop at Shyala, described as giving 360-degree views from a town viewpoint. This is the kind of break where you should pause, breathe, and take in the mountains even if you’re tired.
From there, you reach Sama (Ryo). This is one of the most important tactical days on the trek—not because it’s the hardest, but because it sets you up for acclimatization.
Acclimatization day near Samagaun: Birendra Lake and Manaslu Base Camp options
The itinerary includes a dedicated acclimatization day. You’ll hike from Sama and choose between options such as:
- a hike around Birendra Lake and toward Manaslu Base Camp, or
- a hike up to Pungen Gumpa
This matters because you’re preparing for the higher push toward Samdo and the pass crossing. Your goal isn’t to “win the day.” It’s to let your body adjust while still getting movement and views.
The route notes that Samagaun is known as Samagaon (with gaon meaning village), and that’s a useful reminder: the people living here are part of the trek experience. It’s not just a staging ground.
Samdo: Tibetan refugee camp vibes and the Manaslu angle you came for
Next you move to Samdo, a village at high elevation where it’s important to climb slowly. The plan even calls out that you should take it easy because of the high altitude.
Samdo is described as a well-known Tibetan refugee camp, and that cultural identity shows in the atmosphere. The day also offers a choice: rest in the afternoon or hike up to Samdo Peak for incredible Manaslu views if you have the stamina.
If the trek has a “moment” before the pass, it’s often here. You get the Manaslu perspective from a vantage that feels closer to the mountain’s raw scale.
Dharmasala (Larkya Phedi) via Larke Bazaar: the season-market stop before the pass
Before the actual Larkya La crossing, you’ll spend time near Dharmasala, also called Larkya Phedi. The route includes a walk past the seasonal Tibetan market called Larke Bazaar, right beside the Budhi Gandaki River.
This part of the trek gives you a shift in mood. You’re no longer just hiking through villages—you’re walking through a corridor where different seasons and livelihoods meet. The plan also mentions monasteries along the way, which helps keep the cultural side visible even as you prepare for the pass.
The day is described as shorter to leave time for acclimatization and relaxation in the afternoon, which is exactly what you want the day before a high crossing.
Larkya La Pass day: early start, slow climb, and then the long descent to Bhimtang
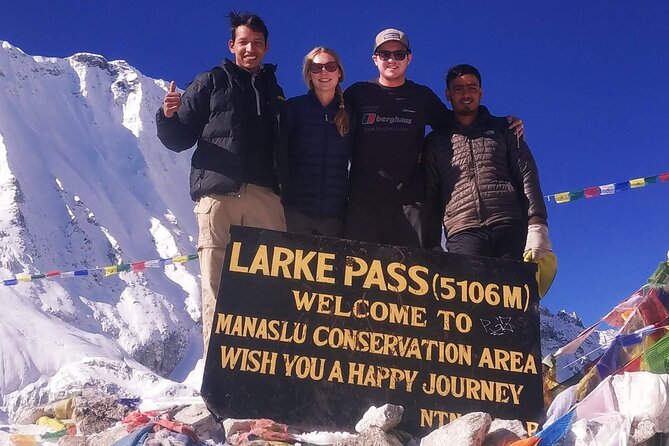
Crossing Larkya La Pass is the central event. You’ll wake early for breakfast and depart for the pass, with a trail that climbs slowly. At the pass itself, you take a break and enjoy major Himalayan views.
The plan highlights views from the pass area including peaks such as Cheo Himal, Gyaji Kung, Kang Guru, and Annapurna II (all noted above 6,000m). After that comes the downhill to Bhimtang, where you overnight.
Bhimtang is described as possibly the best accommodation spot on the trek and a good place to celebrate finishing the hardest segment. Even if you don’t feel like celebrating yet, it’s the first day after the pass where the work drops off a notch, and your body starts to think about recovery.
Bhimtang down to Ghoa, then Tilje: sunrise teahouse vibes and practical WiFi
Your next day is mostly downhill, moving from Bhimtang to Ghoa and continuing to Tilje. The plan notes that waking up early can give you a great sunrise view from the teahouse, so if you’re the type who likes quiet mornings with big skies, this is your day.
Tilje is described as a nice village with local culture and teahouses that include better “day-to-day convenience” for trekkers. It also specifically mentions that you can find free WiFi after crossing the mountain. Even if you don’t plan to spend your time scrolling, it’s a real morale boost to know you’ll have that option.
Tilje to Dharapani to Besisahar: finishing with river confluence energy
On your final trekking day, you move down toward Dharapani, a village at the confluence of the Marsyangdi and Trishuli rivers. The route goes through pine forests and small villages, which is exactly the kind of scenery you want on the last day—less dramatic than the pass, but still beautiful and much easier on sore legs.
After lunch in Dharapani, you arrange a jeep drive (about 2 hours) to Besisahar, where you check into your hotel. The plan suggests you’ll have good food and drinks in town and use the time to plan any further days. That’s practical advice, because the circuit ends with a real shift: mountains out, town routines in.
Price and value: what $589 really buys you (and what it doesn’t)
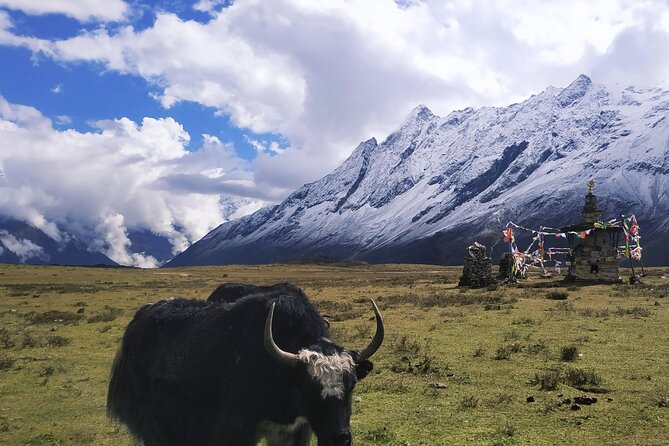
At $589 per person for around 12 days, the value is mainly in what’s included rather than what’s excluded. Your package covers:
- pick-up and drop-off in Kathmandu by car/jeep/Hiace/bus based on group size
- Kathmandu to Machha-Khola and the way back by bus
- multiple required permits: ACAP, MCAP, Manaslu Restricted Area, and TIMS
- an expert local guide (plus meal, accommodation, salary, and insurance)
- assistance guide coverage (noted as one assistance guide for every five trekkers)
- local and government taxes and an achievement certificate
That’s the key: permits and guide support are expensive if you try to DIY them badly, and the trek’s restricted rules make it even harder without a pro. You’re paying for reduced stress.
What you should budget separately:
- trek foods, drinks, and accommodation during the days on trail (not included unless you add it)
- optional upgrades like WiFi, battery charging, and hot showers (not included)
- personal gear, travel insurance, Nepal visa fees, and tips for guides/porter
My advice is simple: treat this $589 as the base logistics and compliance cost. Then plan your day-to-day spending around tea house meals you can buy along the way.
The guide team factor: why the service feels smooth on this trek
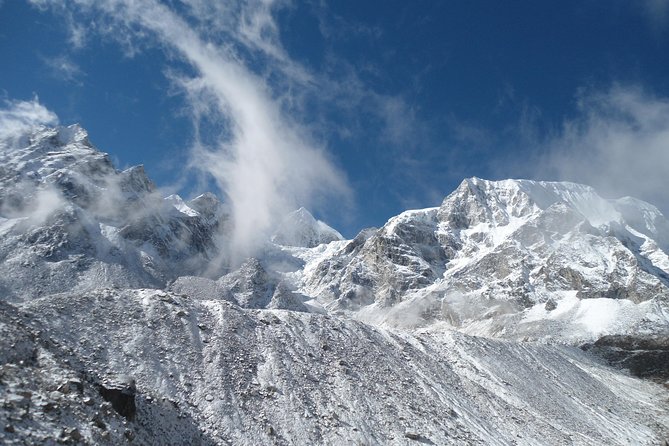
This is one of the most praised parts of the experience. Many accounts highlight a friendly, attentive approach with guides who are flexible on timing and focused on making the trek run smoothly.
Names you’ll see repeatedly include Roshan (including Roshan Pandey), plus Arjun as an assistant. Others mention company manager/owner Madan for quick email responses and easy-going planning, and guides like Kumar Neupane, Raju, and Bishnu. Porters such as Niran and Summer Manasolu Ghale are also called out, which matters because on trekking days the porter is often the difference between steady morale and constantly adjusting.
So what does that mean for you? It usually means:
- you don’t waste time on avoidable problems
- the team helps manage the rhythm of the days
- you’re more likely to get practical answers on-route, not just generic “enjoy your trip” vibes
And that’s not a small thing on a trek with a real pass crossing.
What to pack and how to prepare for 5,000m-plus trekking
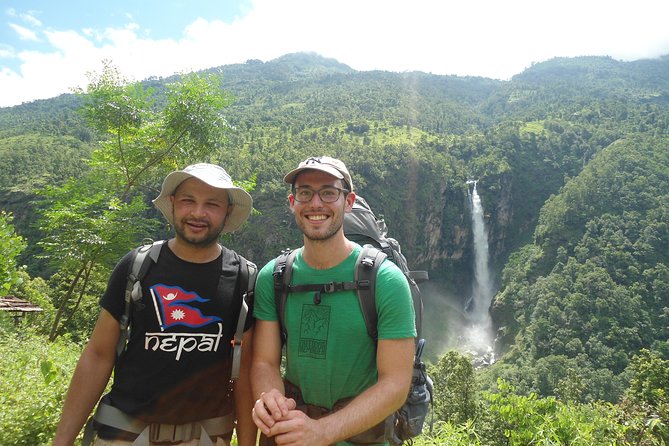
You’ll need to handle cold and effort at altitude, and the trek expects you to show up ready. The essentials listed include:
- trekking boots
- warm clothes
- trekking gears
On top of that, I’d follow a simple rule: pack for the pass day, not for the Kathmandu weather. Since you’re going over Larkya La Pass around 5,100m, your layering and gloves/hat choices matter more than how cool your outfit looks at breakfast.
Also think about your carrying strategy. The plan notes that:
- a porter is optional and can be shared by 2-3 trekkers
- porter limit is 20 kg
If you’re physically strong and want to travel light, you may carry your own essentials. If you want to enjoy the views instead of fighting fatigue, shared porter support is a smart compromise.
Who should book this Manaslu Circuit trek (and who might not love it)
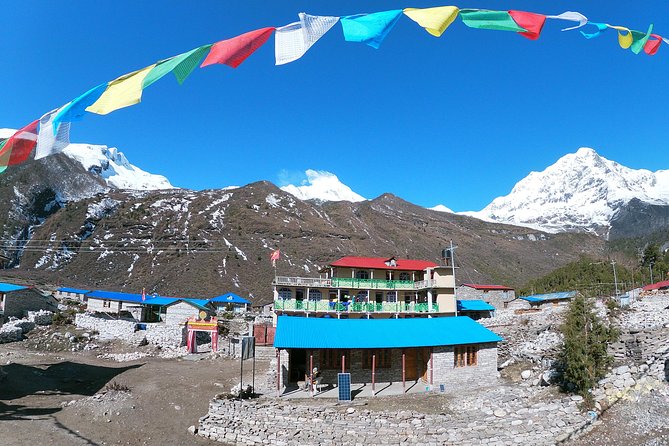
This trek fits you best if you want:
- a remote less-crowded route with Tibetan-influenced culture
- high-altitude scenery and the big payoff of Larkya La
- a realistic teahouse trek experience rather than a luxury lodge circuit
It’s less ideal if you:
- aren’t comfortable with altitude and long trekking days
- need frequent amenities like reliable hot showers and included WiFi (those aren’t included)
- hate the idea of permit checks and documentation being part of your journey
Also note the physical fitness guidance given is both “moderate” and “strong” in different places, which tells me the organizer expects you to be prepared. If you can hike for hours and keep a steady pace, you’ll fit the sweet spot.
Should you book Touch The Himalaya Treks & Expedition for Manaslu Circuit?
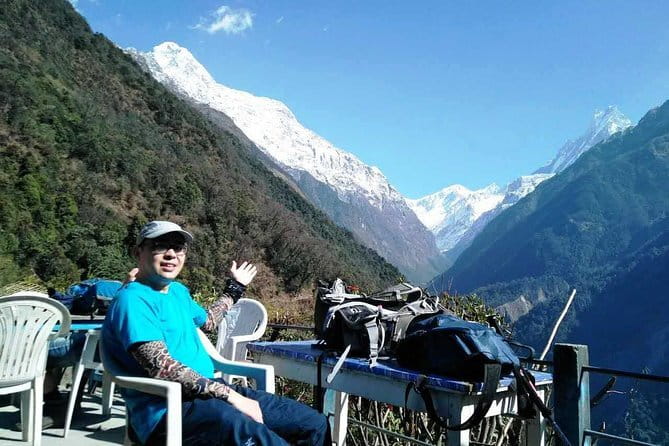
If you want the best chance of a smooth, well-managed trek without getting stuck on permits or logistics, this is a strong match. The included paperwork, the focus on guide support, and the track record of praising leaders like Madan, Roshan, and Arjun all point to a service that prioritizes getting you safely from village to village and over the pass.
I’d book it if:
- you’re aiming for an authentic, quieter Manaslu Circuit experience
- you’re okay with teahouse-style comfort and buying meals on the trail
- you want a team that handles the details so you can focus on the trek
I’d hesitate if:
- you want lots of “easy comfort” included (WiFi/hot shower aren’t included)
- you’re not ready for a true high-pass day around 5,100m
FAQ
How long is the Manaslu Circuit Trek?
It’s listed as 12 days (approx.).
Where does the trek start and where does it end?
It starts in Kathmandu at the meeting point: Touch The Himalaya Treks & Expedition JP Rd, Kathmandu 44600, and it ends back at the same meeting point.
What time does the trek start on the first day?
Start time is listed as 6:45 am.
Is pickup included?
Yes. Airport pickup and drop-off is included, and transfers are provided by car/jeep/Hiace or bus depending on group size.
What permits are included?
Included permits are ACAP Permit, MCAP Permit, Manaslu Restricted Area Permit, and TIMS Card.
Do I need a guide?
Yes. The trek requires a registered guide due to the restricted-area rules, and an expert local guide is included.
Is food and accommodation during the trek included?
No. Foods, drinks, and accommodation during the trek are listed as not included (they can be provided with an additional charge).
Is there WiFi or hot shower during the trek?
WiFi, battery charge, and hot shower are listed as not included. WiFi may be available in Tilje, but it’s not guaranteed as part of the package.
Do I need to carry my own gear?
Yes. The trek requires you to have equipment such as trekking boots, warm clothes, and trekking gears. Porters can carry up to 20 kg, and a shared porter option is mentioned.
Is the trek private, and how many people do I need to join?
It’s listed as private (only your group will participate). The experience requires a minimum of two travelers.
Can I cancel for a full refund?
Yes. Free cancellation is available if you cancel at least 24 hours before the start time.