REVIEW · KATHMANDU
Gokyo Valley Trek
Book on Viator →Operated by Ace the Himalaya · Bookable on Viator
Gokyo Ri turns the whole Khumbu region into a panorama. This 15-day trek pairs Sherpa-village days with big-ticket views of the Ngozumpa Glacier and the 8,000 m giants that look close enough to touch. I especially like the way the trip is staged for acclimatization and the strong guidance, including named guides such as Ngima, Nimesh, Milan, and Aamod Nepal seen across past groups.
One thing to be honest about: you’re trading comfort for altitude. Long hiking days at climbing elevations, plus weather-driven flight timing in Lukla, mean you’ll want solid physical fitness and patience if plans get nudged by conditions.
In This Review
- Key points worth knowing before you go
- Kathmandu warm-up: temples, stupa walls, and Bhaktapur details
- The Lukla flight: quick altitude, real consequences
- Phakding to Namche: your first real rhythm test
- Acclimatization day in Namche: museum, Sherpa culture, and Syangboche sunrise views
- Phortse: rhododendron, juniper, and the “pristine” feel
- Machhermo and the Ngozumpa approach: glacier country begins
- Gokyo: base camp for glacier views and lakeside atmosphere
- Gokyo Ri morning: the 5,483 m climb that earns its reputation
- Dole, Namche, and the long but meaningful return
- Kathmandu buffer day: reflect, shop, or add one more adventure
- Guides, porters, and why the human layer changes everything
- Price and value: what $1,514.67 buys you (and what you still handle)
- Who this trek suits best—and who should pause
- Should you book the Gokyo Valley Trek?
- FAQ
- What is the duration of the Gokyo Valley Trek?
- Where does the trip start and end?
- Is Kathmandu airport pickup included?
- Are permits and trekking guide services included?
- Is airfare to and from Lukla included?
- What trekking gear is provided, and what is not?
Key points worth knowing before you go
- Gokyo Ri (5,483 m) is the main payoff climb, with sweeping views of Everest-area peaks and the full Gokyo valley.
- Ngozumpa Glacier time is built into the route, so the glacier isn’t just a distant photo prop.
- A porter for every two people helps with pacing, carrying, and energy on steep stretches.
- Gear is included (down jacket and sleeping bag), which saves you weight and packing stress.
- Kathmandu includes a real culture warm-up: Pashupatinath, Boudhanath, and Bhaktapur Durbar Square.
- Group size is capped at 15, which tends to keep things organized on trails and in lodges.
Kathmandu warm-up: temples, stupa walls, and Bhaktapur details
You start in Kathmandu with airport pickup and a private vehicle to your hotel. Then the sightseeing day is a strong starter pack: Pashupatinath Temple, Boudhanath Stupa, and Bhaktapur Durbar Square.
At Pashupatinath, you can’t go inside the main temple area, but you can watch the action from the eastern bank of the Bagmati River. Boudhanath is more your pace if you like Buddhist ritual—pilgrims circle the stupa and spin prayer wheels in all directions. Bhaktapur adds a different flavor: you’ll see major palace and temple structures, including the well-known Nyatapola-style pagoda elements and the Palace of 55 windows.
Why I like this setup for a trek: it gives you a mental shift from sitting to moving. You also get your bearings fast in a city that can feel loud and chaotic, so you’re not scrambling later for basics like cash, SIMs, and time zone rhythm.
You can also read our reviews of more tours and experiences in Kathmandu.
The Lukla flight: quick altitude, real consequences
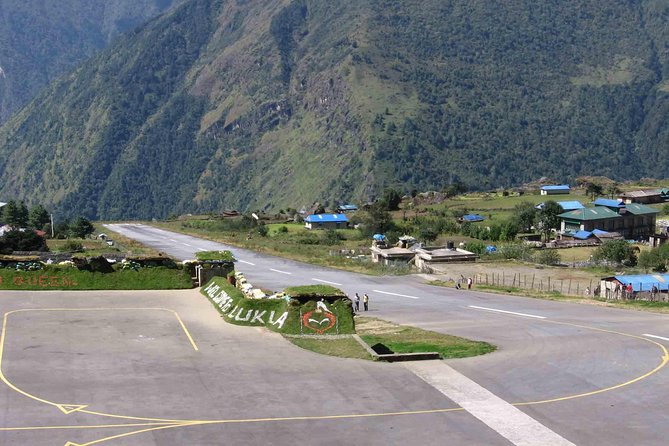
The trekking begins with the classic Everest-region jump: a flight from Kathmandu to Lukla (about 2,804 m). This is where the trip goes from sightseeing to high-stakes hiking logistics. Even with a professional operator, Lukla weather can affect scheduling, so you should expect some timeline sensitivity.
Once you land, you’ll get a briefing and get introduced to your porters before you hit the trail. Past groups have described that arrival moment as instantly memorable—one review even mentioned receiving a garland of flowers right at the airport, which is a small touch but helps you feel like you’re stepping into the region, not just passing through it.
Practical note: if you’re the type who likes tight schedules and zero surprises, Lukla may test you. The upside is that this flight saves days of elevation gain that you’d otherwise have to earn on foot.
Phakding to Namche: your first real rhythm test
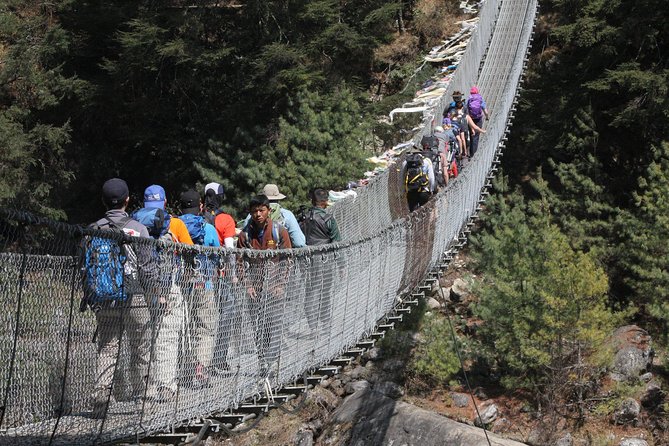
On the first trekking days, the route follows the Dudh Kosi River with multiple suspension bridge crossings. That means steady variety: river views, short climbs, and frequent chances to reset your breathing.
You head toward Phakding (a comfortable early night stop). The walking is described as easy at this stage, but don’t confuse that with “no effort.” It’s the phase where your legs figure out the rhythm of steps that never quite end.
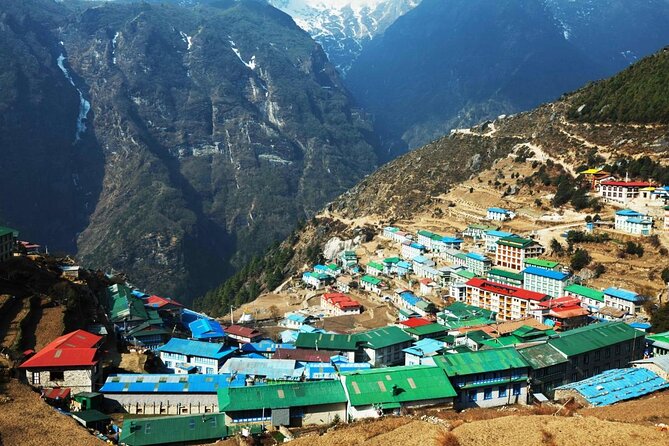
Then comes Namche Bazaar, often called the gateway to Everest. It’s not just a town; it’s your gear reset zone. You’ll find lodges, restaurants, shops, money exchange, and places to check in online if you need it. Most importantly, Namche is where your trekking becomes a negotiation with altitude—narrower breaths, slower steps, and an urge to take breaks sooner than you think.
Acclimatization day in Namche: museum, Sherpa culture, and Syangboche sunrise views
You’ll get a dedicated acclimatization day in Namche. That’s not wasted time. It’s your best investment against altitude headaches later.
Plan on a short hike and cultural time, including a museum focused on Sherpa customs. Then there’s the climb toward Syangboche Airport near the Everest View Hotel area. From there, you can catch rewarding views of the Himalayas, with sunrise and sunset potential.
This day is also where the guide’s role matters. In reviews, several guides were praised for being attentive and adjusting plans when needed, including working around route delays. Even if your exact day is routine, you still benefit from a guide who understands when to push, when to slow, and when to keep the day easy to protect your breathing.
Phortse: rhododendron, juniper, and the “pristine” feel
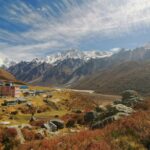
From Namche, the trail climbs through rhododendron forest and areas with juniper and larger conifers as you gain elevation. This is one of those days where the scenery feels calmer than the busy arrival zones. You also pass places like Yak Kharka and summer settlements, which gives you a sense of how seasonal life works up here.
A key point: this is still building your endurance. The day is described as steep climbing, and your body will likely notice that immediately. If you’re coming from sea level or your cardio isn’t consistent, treat this as a pace-setting day, not a challenge day.
You should also expect big views of nearby peaks such as Khumbi La and Tawache when conditions allow. The region is famous for changing light, so even short photo stops can be worth it if the weather cooperates.
Machhermo and the Ngozumpa approach: glacier country begins
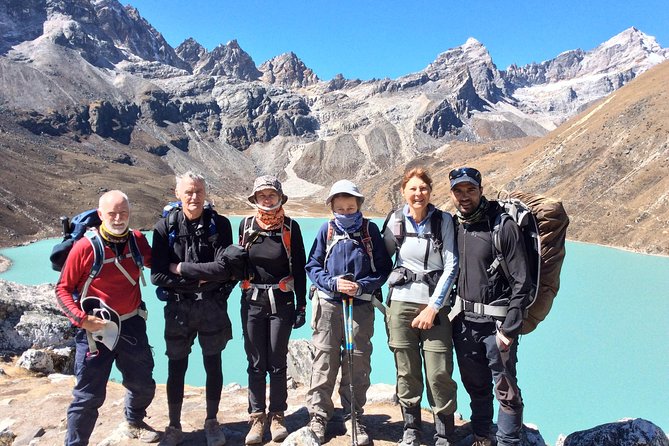
As you move onward, the trek includes ridges and the transition toward the Ngozumpa Glacier area. The route description mentions reaching the glacier terminal moraine, which is a strong indicator that the “mountain walking” phase is shifting into “Himalaya infrastructure” territory—ice, wind, and more exposed feel.
This day includes a descent to a river and another climb to Machhermo. That pattern—down, up, down, up—is typical in this kind of trekking, and it trains you for later altitude. The goal is not to sprint; the goal is to keep your breathing controlled while your legs do the heavy lifting.
If you’re unsure about your footing on uneven paths, this is where the guide’s experience matters. Past groups credited guides for keeping them safe and well cared for throughout the trek, which is exactly what you want when the trail turns into rocks, dust, and steep grades.
Gokyo: base camp for glacier views and lakeside atmosphere
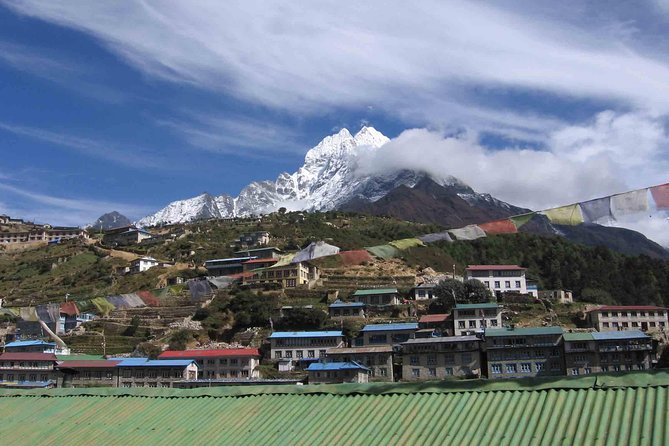
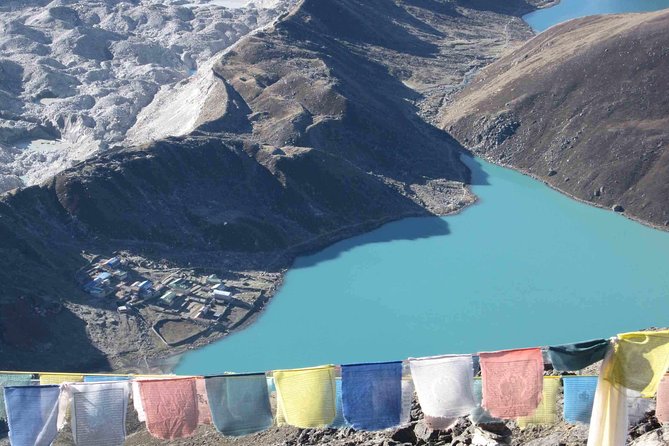
Then you reach Gokyo (about 4,790 m)—one of the main destinations. The plan gives you a base for two nights, plus sightseeing and short hiking options around the area. That extra time is valuable. It helps you avoid the trap of trekking hard every single day without letting your mind enjoy where you are.
Gokyo is directly connected to the glacier story. From here, you can see the Ngozumpa Glacier more clearly, and your “big view” moments start to show up more often. The overall vibe is different than Namche: less town energy, more mountain focus, more sky time.
This is also a good spot to fine-tune how you handle cold at night. Lodges can vary, and you’ll be relying on included sleeping gear plus your own layering habits.
Gokyo Ri morning: the 5,483 m climb that earns its reputation
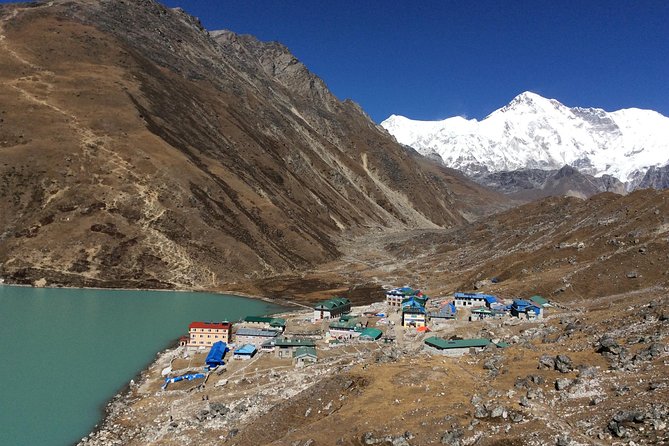
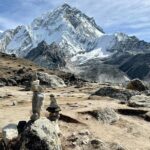
The star day is Gokyo Ri (5,483 m). You’ll start early and climb steeply for a top-of-the-world viewpoint. This is where you can expect the panoramic payoff: the super Gokyo valley, the huge Ngozumpa Glacier, and a broad view across the Khumbu Himalayas, including Everest, Lhotse, Nuptse, Makalu, Cho-Oyu, and Gyachung Kang.
Is it intense? Yes. Is it worth it? In a region like this, yes—because the mountain stacking is the whole point. The key is pacing. Even if you feel good in the first hour, keep moving with controlled effort. Don’t let adrenaline sprint you into fatigue.
A detail I like from real-world trekking feedback: groups praised guides for reprogramming routes when conditions changed, so even your summit window can be managed responsibly. If the day feels windier or colder than expected, a good guide helps you make smart choices instead of stubborn ones.
Dole, Namche, and the long but meaningful return
After Gokyo Ri, you’ll descend toward Dole. Descents can feel easier than climbs, but don’t relax too much—your knees will still work. This is a good time to focus on steady steps and using trekking poles if you have them.
Later you return toward Namche Bazaar through Sherpa villages (including Khumjung). This part of the itinerary is where you stop seeing the mountains behind your routine and start seeing the human scale: prayer flags, stone paths, lodge life, and everyday village rhythms that keep going even when the altitude gets serious.
Then you return to Lukla, the trail ending point from the trekking loop. Spending time in Lukla after all that walking is a mental reset. You’ve earned it, and it helps the trek feel real, not like a blur.
Kathmandu buffer day: reflect, shop, or add one more adventure
After flying back to Kathmandu from Lukla, you’ll be transferred to your hotel again. There’s also a spare day in Kathmandu after the trekking program.
This buffer is practical. Even fit hikers can feel slow after days at altitude, and Kathmandu offers choices if you want to keep moving: you might extend into Chitwan jungle safari, rafting, Kathmandu Valley shopping, a scenic Everest flight, or mountain biking. The plan also includes a farewell dinner in a traditional Nepalese restaurant with cultural performances.
If you’re wondering why a spare day matters: it prevents that awkward feeling of rushing to do everything because you’re out of time. You’ve just spent days learning how to pace your body. You don’t need to punish yourself with a packed last day.
Guides, porters, and why the human layer changes everything
The trip is run with a licensed English-speaking guide and a porter ratio of one porter for every two clients. That matters more than people think. When your legs are taxed and your lungs are working harder, reducing load stress gives you better consistency day after day.
In reviews, guides and support staff repeatedly got singled out by name, including Ngima, Ramesh Karki, Nimesh, Nimesh Nepal, Bishnu, Milan, Santosh, and Aamod Nepal. Porters mentioned include Lochan, Bishaal, Auishe Rai, Bal Krishna Niagiar, Sukre, and Hira. Across those comments, the common thread is responsiveness and flexibility—especially when conditions changed (like delays from landslides in some cases).
I also like that the operator provides real gear for the trek, including a down jacket and sleeping bag that you return at the end. That reduces the temptation to pack too much or too little for cold nights.
Price and value: what $1,514.67 buys you (and what you still handle)
At $1,514.67 per person, this trek is not cheap, but it’s also not just a “sell you a map” kind of price. Based on what’s included, you’re paying for the full scaffold: Kathmandu hotels, guided sightseeing, trekking guide, permits, gear, and roundtrip airfare between Kathmandu and Lukla.
Here’s what you get that usually costs extra if you book loosely:
- Kathmandu accommodation for 4 nights in a three-star hotel and 10 nights in guesthouses during the trek
- Kathmandu guided sightseeing including entrance fees
- Permits for trekking
- Kathmandu to Lukla and back airfare
- Down jacket and sleeping bag (return at the end)
- A porter setup: one porter per two clients
- A pre-trek meeting where you confirm details and paperwork, and you clear any remaining balance if applicable
- Included meals during the trek window (breakfast 14 times, and some lunches/dinners)
What you should plan to cover yourself:
- Travel insurance (especially emergency high-altitude rescue and evacuation, since that’s explicitly not included)
- Nepal entry visa and international airfare
- Alcoholic, hot, and cold drinks
- Personal trekking equipment
- Tips for staff and drivers (tipping is expected)
Value verdict: if you want less stress on logistics and you’d rather pay for coordination than handle it yourself, this pricing makes sense. If you already have your own cold-weather gear, already know the route, and want total independence, the cost may feel heavy—but that’s not what this trip is built for.
Who this trek suits best—and who should pause
This trek is set up for people with moderate physical fitness and an attitude toward steady effort. You’ll hike every day, including steep climbs like Gokyo Ri, and you’ll spend time at elevation where your breathing becomes a limiting factor.
You’ll likely love it if:
- You want a clear “big view” goal at the top of the trip (Gokyo Ri)
- You care about mountain scenery and also want Sherpa culture stops built into the pacing
- You like guided structure, especially for acclimatization days
You might want to think twice if:
- You hate uncertainty around weather and flight timing in Lukla
- You’re looking for a fully comfortable experience (lodges and cold nights are part of the deal)
- You don’t want to manage cold-weather layering, even with some gear provided
Should you book the Gokyo Valley Trek?
I’d book it if you want a guided route that focuses on the best mountain views without turning the trip into a logistics project. The standout strength here is the combination of Gokyo Ri’s viewpoint and the Ngozumpa Glacier access, backed by a guide/porter setup people consistently praise by name.
Book with confidence if you’re ready to hike steadily, respect acclimatization, and treat Lukla timing like part of the adventure. If you’re on the fence, the one question to answer is simple: can you handle big days at altitude with a calm pace? If yes, this is a very solid way to see the Everest region from a different (and often more glacier-focused) angle.
FAQ
What is the duration of the Gokyo Valley Trek?
The trek runs for about 15 days.
Where does the trip start and end?
It starts at Tribhuvan International Airport in Kathmandu and ends back at the same meeting point.
Is Kathmandu airport pickup included?
Yes. Airport transfers are included, and an airport representative transfers you between the airport and your hotel.
Are permits and trekking guide services included?
Yes. The tour includes permits for trekking and a licensed English-speaking trekking guide.
Is airfare to and from Lukla included?
Yes. Kathmandu–Lukla–Kathmandu airfare is included.
What trekking gear is provided, and what is not?
You receive a down jacket and a sleeping bag for the trek, and you return them at the end. Personal trekking equipment is not included, and travel insurance is also not included.