REVIEW · KATHMANDU
Gokyo to Everest Base Camp Trek
Book on Viator →Operated by Ace the Himalaya · Bookable on Viator
High passes, big views, and strong logistics. This Everest Circuit route links Lukla, Namche Bazaar, Gokyo Lakes, Cho La (5,330 m), Kala Patthar, and finally Everest Base Camp on a classic high-altitude loop. I especially like how the itinerary gives you both the dramatic Everest focus and the quieter, more scenic Gokyo side.
My other favorite part is the day-to-day support: a licensed English-speaking guide, permits handled, and a porter system (1 porter for every 2 clients) that makes the hike feel doable for non-mountain-climbers. The one real consideration is the altitude grind—plus early starts (including a pre-dawn Cho La crossing)—so you need solid pacing, not bravado.
In This Review
- Key things that make this trek worth it
- Why the Everest Circuit via Gokyo feels different
- Kathmandu arrival and the first logistics win
- The Lukla flight and the early trail to Phakding
- Namche Bazaar acclimatization: the day that saves your trek
- The way up: Phortse and Machhermo transitions
- Base in Gokyo and the sunrise-style push to Gokyo Ri
- Cho La Pass (5,330 m): the day you respect, not rush
- Lobuche and Everest Base Camp: walking the glacier edge
- Kala Patthar (5,555 m): your hardest payoff hour
- Descent via Tengboche and Pangboche back to Namche
- Return to Lukla and back to Kathmandu
- Price and logistics: does $2,200 feel like good value?
- Guides, porters, and daily comfort at altitude
- Who should choose this Gokyo to Everest Base Camp trek
- Should you book this trek?
- FAQ
- How long is the Gokyo to Everest Base Camp trek?
- What is the tour price per person?
- Where does the trip start and end?
- When does the activity start?
- Is airport pickup included in Kathmandu?
- Do I need to handle permits?
- What kind of guide and porter support is provided?
- What are the accommodations like during the trek?
- Are meals included?
- What if weather forces changes or cancellation?
Key things that make this trek worth it
- Gokyo Lakes + Gokyo Ri: you get mountain views from a higher, more varied vantage than the standard Everest-only routes
- Cho La Pass timing: the route is designed for an early start so you can reduce your chances with afternoon weather
- Kala Patthar day: the hardest-feeling day for most people, and usually the one that delivers the most payoff
- Small group size (max 15): easier movement, less chaos on narrow trails and in busy tea houses
- Porters for shared loads: 1 porter per 2 clients is a practical way to keep you climbing efficiently
- Gear and water support: down jacket + sleeping bag are included (loaned), and you use a Katadyn Pocket filter on the trail
Why the Everest Circuit via Gokyo feels different
If you picture Everest Base Camp as a single straight line, the Gokyo route changes the whole feel. You’re not just chasing Everest from one direction—you’re looping around, crossing a major pass (Cho La), and spending time at 4,790 m Gokyo as a base before you push higher.
That loop matters because it spreads the effort across multiple “views days,” not just one heroic push. It also tends to feel less like a conveyor belt than the most basic itineraries, because you’re moving through different valleys and different high points (especially around the Gokyo area).
You should still expect classic Everest trekking realities: thin air, cold evenings, and days where you’re counting steps more than scenery. The good news is the structure of the route helps you adjust gradually before the highest moments.
You can also read our reviews of more tours and experiences in Kathmandu.
Kathmandu arrival and the first logistics win
This trip starts with airport pickup at Tribhuvan International Airport, Kathmandu. You’re then placed in a three-star hotel for 2 nights, which is more than a simple convenience—it’s your buffer for jet lag, gear checks, and getting organized before Lukla.
One smart included touch is that you’ll be given trekking basics that reduce the “what did I forget?” stress. The package includes a down jacket and sleeping bag for the trek (returned at the end), plus an official filtered-water approach using a Katadyn Pocket Water Filter.
Also pay attention to the small details you might not think about until you need them. This operator offers pickup, uses a mobile ticket, and runs with a maximum of 15 travelers, which can make the early organization in Kathmandu smoother.
The Lukla flight and the early trail to Phakding
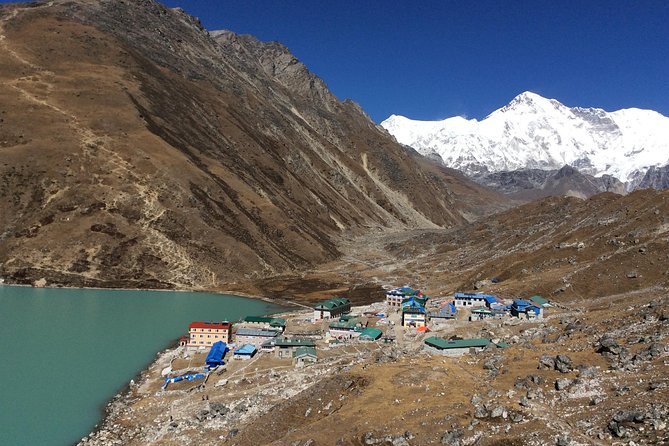
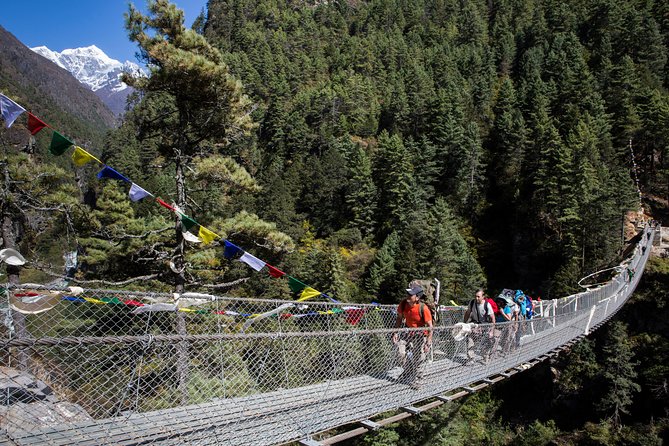
Your trek kicks off with a short but unforgettable flight from Kathmandu to Lukla (2,804 m). From there, you head toward Phakding, following the Dudh Kosi corridor and crossing suspension bridges with prayer flags along the way.
This section is your “get used to the rhythm” part. It’s long enough to feel like you’re trekking, but not yet the brutal high-pass push you’re saving for later. The route also sets expectations: you’ll be hiking with a lot of up-and-down, even in the “easier” days.
One practical note: the itinerary includes guest house-style nights in several key villages, and it matters that you start building a routine early—same breakfast timing, similar packing habits, and learning how your body responds after altitude changes.
Namche Bazaar acclimatization: the day that saves your trek
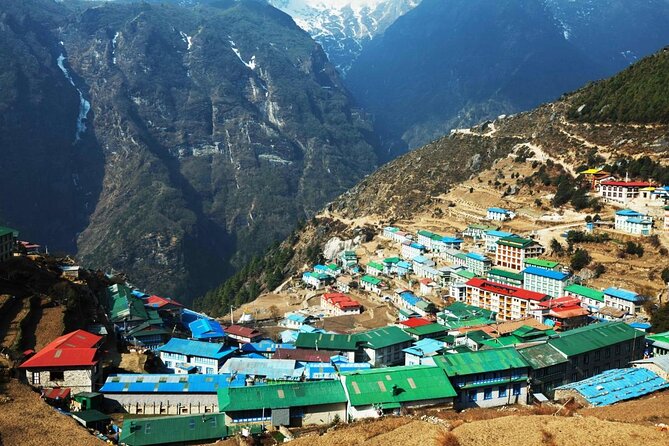
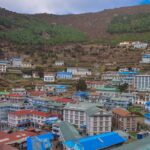
Namche Bazaar is where the trip turns from “trek” into “adapt to altitude or suffer.” You’ll spend time here for acclimatization, including a full acclimatization day rather than rushing through.
I like this approach because it’s not only about physics. It’s also about pacing your mind. When you acclimatize properly, later days—Gokyo Ri, Cho La, Kala Patthar—feel like objectives instead of survival.
That Namche day also includes a museum visit focused on Sherpa culture and traditional customs. It’s a nice break from the constant mountain focus, and it helps you understand what you’re walking through and who maintains much of the human side of this region.
The way up: Phortse and Machhermo transitions
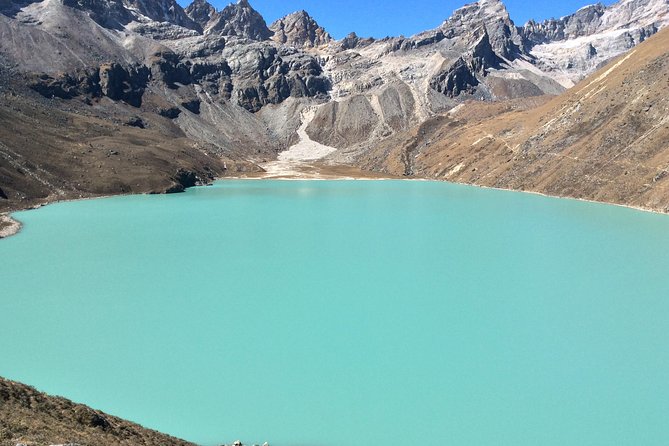
After Namche, the route continues through the higher valleys toward Phortse and onward to Machhermo. Expect steeper climbs, plus a shift in the feel of the trail as elevation increases—more alpine character, less lush forest, and more wide-open weather exposure.
This part of the trek is where you start learning your personal altitude pace. Some people feel okay early, then hit a slowdown later; others feel fine until the first steep ramp. Either way, having a planned sequence of climbs and ridgeline walking helps keep you consistent.
The Machhermo area also brings you to another “gateway” point: you’re nearing the Gokyo region, which means the environment gets colder and the air gets thinner again. It’s not the time to test your limits—it’s the time to build them.
Base in Gokyo and the sunrise-style push to Gokyo Ri
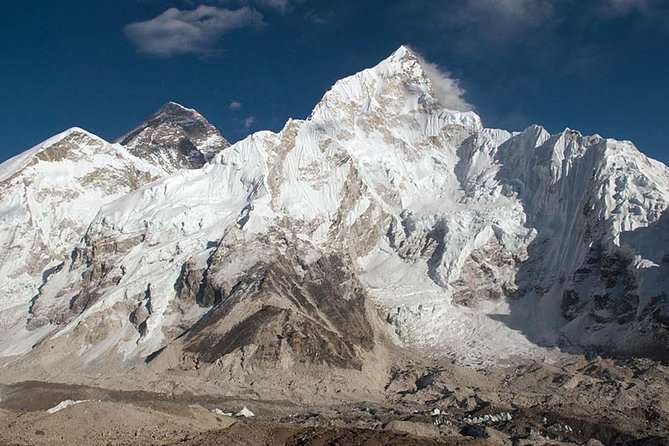
Once you reach Gokyo (4,790 m), you settle in for two nights, and that extra time is a gift. You’re not constantly moving village to village, so you can recover between big efforts.
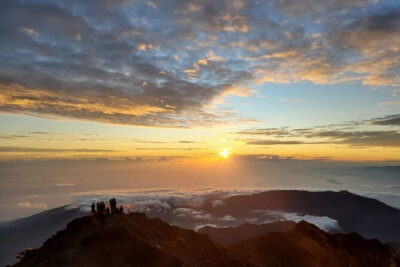
The big highlight here is the early climb to Gokyo Ri (5,483 m). This is steep, and the timing is designed for the best views—early in the day when visibility is more likely. If you like dramatic mountain panoramas, this is one of the cleanest “wow moments” on the whole circuit.
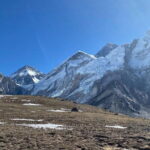
I also like that Gokyo gives you a different kind of Everest viewing. You’re positioned west of Everest Base Camp, and you see multiple major peaks in a broader frame. This is where the trek earns its extra days: not just reaching high places, but changing your perspective.
Cho La Pass (5,330 m): the day you respect, not rush
Cho La is the centerpiece high pass of this route. The plan is to start walking before sunrise (around 4:00 or 5:00 am) so you can reach the pass area in the late morning window and reduce exposure to harsher conditions.
That matters because Cho La isn’t just altitude—it’s weather. Cold, wind, and shifting conditions can turn the pass into a very different day than the one you imagined.
You’ll sleep in a more remote area (Thangnag) where the accommodations are very basic and dormitory-based. That’s not a reason to panic, but it is a reason to pack smart for sleep: keep your warm layers accessible and plan for colder, less comfortable nights than in Namche.
Once you cross the pass around 5,300 m, the day becomes about careful walking and smart breathing. This is usually not a “fast and strong” day. It’s a “steady and safe” day.
Lobuche and Everest Base Camp: walking the glacier edge
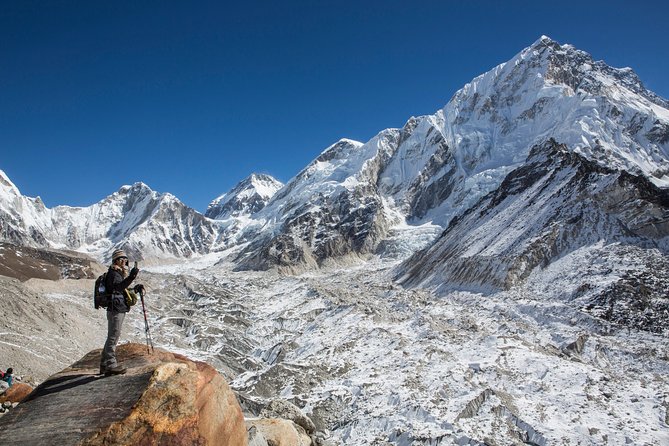
After Cho La, you move toward Lobuche and then to Everest Base Camp (5,365 m). This is a big day on foot, with routes that follow the Khumbu Glacier area and involve a real uphill effort.
Everest Base Camp itself is the closest you can get to Everest without mountaineering equipment. The point here isn’t comfort—it’s the scale and intensity of being that close to the mountain system.
One reason this day hits people hard is that it’s both emotional and physical. You’ll feel the altitude more, and you’ll also feel the weight of the goal. It’s not a marathon of speed; it’s a long, focused climb and approach.
Because conditions can change quickly, the guide’s judgment is crucial. On this kind of trek, I’d rather you go slower and arrive feeling intact than rush and regret it later.
Kala Patthar (5,555 m): your hardest payoff hour
Kala Patthar is described as one of the most difficult yet rewarding days, and that matches what you should expect. You’ll spend the morning climbing to 5,555 m, with a demanding ascent that tends to make everyone work.
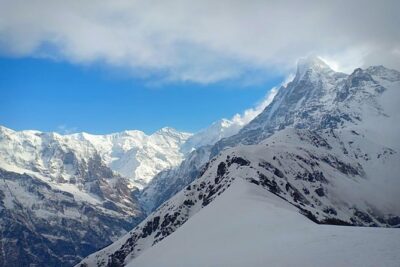
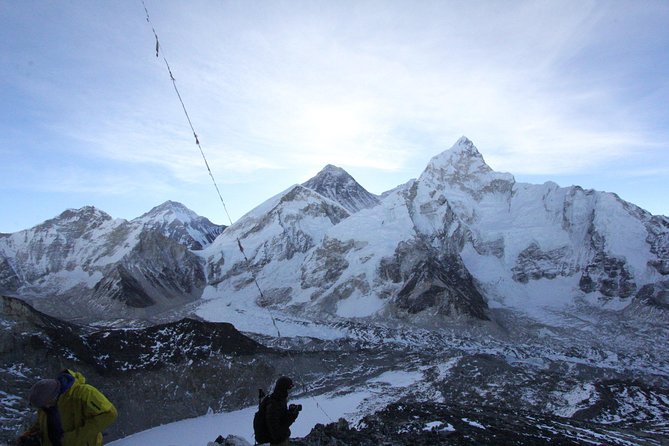
But if your body is cooperating, it’s also one of the best viewpoints of the trek. You’ll get close, dramatic views of Everest and the surrounding peaks, and the effort feels justified when visibility is good.
Think of Kala Patthar as your “finish line climb.” It’s not the easiest day, but it’s a classic moment that helps people understand why they came. If you want one day that defines the emotional memory, this is typically it.
Descent via Tengboche and Pangboche back to Namche
After Kala Patthar, you’ll descend toward Namche Bazaar. The route goes through Pangboche and Tengboche, then continues down into Namche in the afternoon.
This is where many trekkers feel a mix of relief and loss. Relief because the altitude pressure eases as you drop. Loss because you’ve built your daily rhythm in the mountains, and now you’re leaving it.
Still, don’t treat descent like a stroll. Your legs will be tired, and the steps can be rough on knees. Use the time wisely: hydrate, move carefully, and keep your pack weight under control.
Return to Lukla and back to Kathmandu
The trek finishes with your return to Lukla, where you originally flew in. You’ll have a free afternoon in Lukla to reflect as a group and then take the 35-minute scenic flight back to Kathmandu.
In Kathmandu, you’re met and transferred back to your starting hotel. The overall schedule ends with an airport drop for your flight departure.
That flight from Lukla is part of the story. One moment you’re living in cold high air; the next you’re back with roads, buildings, and the very normal chaos of a city.
Price and logistics: does $2,200 feel like good value?
At $2,200 per person for an approximately 17-day trek, you’re paying for more than just walking. You’re covering domestic flights (Kathmandu–Lukla–Kathmandu), permits, trained staffing, and the infrastructure that keeps you fed and moving safely.
Here’s what stands out as value:
- Meals included: lunches and dinners during the trek, plus breakfasts (included counts are part of the package)
- Accommodation: a three-star Kathmandu hotel for 2 nights, plus guest house accommodation for the trek nights listed in the plan
- Guide + porter support: licensed English-speaking guide and 1 porter per 2 clients
- Trek gear loan: down jacket and sleeping bag included (loaned, returned at the end)
- Water treatment: filtered water using a Katadyn Pocket filter
- Permits and taxes handled
What’s not included (and matters for budget planning):
- Nepal entry visa and international airfare
- Travel insurance that covers emergency evacuation at altitude (not included)
- Tips for trekking staff and driver (tipping is expected)
- Alcohol and personal drinks in general
- Personal trekking equipment
Also worth knowing: this operator books groups with an average booking lead time of about 51 days. If you’re traveling in a peak season window, planning early helps you get the dates you want and reduces last-minute stress.
To me, the value comes down to risk management: altitude trips are expensive when something goes wrong, so you want the operator to have the staffing, permits, and structure to run a clean experience. This itinerary is built around that.
Guides, porters, and daily comfort at altitude
You’ll travel with a licensed English-speaking trekking guide. And the leadership style matters on this route—especially around the pass day and the highest viewpoints. In the experience notes you’ll see for this company, the guides are described as safety-first and flexible when weather hits.
Porters are a real comfort multiplier here. With 1 porter per every two clients, you can keep your pack manageable and focus on steady pacing. That makes a difference on long days like the Everest Base Camp approach and the Kala Patthar climb.
For sleeping comfort, it’s a mixed story by design. Guest houses in some villages include rooms with attached toilets in areas like Lukla, Phakding, and Namche Bazaar. But in remote stretches like Thangnag, expect very basic dorm-style lodging.
The lesson: you’re buying access to the route, not hotel luxury at every stop. If you’re okay trading comfort for altitude and views, you’ll enjoy the experience more.
Who should choose this Gokyo to Everest Base Camp trek
This itinerary is best for you if:
- You have moderate physical fitness and can hike uphill for long hours
- You want both Gokyo Lakes and Everest Base Camp, not just one signature stop
- You prefer a structured plan with acclimatization time in Namche and scheduled high-point days
If you’re seeking a super relaxed stroll, this isn’t it. This is a serious trekking circuit with meaningful altitude exposure at Cho La and Kala Patthar.
Should you book this trek?
I’d book it if your “why” is clear: you want the Everest area but you also want the added payoff of Gokyo and the route over Cho La. The mix of viewpoints, plus the way the trip builds in acclimatization and planned early starts, makes it a strong fit for people who want a real adventure without improvising logistics.
I would pause if you’re not ready for early morning climbs, cold dorm-style nights in remote areas, and the physical cost of days above 5,000 m. Also, don’t skip insurance thinking. Since emergency high-altitude rescue/evacuation coverage isn’t included, you should line up proper coverage before you go.
If you’re on the fence, pick the factor you care about most: if it’s views and route variety, this circuit is a smart choice.
FAQ
How long is the Gokyo to Everest Base Camp trek?
The trek is scheduled for about 17 days.
What is the tour price per person?
The price is $2,200.00 per person.
Where does the trip start and end?
It starts at Tribhuvan Airport in Kathmandu, Nepal, and ends back at the meeting point.
When does the activity start?
The start time is 8:00 am.
Is airport pickup included in Kathmandu?
Yes. Airport transfers and pickup in Kathmandu are included.
Do I need to handle permits?
No. Permits for trekking are included.
What kind of guide and porter support is provided?
You’ll have a licensed English-speaking trekking guide, and there is 1 porter for every two clients.
What are the accommodations like during the trek?
You’ll have twin-sharing guest house accommodation for the trek nights (including attached toilets in Lukla, Phakding, and Namche). Some remote areas can be very basic, including dormitory-based lodging in Thangnag.
Are meals included?
Yes. Lunch and dinner are included during the trek, and breakfast is also included.
What if weather forces changes or cancellation?
This experience requires good weather. If it’s canceled due to poor weather, you’ll be offered a different date or a full refund.