REVIEW · ARUSHA
8 Days Lemosho Route Kilimanjaro Trekking
Book on Viator →Operated by Mafie Adventures · Bookable on Viator
A volcano summit starts in rainforest calm. The Lemosho route mixes Kibo-rim views, quiet walking early on, and a steady move toward the southern circuit. It’s one of those treks where every new habitat feels like a different country, all within a few days’ hike.
I especially like the low crowds until the route merges with Machame, which keeps the vibe calmer on the early days. I also like that you’re guided by a local, hands-on team, and names like Erastus, Oliver, and John come up for a reason: clear communication and a crew that stays on your side.
One real consideration: the final ridge section around Barafu Camp is exposed and wind-prone, and it’s also the last reliable water stop before the summit night.
In This Review
- Key things you’ll like right away
- Why the Lemosho Route Works So Well for First-Time Summit Dreams
- Arusha Pickup and the Local Team Dynamic (Erastus, Oliver, John)
- Day 1: Forest Quiet to Your First Camp at Londorossi
- Day 2: Into Moorland and the Shira Ridge Kibo Moment
- Day 3: Plateau Walking Toward the Northern Ice Fields
- Day 4: Lava Tower and Arrow Glacier, Then Down to Barranco Hut
- Day 5: The Great Barranco Wall and Overnight at Karanga (3950 m)
- Day 6: Barafu Hut to a Windy, Exposed Camp (Last Water Stop)
- Day 7: Summit Night from 23:30, Stella Point Sunrise, Uhuru Peak
- Day 8: Dancing, Tips, Certificates (Green vs Gold), and Back to Mweka
- Camps, Meals, and What’s Included (So You Can Pack Less Stress)
- Price and Value: What $2,700.52 Buys on This 8-Day Trek
- Who Should Book This Trek, and Who Might Want a Different Plan
- Should You Book This 8-Day Lemosho Trek?
- FAQ
- What time does the trek start in Arusha?
- Is pickup from Arusha included?
- Is this a private tour or a shared group?
- What meals are included during the trek?
- Is camping equipment included?
- Do I need to bring a sleeping bag or climbing gear?
- What time do you start the summit attempt?
- What certificates do you receive at the end?
- Is the booking refundable if plans change?
Key things you’ll like right away
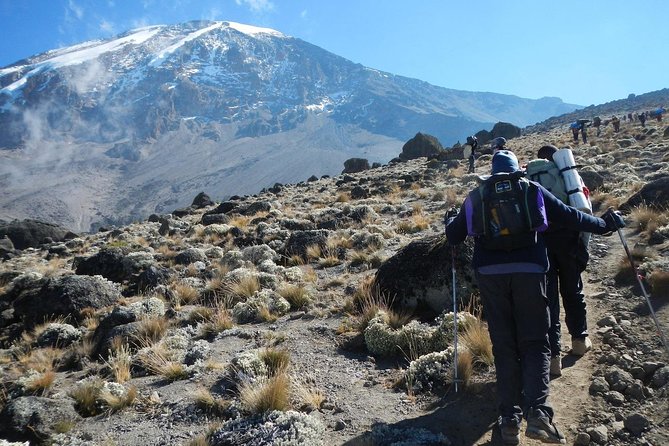
- Rainforest start plus Shira Plateau drama (views build fast once you’re above the trees)
- Early quiet on Lemosho before it combines with Machame
- Acclimatization built into the schedule, not bolted on at the last minute
- Lava Tower and Arrow Glacier territory with big “wow, we’re really here” moments
- A clear summit plan with a late-night start and a sunrise milestone at Stella Point
- Certificates and celebration at the end, including green vs. gold depending on how high you got
Why the Lemosho Route Works So Well for First-Time Summit Dreams
If you want a Kilimanjaro trek that doesn’t feel like one long, identical slog, Lemosho is a strong pick. It begins in rainforest, then climbs out into moorland and high, open plateau terrain. That change matters more than it sounds. Forest walking feels slower and more shaded; plateau hiking feels wider and more exposed; and those shifts can help your brain stay engaged while your legs do the work.
Lemosho is also known for staying quieter early. The route keeps its own rhythm until it merges with Machame, so you’re not stuck in a long line of headlamps on the first part of the climb. In practice, that can mean fewer interruptions, more space for photos, and a calmer feel when you’re trying to get settled into altitude and routine.
The other reason people like this route is that the views arrive in stages. You don’t only get “big mountain at the end.” You get Shira Ridge and Kibo sightlines across the plateau, then later a move toward features like Lava Tower (the Shark’s Tooth) and the area around Arrow Glacier. By the time summit day arrives, the mountain doesn’t feel totally new—you’ve been meeting it piece by piece.
Is it perfect? No. The trek still includes a tough summit night, and you’ll be dealing with cold, wind, and long hours. But Lemosho gives you a path that feels structured and scenic, not random. For many hikers, that balance between challenge and beauty is the whole point.
You can also read our reviews of more tours and experiences in Arusha.
Arusha Pickup and the Local Team Dynamic (Erastus, Oliver, John)
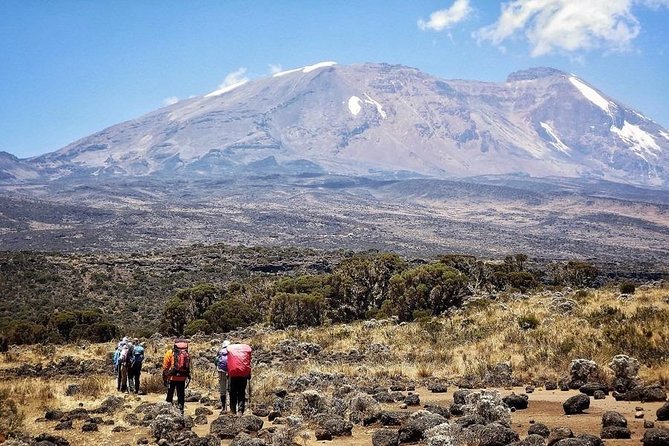
This trek starts in Arusha with a pickup offered, and the start time is 6:00 am. The schedule matters because it sets the tone: you’re not waking up at the last second, grabbing breakfast, and hoping everything works out. Your first day involves drives to the park and trailhead, plus entry formalities—so getting moving early is the smart play.
This is also set up as a private tour, meaning it’s only your group and your crew. That matters on a multi-day mountain hike because you’re not constantly negotiating space, pace, or needs with strangers. Your guide can explain things clearly, your team can keep a close eye on timing, and you can ask questions without feeling like you’re slowing a big group down.
From the local-company reviews and the way the trip is described, the human factor is strong. Erastus is mentioned as quick to respond and supportive with planning changes, and Oliver comes up as a friendly main guide. John is also referenced as part of the team. While names don’t change the air pressure, they do change the experience: you’re more likely to feel looked after when a problem pops up, like a pace adjustment or a last-minute route-day tweak.
One more thing I like for practical travelers: the package includes a professional driver/guide, plus porterage and rescue fees. That reduces a lot of uncertainty. When you’re going from Arusha to Londorossi and then into the Kilimanjaro ecosystem, you want the logistics to be handled so you can focus on your breathing and your footwork.
Day 1: Forest Quiet to Your First Camp at Londorossi
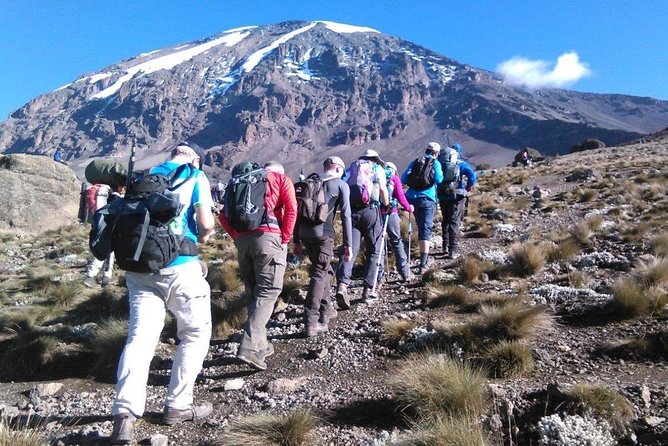
Day 1 is a classic “get in the system” start. After breakfast at your hotel, you drive from Arusha (about 1400 m) to Londorossi Park Gate (about 2100 m). Then you do entry formalities in the village near the gate, and you keep driving to the Lemosho trailhead.
Once you start hiking, the day stays in rain forest. You’ll cover around 6 km in about 3–4 hours. This portion is often mentally helpful. Forest trails tend to feel cooler and more sheltered, and the slower pace gives you time to settle into the rhythm of walking with a backpack (or whatever you’re carrying personally) while the higher elevations are introduced gradually.
You’ll also get lunch after reaching the trailhead, then continue into undisturbed forest until you reach the first camp site. That first camp isn’t about big views yet. It’s about routine: meals on schedule, camp setup working smoothly, and your body learning how long a day like this can be.
If you’re coming in from sea level or a hot climate, take Day 1 seriously. Don’t force speed. Get comfortable with the feel of the air and the consistent effort. The better you manage Day 1, the easier the transition to open terrain on Day 2 feels.
Day 2: Into Moorland and the Shira Ridge Kibo Moment
Day 2 is where the route starts changing character. You’ll hike about 8 km in roughly 5.5 hours, and you move from forest into a savannah of tall grasses, heather, volcanic rock, and lichen beards. It sounds poetic because it is, but it’s also practical: once you’re out in open moorland, the weather becomes more direct, and you’ll feel wind and temperature swings sooner.
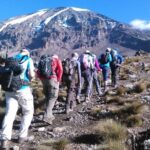
The trail ascends through rolling hills and crosses several streams before reaching Shira Ridge. Then you drop gently to Shira 1 camp. One of the most memorable parts here is the view of Kibo from across the plateau. It’s a milestone sightline. You’re not just climbing toward a distant peak anymore—you can see it in a way that makes the summit feel real.
Downside? Open moorland can be colder and more exposed than you expect, especially if fog rolls in. This is also a day when you might feel a mild “are we really getting higher?” sensation. You’re gaining elevation, but the terrain can trick you into thinking you’re still on a moderate walk. Stay aware of your breathing and keep your pace steady.
Good news: the trek’s structure supports acclimatization. Day 2 doesn’t try to crush you. It sets the stage for plateau walking and helps build that confidence of progress.
Day 3: Plateau Walking Toward the Northern Ice Fields
On Day 3, the hike stretches longer—about 15 km over 5–7 hours—and the habitat stays in moorland. The route heads east toward Kibo’s glaciered peak, walking across the plateau to Shira 2 camp, which sits on moorland meadows near a stream.
Then you keep going toward Moir Hut, described as a less-used site near the base of the Lent Hills. This is an acclimatization-friendly setup. The Lent Hills area allows for a variety of walks, which matters because it lets you adjust without pushing a full summit effort. You get to “work” your body at altitude while staying within a day profile that’s designed for adaptation.
This is also one of those days where you’ll likely feel the height psychologically. The trek is high-altitude, but the open plateau makes the air feel sharp and the distances feel bigger. If you’re prone to rushing, Day 3 is where you’ll want to practice restraint. Use the terrain changes to slow yourself down.
The payoff is that you end up closer to the glacier and ice-field realm than most hikers expect from the early part of the trek. It’s the moment when the mountain stops being just a shape and starts being a landscape of snow, ridges, and big weather changes.

Day 4: Lava Tower and Arrow Glacier, Then Down to Barranco Hut
Day 4 is about dramatic Kilimanjaro features, but it’s also about acclimatization logic. You’ll hike around 7 km for about 7 hours, moving into semi-desert terrain.
From Moir Hut, you continue east up a ridge, passing a junction toward the peak area of Kibo. Then your direction shifts to the southeast toward Lava Tower, often called the Shark’s Tooth. After that, you reach another junction that leads up to the Arrow Glacier at around 16,000 ft.
Then the day changes tone again: you descend to Barranco Hut at about 13,000 ft. The note that matters for your body is that you end the day at a similar elevation to when you started. That doesn’t mean the day is easy. It’s still a long day, and it still forces you to deal with altitude. But it’s the kind of pattern that can help your system adjust without adding a huge altitude jump.
One practical consideration: semi-desert terrain can feel harsh and exposed. When the wind picks up, it’s noticeable. Keep an eye on how you’re bundled, and don’t treat this as a day for “I’m fine, I’ll just push through.” You’re preparing for the Great Barranco Wall and then the final ridge.
This is the day when you’ll start thinking less about kilometers and more about survival-style pacing: steady, careful steps, no hero moves.
Day 5: The Great Barranco Wall and Overnight at Karanga (3950 m)
Day 5 is a shorter hike on paper—about 5 km for 4–5 hours—but it includes one of the trek’s signature challenges: the Great Barranco Wall.
The route frames it as a Class 2 climb. That’s a useful descriptor because it tells you it’s not just a casual uphill. It requires attention. The wall may look intimidating, but the key point is that it’s usually easier than it first seems. Still, you’ll benefit from focusing on foot placement, grip points, and a steady pace.
At the top, you’ll get a view of Heim Glacier and find yourself above the clouds. This is one of those moments that can make all the walking feel worth it. You’re not just climbing—you’re stepping into a world of ice and atmosphere.
After that, the trail winds up and down in the Karanga Valley. You’ll sleep at Karanga Camp (3950 m). There’s also a practical perk mentioned for this camp: washing at the site. On a trek like this, small comforts matter.
Consideration: even short days can feel long when you’re already high. Day 5 works as a controlled acclimatization day because it challenges you without dragging out into an all-day grind.
Day 6: Barafu Hut to a Windy, Exposed Camp (Last Water Stop)
Day 6 is where the trek tightens. After breakfast, you start ascending and your trail intersects with the Mweka Route—the route used for descent on the final two days. That intersection is a quiet reminder that you’re entering the home stretch.
You hike for about an hour, reach Barafu Hut, and continue onward to Barafu Camp (4550 m). This is described as the last water stop for porters, and there’s also mention that there is no accessible water at Barafu Camp. That detail is important for your planning and behavior. Don’t treat water as an afterthought. You’ll want to drink and manage accordingly before you reach the ridge areas.
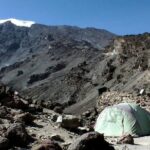
Barafu Camp sits on a rocky, exposed ridge. The trek notes that tents are exposed to wind and rocks, and it’s worth familiarizing yourself with the campsite before dark. In plain terms: you don’t want to be figuring out where you’re sleeping and how conditions work while the environment is changing fast.
This is also a day built for rest. You’ll get early dinner and time to settle before summit-night demands. If you’re tempted to stay out late for photos, remember what’s coming. Summit day starts at night, and you need sleep more than scenery.
Day 7: Summit Night from 23:30, Stella Point Sunrise, Uhuru Peak
Summit day starts in the dark. You’re woken around 23:30 with tea and biscuits, then you begin the climb. The route heads northwest over stone scree. The trek description highlights what many hikers feel on summit night: this is often the most mentally and physically challenging part.
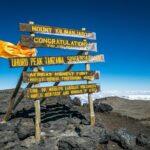
Your first big milestone is Stella Point (5685 m) on the crater rim, reached after about 6 hours. Then you get sunrise here, and it’s described as magnificent. After enjoying it, you continue for about 2 more hours on a snow-covered trail to Uhuru Peak (5895 m).
Distance-wise, the ascent is roughly 7 km, but the ascent feels longer because of altitude and the texture of the ground. That’s why it’s not just the distance that matters. The gradient, your pace, and keeping calm all do their part.
After Uhuru Peak, you descend. The itinerary describes about 7–8 hours to reach Mweka for the next camp. The distance is listed as about 23 km descent. You’ll likely feel tired in a way that’s different from normal hiking. Descending is still hard work on knees and quads, even when the hardest climbing is behind you.
Practical tip for mindset: on summit day, you don’t just chase altitude. You also manage the cold and the darkness early on. Your pace discipline from earlier days pays off here.
Day 8: Dancing, Tips, Certificates (Green vs Gold), and Back to Mweka
You don’t just wake up on Day 8. You celebrate. After breakfast, your staff holds a celebration with dancing and singing. Then you present your tips to the guide, assistant guides, chef(s), and porters.
This day turns the mountain into something communal. It’s a reminder that Kilimanjaro isn’t a solo achievement if you’re doing it the standard way. You’re climbing with a whole support system, and the ceremony makes sure everyone gets recognized.
After the celebration, you descend about 3 hours back to Mweka Gate. Then the National Park requires you to sign your name to receive certificates of completion. The certificate colors are clear:
- Green certificates if you reached Stella Point (5685 m)
- Gold certificates if you reached Uhuru Peak (5895 m)
After certificates, you descend into the Mweka village area for about an hour. The trekking is over, but the walking continues just long enough to transition you out of summit-mode.
If you’re the kind of person who worries about missing out if you don’t get to the very top, this is worth noting. The certificate system recognizes two key milestones, not just one. That can help you measure your success in a way that’s more honest than comparing peak numbers.
Camps, Meals, and What’s Included (So You Can Pack Less Stress)
One reason this package appeals to value-minded hikers is what it includes. You get camping equipment such as a mess tent, mattress, and all cooking equipment. You also get accommodation during the trek, plus meals: 7 breakfasts, 8 lunches, and 7 dinners.
You’re also covered on fees that often feel like surprises. The included list mentions parking fees, rescue fees, and all taxes/VAT. Porterage is also included, which is a huge deal for a multi-day mountain hike because you’re freed from carrying camp logistics.
That said, a couple items still matter for your personal packing plan:
- Sleeping bag is not included (but it’s available for rent)
- Climbing gear is not included (also available for rent)
- Bath towels are not included
- Tips are not included, and they’re part of the Day 8 celebration
So the sweet spot is this: you don’t have to carry camp gear, you’re not guessing on meals, and the trip covers the big operational costs. But you do need to plan for the personal cold-weather gear that the trek requires.
Also, pay attention to water constraints. Barafu Camp is described as having no accessible water, and it’s the last water stop for porters. That means hydration strategy matters, especially as summit night approaches.
Price and Value: What $2,700.52 Buys on This 8-Day Trek
At $2,700.52 per person, you’re paying for a fully run expedition with a lot included: meals, camping setup, porterage, a professional guide/driver, rescue fees, taxes, and accommodation during the trek. For many hikers, the value isn’t only in the price. It’s in what you don’t have to manage.
Here’s where the money seems to go:
- Staffing: professional guidance and porterage
- Camp logistics: cooking equipment, mess tent, mattresses
- Food system: multiple meals across the trek
- Risk planning: rescue fees included
- Operational costs: parking fees and taxes/VAT
You’ll still handle your own international flights, visa or travel insurance (not listed as included), plus any items not covered like sleeping bag and climbing gear. But the core trekking machine is handled.
This price also makes sense if you want a private setup rather than a shared group where you might be adjusting to other paces. Private trekking isn’t automatically better, but it usually feels more personal and easier to coordinate on altitude days.
One caution tied to value: the trek is non-refundable and cannot be changed if you cancel. So when you buy, treat it like a firm commitment. If your plans depend on uncertain work schedules or health risks, consider that seriously before booking.
Who Should Book This Trek, and Who Might Want a Different Plan
This trek says most travelers can participate, and the route does include multiple acclimatization-friendly days. You also get a short hiking day on Day 5 and a rest-supporting pattern around Day 4 and Day 6.
I’d recommend this for you if:
- You want the Lemosho variety: forest, plateau, moorland, semi-desert, alpine desert, and then back toward forest on descent
- You like a route with structure and acclimatization logic
- You want a team-based experience where Erastus and the guides like Oliver and John help with smooth planning and on-trail support
- You can handle a late-night summit start and a long descent after reaching Uhuru Peak
I’d think twice if you:
- Struggle with high-altitude cold and exposed camps
- Don’t have experience with step-up terrain like the Great Barranco Wall
- Expect a relaxed, short-day adventure. Even the “short” days here are still at elevation and on mountain terrain.
If you’re ready for a serious trek with real milestones—Stella Point sunrise, certificate colors, and a team celebration—this route fits that goal well.
Should You Book This 8-Day Lemosho Trek?
I think you should book this trek if you want a route that’s scenic in stages, not scenic once. The early quiet of Lemosho, the Shira Plateau Kibo views, and the classic Kilimanjaro highlights like Lava Tower and the Barranco Wall create a trek that feels like a journey, not a single task.
Book it with confidence if your priority is hassle-free logistics. The package covers camping gear, meals, porterage, rescue fees, taxes/VAT, and accommodation during the trek. That reduces the stress load when you’re already carrying altitude and cold.
Skip it if you need flexible change options or you’re worried about summit night feasibility. At this price point, it’s also smart to be honest about your readiness for long hiking days and the exposed ridge conditions around Barafu Camp.
If you’re planning smart, training a bit for uneven footing, and you’re mentally ready for the summit night, this is a strong and well-paced way to chase Kilimanjaro.
FAQ
What time does the trek start in Arusha?
The activity start time is 6:00 am in Arusha.
Is pickup from Arusha included?
Pickup is offered, and the tour starts in Arusha, Tanzania.
Is this a private tour or a shared group?
It’s a private tour/activity, so only your group participates.
What meals are included during the trek?
Dinner is included for 7 days, breakfast for 7 days, and lunch for 8 days.
Is camping equipment included?
Yes. Camping equipment is included, including a mess tent, mattress, and all cooking equipment.
Do I need to bring a sleeping bag or climbing gear?
Climbing gear and sleeping bag are not included, but both are available for rent.
What time do you start the summit attempt?
You’re woken around 23:30 for tea and biscuits, then you start the summit attempt that night.
What certificates do you receive at the end?
You sign your name to receive certificates. Reaching Stella Point (5685 m) gives a green certificate, while reaching Uhuru Peak (5895 m) gives a gold certificate.
Is the booking refundable if plans change?
No. The experience is non-refundable and cannot be changed for any reason.