REVIEW · ARUSHA
7 Days Kilimanjaro trek via Machame route
Book on Viator →Operated by Mountain Warriors Tours and Safaris · Bookable on Viator
Kilimanjaro is a serious hike, not a stroll. This 7 Days Kilimanjaro trek via the Machame route is built around an accessible trailhead, varied scenery, and that classic west-side feel as you work your way up toward Uhuru Peak. I like the way it mixes forest mornings with high-altitude plants later on, so every day looks and feels different.
Two things I really appreciate: the camp setup (private, waterproof tents plus mess tents with table and chairs) and the human support system. In particular, the guides and crew have a reputation for keeping people moving pole pole, and the energy on summit night can be oddly comforting when you’re running on headlamp light and stubborn will.
One possible drawback: Machame is the most popular camping route overall, so you’ll spend time in camps with plenty of other climbers. If you prefer quiet, this isn’t your summit Zen retreat.
In This Review
- Key Highlights to Expect
- Mountain Warriors and the Machame Route: The Big Picture
- Price and What You Get for $2,800 per Person
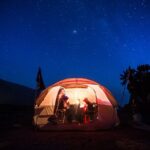
- Camp Comfort on Kilimanjaro: Tents, Mess Tents, and Purified Water
- Day 1: Machame Gate and Cloud Forest to Machame Camp
- Day 2: Up Sections, Viewpoints, and the Shira Plateau Switch
- Day 3: Acclimatization Day to Barranco Camp (and Lava Tower as a Bonus)
- Day 4: Barranco Wall Scramble Into Karanga Valley
- Day 5: Barafu Camp, Glaciers in View, and the Midnight Wake-Up Plan
- Day 6: Summit Night to Uhuru Peak via Stella Point
- Day 7: Mweka Forest to the Gate and Back to Arusha
- Who This Machame Trek Suits (and Who Should Think Twice)
- Should You Book This 7-Day Kilimanjaro Trek via Machame?
- FAQ
- How long is the Kilimanjaro trek via Machame?
- Where does the trek start?
- What’s the summit plan and when do you start the final ascent?
- What camps are on the route?
- Is park or rescue coverage included?
- What’s included with meals and water?
- What’s not included in the price?
- How much does it cost?
- Is this tour private?
- What is the cancellation policy?
Key Highlights to Expect
- Easy access to the trailhead from Arusha with a short drive to Machame Gate
- Varied scenery from cloud forest to Shira Plateau to alpine desert
- A real acclimatization plan with a crucial Day 3 profile before dropping to Barranco Camp
- Barranco Camp is a staff favorite, with lots of shared energy on this route
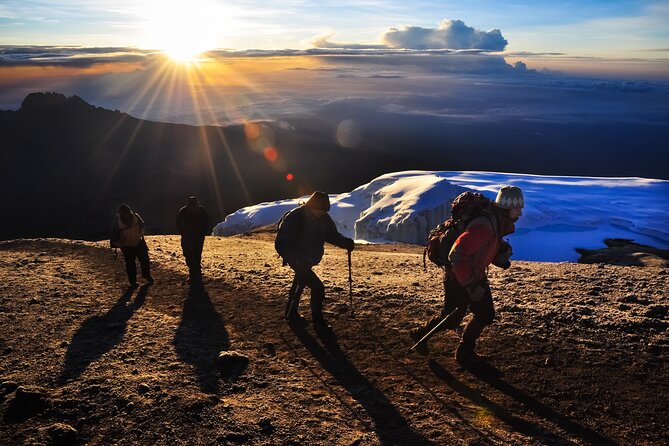
- Summit push starts around midnight and follows the trail through Stella Point
- Strong camp comfort: waterproof private tents, mess tents, and purified drinking water
Mountain Warriors and the Machame Route: The Big Picture
This is a full-on Kilimanjaro trekking week on the Machame route, one of the most popular ways up. The big idea is simple: you start relatively close to the mountain, you climb through enough changing terrain to keep your brain awake, and you give your body a shot at acclimatization before the steepest part.
The trek ascends on the west side, which matters because it shapes what you see. You’ll track Kibo’s presence and often catch big views with Mawenzi coming into the picture too. It’s also a route where the camps feel like stepping stones rather than random overnight stops. Barranco Camp, which is the third campsite on this route, is frequently called out by mountain staff as a favorite, and I can see why: it’s a point where people feel both tired and oddly alive.
Another practical win: you’re not doing this as a “show up and figure it out” situation. You’ll have professional guides, cooks, and porters managing day-to-day logistics so you can focus on hiking, hydration, and rest.
You can also read our reviews of more tours and experiences in Arusha.
Price and What You Get for $2,800 per Person
$2,800 per person is not cheap, but Kilimanjaro isn’t a bargain-item vacation either. The value here comes from what’s wrapped into the price, including things that often get missed when people compare options.
Included items that make a real difference:
- Professional, experienced mountain guides
- All park fees and rescue fees
- All meals while on the mountain (breakfast, lunch, dinner each day on the trek)
- Clean, purified drinking water
- Quality, waterproof private mountain sleeping tents
- Quality mess tents with table and chairs
- Airport transfers
On top of that, your trip is described as private in the sense that it’s for your group only. The camps can still be busy because this route is popular, but you’re not sharing your hiking team with random strangers.
What’s not included is also important:
- Person climbing gear (you’ll need to bring your own)
- Tipping
- Visas fee
If you already have solid hiking gear and you understand tipping as part of the experience, the $2,800 starts to look more reasonable. If you’re arriving with zero equipment and no plan, the extras can add up fast.
Camp Comfort on Kilimanjaro: Tents, Mess Tents, and Purified Water
Kilimanjaro success is half stamina and half logistics. This trek leans hard into the logistics side.
You sleep in quality, waterproof private mountain sleeping tents, not shared or flimsy setups. That matters because summit day is long, and recovery depends on sleep quality. Even if you don’t love the cold, having shelter that holds up is a big plus.
Meal time is also designed to be usable, not just edible. You get quality mess tents with table and chairs, so you can actually eat and reset your legs. Add in clean purified drinking water, and you’re less likely to spend your energy on complicated hydration decisions.
Finally, the way the operation is described suggests a strong rhythm: your porters and cooks prepare camp ahead of your arrival so you’re not waiting around when you’re tired. That’s the kind of small thing that makes the whole week feel calmer.
Day 1: Machame Gate and Cloud Forest to Machame Camp
Day 1 starts with a drive from Arusha to Machame Gate, about 1.5 hours through coffee farms and villages. You’ll meet your guides, porters, and cooks at the gate, and then you register the climb and let the team handle final preparations.
Once you’re on the trail, the early feel is all about the moss-covered cloud forest. It’s “mystical” in the way only Kilimanjaro can do—dark greens, damp air, and a sense of stepping into another world. As you hike, the forest thins and you start seeing heathers, tall grasses, and wildflowers. If weather is clear, the view of your big destination (Kibo Peak) can pop through, which is a mental boost.
This is also a day where camp logistics matter. Your porters and cooks go ahead and set up camp so you can arrive to something ready, not a blank slate.
Hike time is listed at about 6 hours, so you get a real start without frying yourself. That’s the right way to begin a multi-day trek.
Day 2: Up Sections, Viewpoints, and the Shira Plateau Switch
Day 2 includes several uphill sections, and the heat can surprise you on clear days. The practical advice here is straightforward: carry plenty of drinking water and don’t treat hydration like a “later” task.
The trail rewards you with viewpoints where you can see forests and plains below and Kibo and Mawenzi peaks above. You also get one of Kilimanjaro’s key transitions: vegetation changes as altitude rises. Trees shrink and you move into the zone of high-altitude plants like Senecio kilimanjari and Lobelia deckenii.
After lunch, you climb the Shira Plateau, formed when Kibo’s lava filled the Shira crater. It’s a geological story you can actually walk across. Then you continue to Shira Camp and relax.
One useful detail: Kibo lies to the west and Mount Meru to the east. Even if you’re not a map wizard, that directional contrast helps you orient yourself mentally as the mountain “turns” around you.
Again, you’re on about 6 hours of hiking, so it’s work, but it stays within a manageable range for a week that needs to save energy.

Day 3: Acclimatization Day to Barranco Camp (and Lava Tower as a Bonus)
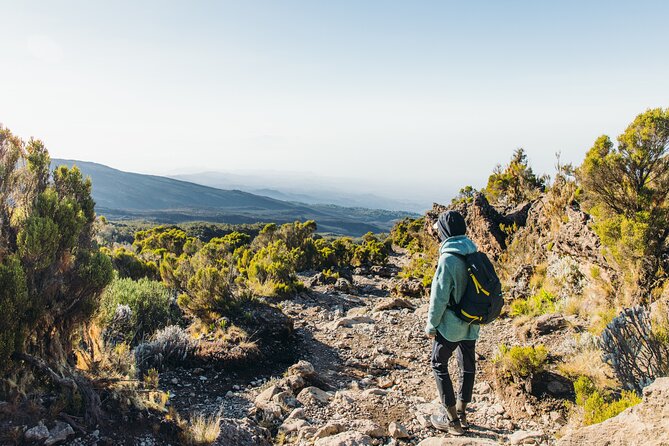
Day 3 is the day I’d call “strategic hard.” You end the day with an elevation gain of only about 110 meters, but before the descent you climb up to around 4,530 meters, with an elevation climb of about 690 meters. That profile is built for acclimatization: you challenge your body, then you come down to sleep lower.
After breakfast, you hike east on the Shira Plateau until you reach the junction for the Shira and Lemosho Routes. Then the trail continues through barren landscape before lunch. The day’s highest point comes before you descend quickly to Barranco Camp.
If you’re feeling strong and you’re listed as a faster hiker, there’s a detour option via Lava Tower, described as a 300-foot lava formation. You only do this if your group pace allows it, but it can add an extra “wow” moment without changing the overall structure of the day.
Seven hours of hiking time is listed here, so it’s longer than Day 2 even though the net elevation gain at the end of the day is modest. Expect it to feel like effort plus altitude homework.
Day 4: Barranco Wall Scramble Into Karanga Valley
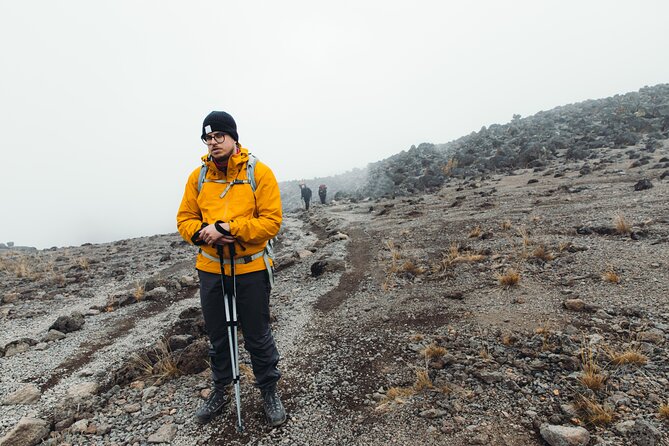
Day 4 starts with the part most people remember: Barranco Wall. The trek begins with about 1.5 hours of scrambling up the wall. In some places you may need your hands for balance and assistance.
This is one of those days where technique helps. You’re not racing; you’re finding stable footing and using your arms when the trail gets steep. If you try to walk it like a flat path, you’ll feel it more than you need to.
After you reach the top, the trail becomes fairly level before a short but steep descent into Karanga River Valley. The Karanga Valley section is where your body starts to think, Okay, we’re moving again, not climbing the whole time.
Total hike time is listed at about 7 hours. It’s a tough-feeling day, but it’s also the kind of challenge that makes later days feel more predictable. You’ll leave with that “we handled the hard part” energy.
Day 5: Barafu Camp, Glaciers in View, and the Midnight Wake-Up Plan
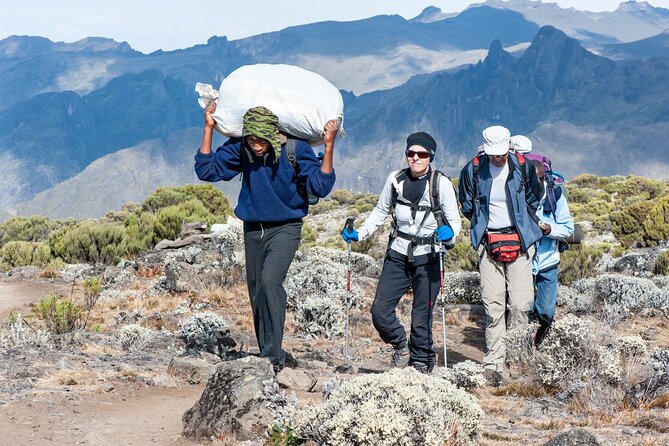
After breakfast, you hike toward Barafu Camp, with stops and views along the way. You’ll see glaciers connected to Kibo’s ice fields, and you’ll pass a junction connected to the descent route at Mweka with the Machame trail.
During Day 4 you can view the Heim, Kersten, and Decken Glaciers, and they’re visible again in the broader approach around this area. Even if you’ve seen glacier photos before, standing near the real thing shifts the experience from “image” to “scale.”
The trail to Barafu passes through alpine desert with little vegetation, so you get fewer breaks in scenery and more open exposure. The camp itself sits with stunning views of Kibo and Mawenzi peaks, which matters because summit night is coming.
Here’s the practical instruction you should take seriously: you’ll want to try to sleep after dinner, because you’ll wake before midnight for the summit hike. Your body needs rest. You’re not trying to cram extra excitement into that evening.
Hike time is listed around 7 hours. It’s enough to feel like you worked, but Barafu is the last big “setup” stop before the hardest night of the trek.
Day 6: Summit Night to Uhuru Peak via Stella Point
This is the day Kilimanjaro turns from hiking into survival arithmetic, in the best way.
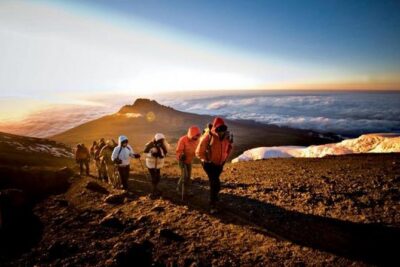
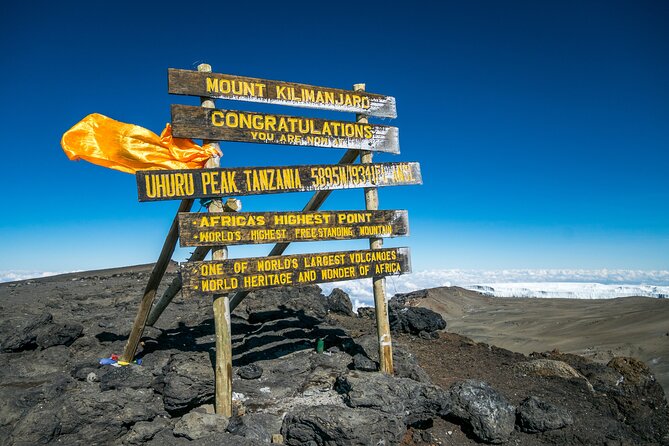
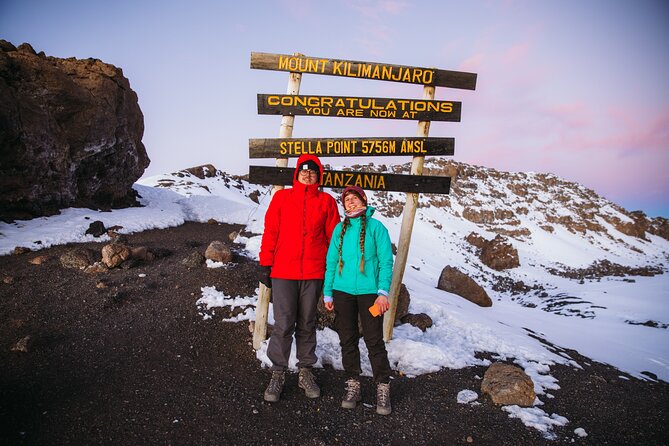
Around midnight, you begin the final ascent to Uhuru Peak. You hike for about six hours, using headlamps for visibility. The ascent to the crater rim at Stella Point is the most challenging part of the entire trek, described as very steep.
After Stella Point, the hike from the crater rim to Uhuru Peak is a gradual climb and not very difficult in technical terms. The catch is altitude. It makes everything feel slower and longer, even when the trail is simpler.
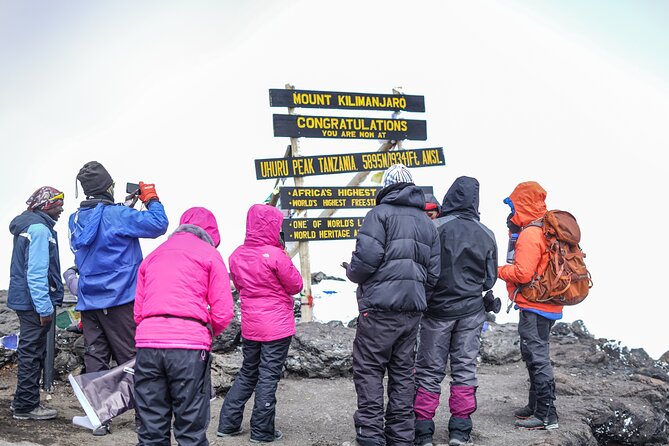
Once you reach Uhuru, you take photos with your guide and group, then you start your descent to Mweka Camp. On the way down, you’ll get views of the mountain, crater, clouds, and glaciers—exactly the kind of payoff that makes people forget the pain in the next few hours.
This day is where the strong group pacing matters. One reason people talk about guides named Gasto and his team with such warmth is that summit night is mentally loud. A steady pace and morale support can make the climb feel possible instead of just inevitable.
Day 7: Mweka Forest to the Gate and Back to Arusha
Day 7 is your finish line with less altitude pressure.
After breakfast, you hike through the forest to Mweka Gate. The trail may be slippery after rain, so plan for careful foot placement. If you’ve got sore knees, this is where trekking poles (if you use them) and controlled descents can help.
Once you reach the lower station of Mweka Gate, your vehicles will meet you and take you back to Arusha.
This is listed at about 6 hours. You’ll still feel the week in your legs, but the air and the forest feel like a reward, not a punishment.
Who This Machame Trek Suits (and Who Should Think Twice)
This trek is a good match if you have moderate physical fitness and you’re willing to walk steadily for multiple days. The route is designed with acclimatization in mind, and it includes one day (Day 3) that climbs high before sleeping lower. That’s not an accident; it’s the body’s chance to adjust.
You’ll also enjoy it if you like variety. You won’t just hike “rocky trail.” You move through cloud forest, plateau terrain, barren zones, and alpine desert, then finish in forest again.
Two things to consider before you commit:
- It’s the most popular camping route overall, so camps can be busy and you’ll share the experience with many other climbers.
- The summit night is long and steep up to Stella Point. Even if you’re fit, altitude turns it into a mental game.
If you want a calm, solitary trek, Machame might feel crowded. If you want a classic Kilimanjaro experience with strong support and a good chance of summit-day momentum, this route fits.
Should You Book This 7-Day Kilimanjaro Trek via Machame?
If you’re aiming for Uhuru Peak and you want a route with easy access to the trailhead, varied scenery, and an operation that handles the heavy lifting (guides, porters, cooks, meals, tents, fees, purified water), I think you should seriously consider booking this Machame trek.
I’d pass only if you know you struggle with steep climbs, you dislike night hiking, or you need total quiet. Otherwise, the mix of acclimatization, camp comfort, and strong guide support—often associated with leaders like Gasto and his team—is exactly what you want for a first or second-time serious mountain challenge.
FAQ
How long is the Kilimanjaro trek via Machame?
It’s listed as about 7 days.
Where does the trek start?
You’ll depart from Arusha and drive to Machame Gate, which takes about 1.5 hours.
What’s the summit plan and when do you start the final ascent?
You start the final ascent around midnight, hike by headlamp, reach Stella Point on the steep crater-rim approach, and then continue to Uhuru Peak.
What camps are on the route?
The itinerary includes Machame Camp, Shira Camp, Barranco Camp, Karanga Valley (during Day 4), Barafu Camp, Mweka Camp, and ends at Mweka Gate.
Is park or rescue coverage included?
Yes. The price includes all park fees and rescue fees.
What’s included with meals and water?
All meals while on the mountain are included, along with clean, purified drinking water. Mess tents with table and chairs are also included.
What’s not included in the price?
Person climbing gear, tipping, and visas fee are not included.
How much does it cost?
The price is $2,800 per person.
Is this tour private?
Yes, it’s described as a private tour/activity, with only your group participating.
What is the cancellation policy?
Free cancellation is offered. You must cancel at least 24 hours in advance for a full refund; within 24 hours there is no refund.