REVIEW · ARUSHA
7 Days Kilimanjaro Trekking Machame Route with Professional Guide
Book on Viator →Operated by Africa Joy Tours - Day Tours / Mult Day Tours · Bookable on Viator
Kilimanjaro tests your will, then rewards it. This 7 Days Kilimanjaro Trekking Machame Route takes you from Machame Gate up through rainforest and moorland, across the Shira Plateau, and toward the Southern Icefields before the midnight push to Stella Point. I really like the way this version builds in extra acclimatization (7 days on the mountain, with the Machame “Whiskey” pacing).
The other big win is how organized it feels: airport-to-Arusha transfers, a pre-climb briefing and equipment check, and a trained team with rescue and oxygen support built in. The main drawback to plan for is simple: summit night is long and steep. You’ll start around 1 a.m., walk roughly 11–15 hours on Day 7, and you’ll be on loose volcanic scree most of the time—so moderate fitness and good hiking stamina matter.
In This Review
- Key things that stand out on this Machame trek
- Machame’s Whiskey Route: why this plan fits real bodies
- Arusha start: airport transfer, lodge dinner, and a real briefing
- Day 2 in Kilimanjaro: Machame Gate rainforest to Machame Camp (9,800 ft)
- Day 3: Shira Plateau views and the giant heather moorland
- Day 4: Lava Tower lunch, then down into Barranco Camp (12,800 ft)
- Day 5: up Barranco Wall, then toward Karanga Camp and the icefield approach
- Day 6: Barafu Hut staging (14,800 ft) plus a short acclimatization hike
- Day 7 summit night: 1 a.m. start, Stella Point sunrise, optional Uhuru Peak
- Day 8: descent into tropical forest and down to Mweka (5,400 ft), then Arusha
- Day 9: farewell and a private departure transfer from Arusha to JRO
- Price at $2,400: what you’re actually paying for (and what you’re saving)
- Guides, pace control, and safety details that matter on summit night
- What you’ll feel each day: walking time, altitude, and fatigue management
- Gear, fitness, and training: what you should prepare before Day 1 dinner
- Who this Machame 7-day trek is best for (and who should reconsider)
- Should you book this 7 Days Kilimanjaro Trekking Machame Route?
- FAQ
- What’s the total duration of this Kilimanjaro Machame trek?
- Where does the trek start and end?
- What time is the start time mentioned for the experience?
- Is airport pickup included?
- What route is this, and why is it called Whiskey?
- How early do you start summit night?
- Is Uhuru Peak included?
- What meals are included?
- What climbing support is included for safety?
- What is not included in the price?
Key things that stand out on this Machame trek
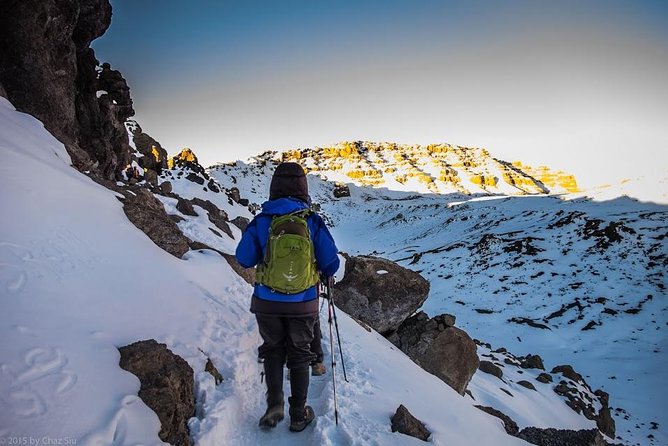
- Whiskey Route pacing that adds acclimatization time and shortens some day-to-day hiking pressure
- Professional guide support plus rescue fees, first aid, and oxygen included
- Big view days: Shira Plateau panoramas, Barranco Valley cliffs, and Southern Icefields approach
- Summit timing that targets sunrise from Stella Point, with an optional further push to Uhuru Peak if you feel good
- All-in setup: tents, all gears, and full meals are included, so you’re not juggling logistics mid-trek
Machame’s Whiskey Route: why this plan fits real bodies
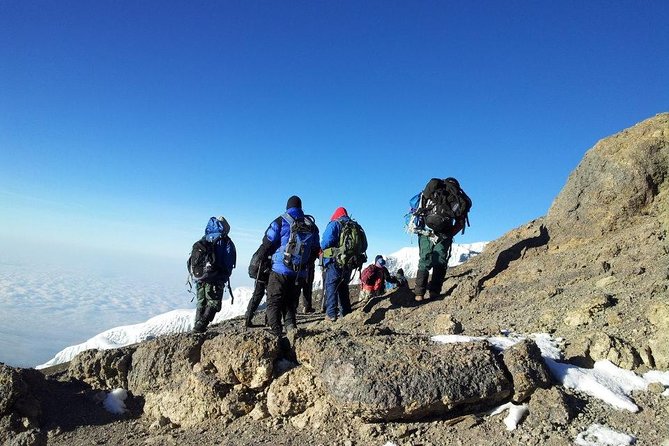
The Machame Route is famous for views and variety, but the smart reason to pick this specific “Whiskey” version is pacing. You still climb hard, because Kilimanjaro is Kilimanjaro, but the itinerary is built to help your body adjust. That means fewer “surprise” long days and more structured altitude change.
Here’s the practical takeaway: altitude is the real boss. The itinerary gradually steps upward—rainforest to moorland, then higher and higher camps—so you’re not just going from warm to thin air with no prep. You’ll still need to hike at a slow, steady pace, drink water, and follow your guide’s lead on timing and rest. But the route gives you the best shot at feeling steady, not wrecked.
Also, the walking hours are not hidden. Some days are short and scenic; others are long. Knowing that upfront helps you pack mentally (and physically) for the long haul.
You can also read our reviews of more tours and experiences in Arusha.
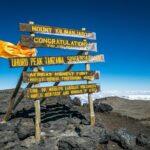
Arusha start: airport transfer, lodge dinner, and a real briefing
Your trek life begins in Arusha. If you land at Kilimanjaro International Airport (JRO), you get a private transfer to Arusha Safari Lodge. Day 1 has two big things that I’m glad are included: a pre-climb briefing plus an equipment check.
That briefing timing is key. You’ll meet around 4:30 pm, and dinner is served at 6:30 pm. This gives you time to confirm you have the required medical coverage and travel insurance before anyone starts talking about summit strategy.
You also get a chance to get your bearings early: how you’ll organize your bags, what to wear, what to keep accessible, and how your team will handle the rhythm of the climb. If you’re the kind of person who likes to know the plan before you’re tired, you’ll appreciate this.
Day 2 in Kilimanjaro: Machame Gate rainforest to Machame Camp (9,800 ft)
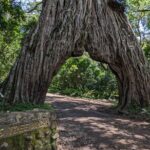
Day 2 starts with rainforest trekking right after park registration at Machame National Park gate. This is one of those days where the altitude isn’t yet bullying you, but the hike is still a workout. The trail runs through dense, green growth, and you’ll likely feel warm and humid as you find your pace.
You’ll stop for a picnic lunch en route, then camp at Machame Camp (9,800 ft). Typical walking time is about 5–6 hours.
Why Day 2 matters: it’s your warm-up for tomorrow’s altitude step. I like that it’s long enough to start building rhythm, but not so long that you blow your energy early. Use this day to test your layers, your hydration routine, and how your body handles sustained walking.
Day 3: Shira Plateau views and the giant heather moorland
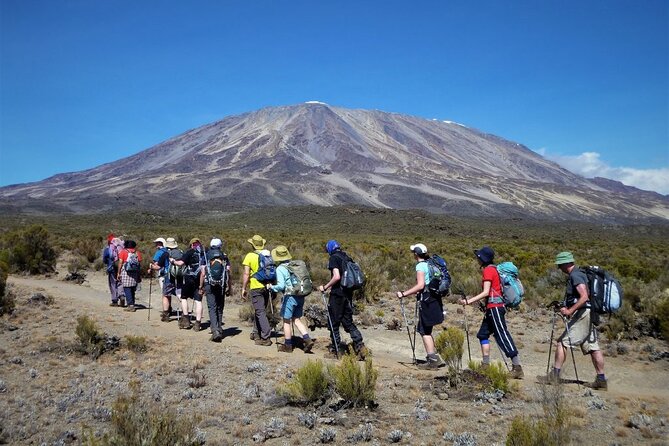
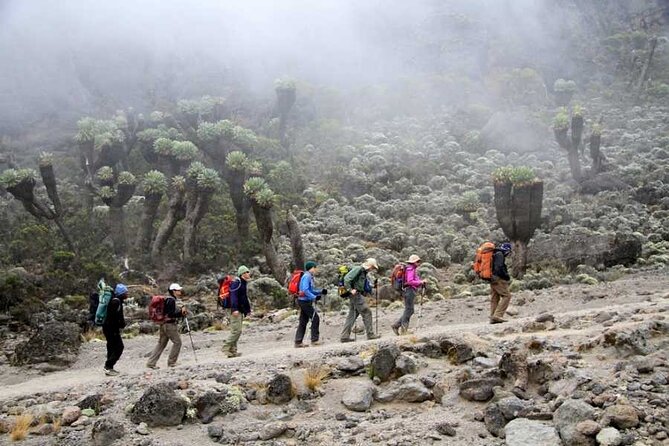
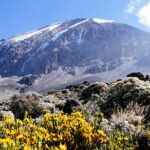
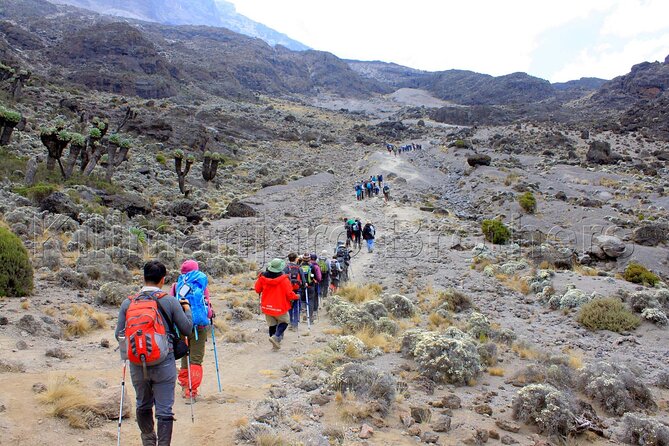
Day 3 is where the scenery changes. You leave forest behind and move into the moorland zone with giant heather. The climb is steady through rocky hills, and the payoff is wide views toward the Shira Plateau (around 11,000 ft).
You’ll camp near Shira Hut (12,600 ft). Walking time is usually 4–5 hours.
Also, don’t miss the small moment: the itinerary calls out views of Mount Meru floating among clouds. That’s the kind of scene you remember later, especially after summit night noise and exhaustion.
This day is a reminder that acclimatization isn’t only about “altitude numbers.” It’s also about giving your breathing time to adjust. Keep your pace slow. Let your guide set the rhythm, not your ego.
Day 4: Lava Tower lunch, then down into Barranco Camp (12,800 ft)
Day 4 is a mixed-feelings day. You get sustained ascent and big panoramas, including lunch near Lava Tower (14,900 ft). Then the trail drops down into the Barranco Valley to Barranco Camp (12,800 ft), with towering cliffs around you.
Walking time is listed as 7–9 hours, which makes this one of the heavier days in the middle of the trek.
The big practical point: descending can still drain you. Your knees and ankles feel it, especially when you’ve been hiking for days already. I like that this day ends at a camp surrounded by dramatic cliff walls—mentally, it helps to arrive somewhere visually “contained” after a day of open views.
This is also a good day to practice careful footing. On Kilimanjaro, slipping is never worth the risk.

Day 5: up Barranco Wall, then toward Karanga Camp and the icefield approach
From Barranco Camp, you climb the Barranco Wall—a steep section—then move onto an undulating trail along the south-eastern flank of Kibo. This is where the trek starts feeling more “mountain proper.”
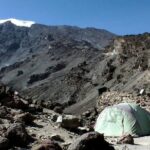
Expect scree and pockets of lush vegetation in sheltered hollows. The trek’s payoff is superb vistas of the Southern Icefields. You’ll camp at Karanga Camp (13,100 ft), which is described as the last water point on the approach to the summit.
Walking time is 5–7 hours.
Why this day is a big deal: Karanga is right before the final push setup. The route is changing under your feet—more loose volcanic material, more exposed views, and more moments where you can’t hide from altitude. So keep moving calmly, eat what you can, and don’t treat the icefield views as a reason to surge.
Day 6: Barafu Hut staging (14,800 ft) plus a short acclimatization hike
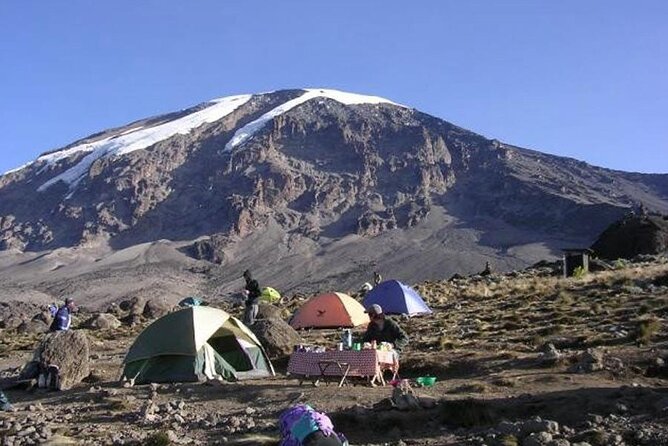
Day 6 continues the climb with an “unrelenting” sense of gaining altitude. You follow compacted scree and wide views to reach Barafu Hut (14,800 ft) for lunch.
Then the itinerary adds a smart add-on: a short acclimatization hike to a plateau at about 15,700 ft. After that, the rest of the day becomes preparation and recovery, because the summit plan starts very early.
Walking time is 3–5 hours for this day, but don’t interpret that as easy. You’re tired already, and you’ll be saving energy for night climbing.
I like this structure because it gives your body a little extra altitude education before the big push. It also gives your team time to manage gear checks, water planning, and a calm evening.
Day 7 summit night: 1 a.m. start, Stella Point sunrise, optional Uhuru Peak
This is the day everyone remembers, and for good reason. You start the ascent by torchlight around 1 a.m. so you can reach the crater rim for sunrise.
The climb is steep over loose volcanic scree with well-graded zig-zags. The pace has to be slow and steady. The itinerary targets Stella Point (18,800 ft) in about 5–6 hours. Then you rest briefly for sunrise over Mawenzi.
If you feel strong, you can do a further two-hour round trip to Uhuru Peak (19,345 ft), passing near glaciers and ice cliffs still present in the summit area. After that, the descent to Barafu is surprisingly quick. Then you continue down to Millenium Camp (12,500 ft).
Walking time is listed as 11–15 hours. That’s a long day, even if you’re fit. The best way to handle it is to treat it like a series of smaller tasks: step, breathe, sip water, and keep your mind on the next checkpoint.
Also, this is where guide skill matters most. When your body starts bargaining, you need someone who can read the pace and manage your effort. Based on past trips with guides like Frankie, Nestor, Bryson, Emmanuel, Augustine, and Clinton, the pattern is consistent: professional support, adjusted pacing, and a safety-first mindset.
Day 8: descent into tropical forest and down to Mweka (5,400 ft), then Arusha
After the summit comes relief and gravity. Day 8 is a sustained descent on a well-constructed path through tropical forest, with birdsong and lush undergrowth. The route heads to the Kilimanjaro National Park gate at Mweka (5,400 ft), then continues through coffee and banana farms to Mweka village.
From there, you’re transferred back to your Arusha lodge.
Walking time is 4–6 hours.
This day is valuable because it lets your body come down gently instead of “stopping cold.” It’s still hiking, but now it’s mostly about finishing strong and feeling human again. Your legs will be tired, though, so focus on steady steps rather than speed. Then you’ll get dinner and an overnight back at Arusha Safari Lodge.
Day 9: farewell and a private departure transfer from Arusha to JRO
Day 9 is the wrap-up day. You say goodbye to your guide team, then take a private departure transfer to JRO.
If you want a little extra time on the ground, the plan notes you can discuss an optional short safari or other add-on.
This is also a helpful moment to reflect: Kilimanjaro teaches you a lot about how you handle fatigue, pacing, and altitude. Your team has already handled the tough logistics; now you get to enjoy the “return to normal” feeling.
Price at $2,400: what you’re actually paying for (and what you’re saving)
At $2,400 per person, this trek isn’t cheap, but it’s not just a “walk up a mountain” price either. In practice, you’re paying for a package that removes many big costs and risks:
- All fees and taxes, plus rescue fees
- Private transportation and all transfers (airport-to-lodge and back)
- All accommodation, plus tents and all gear
- Professional guide support
- Oxygen and first aid included
You’re also fed well by trekking standards: 9 breakfasts, 8 dinners, and 8 lunches are included.
The main thing I’d watch is what’s not included: tips. That’s normal on treks, but you should budget for it so it doesn’t surprise you at the end.
When you compare this to the cost of assembling everything yourself—guides, gear rental, permits, and logistics—this price starts to look less like a markup and more like buying a working system. You don’t want to be improvising at 15,000 ft.
Guides, pace control, and safety details that matter on summit night
The reviews tied to this experience emphasize one theme again and again: the guides and porters make the difference between a scary climb and a manageable one.
I’m especially glad this trip is built around a professional guide and not just a generic group leader vibe. Guides have to read your breathing, energy, and attitude in real time. The summit night experience is where that skill matters most, since the itinerary asks you to move at torchlight hours and still keep your pace controlled.
Past guide names tied to successful trips include Frankie and Nestor, Bryson, Emmanuel, and Augustine, and Clinton who answered questions before booking. That’s a helpful signal: you’re not just getting someone who can point at a trail. You’re getting people who know how to manage tired humans.
Safety support is also directly built in: oxygen, first aid, and rescue fees are included. No, that doesn’t make Kilimanjaro easy. But it does mean you’re not walking into it without serious backup.
What you’ll feel each day: walking time, altitude, and fatigue management
Kilimanjaro is not one long suffering session. It’s a rhythm of effort.
- Day 2 and Day 3 are about building steady breathing and leg strength.
- Day 4 stretches into a longer hiking day (7–9 hours).
- Day 5 starts shaping the “summit approach” feeling with steeper terrain and icefield views.
- Day 6 is shorter on paper, but it’s your staging day.
- Day 7 is the monster: 11–15 hours, starting around 1 a.m.
- Day 8 is recovery hiking: still downhill, still work, but mentally easier.
The guide’s job is to keep you from going out too fast. Your job is to listen to that pace. If you feel great, your guide might still hold you back for altitude reasons. That can feel frustrating in the moment, but it’s often what keeps you climbing through the final hours.
Gear, fitness, and training: what you should prepare before Day 1 dinner
This trek is for people with moderate physical fitness. You don’t need to be an elite runner. You do need stamina for multi-hour hikes and the ability to handle steep sections and loose scree.
Because the itinerary includes oxygen, first aid, tents, and all gear, you don’t have to rent everything yourself. Still, you should plan your personal clothing and hiking comfort carefully (warm layers, rain protection, and shoes that work on rocky downhill). The trail surfaces change from forest paths to moorland to scree. Your feet will notice.
Training-wise, I’d focus on:
- long walks on hills or stairs
- leg endurance for descents
- practicing slow pace hiking (not just speed)
The goal isn’t to finish exhausted. The goal is to finish with enough strength that sunrise on the crater rim doesn’t feel like a punishment.
Who this Machame 7-day trek is best for (and who should reconsider)
This Machame Route is a strong fit if you:
- want a realistic acclimatization plan without cutting too many hiking days
- enjoy variety (forest, moorland, barranco cliffs, icefield views)
- are okay with a very early summit start around 1 a.m.
- like having a trained team and clear structure
It may be a tough match if:
- you can’t handle long days and steep scree
- you’re looking for a mostly flat, easy walk
- you expect summit day to feel short or simple
If you’re unsure, you might find it helpful to be honest about your hiking history during the pre-trip conversation. A good guide will shape the pace to the group’s real condition.
Should you book this 7 Days Kilimanjaro Trekking Machame Route?
I’d say yes if you want a trek that feels like a system: organized transfers, structured altitude progression, and real support on the hardest day. The included oxygen, rescue fees, first aid, and gear reduce stress so you can focus on hiking and acclimatization.
I’d think twice only if you know you struggle with very early starts, long hiking days, and scree footing. This route is designed for success, but it still asks a lot of you.
If you like clear logistics, professional guiding, and the chance to see Kilimanjaro from multiple zones—not just one long slog—this Machame “Whiskey” plan is a solid choice.
FAQ
What’s the total duration of this Kilimanjaro Machame trek?
The experience is listed as 9 days approximately, with 7 days on the mountain.
Where does the trek start and end?
Your trek begins and ends at your lodge in Arusha, Tanzania, with transfers included.
What time is the start time mentioned for the experience?
The experience shows a start time of 8:30 am.
Is airport pickup included?
Yes. You get a private transfer from Kilimanjaro International Airport (JRO) to Arusha Safari Lodge, and a private departure transfer back to JRO is also included.
What route is this, and why is it called Whiskey?
It’s the Machame Route 7 Day, known as the Whiskey route. It’s recommended for additional acclimatization and shorter some of the daily hikes, with 7 days on the mountain.
How early do you start summit night?
You start the ascent by torchlight around 1 a.m. on summit day, aiming to be on the crater rim for sunrise.
Is Uhuru Peak included?
Uhuru Peak is an option. The itinerary describes a return from Stella Point to Uhuru Peak as about a two-hour round trip if you still feel strong.
What meals are included?
The package includes 9 breakfasts, 8 dinners, and 8 lunches.
What climbing support is included for safety?
The trip includes oxygen, first aid, rescue fees, and professional guide support.
What is not included in the price?
Tips are not included.