REVIEW · ARUSHA
7 Days Machame Route Kilimanjaro Trekking
Book on Viator →Operated by Mafie Adventures · Bookable on Viator
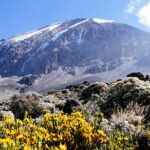
There is nothing subtle about Kilimanjaro. This 7 Days Machame Route Trek runs you through rainforest, moorland, semi-desert, and alpine desert before the big midnight push. I love the route’s mix of habitats (you actually feel the mountain change day by day), and I like how the pace is built around altitude acclimatization stops like Lava Tower and the Great Barranco Wall. One thing to consider: nights get dangerously cold at high camps, so your comfort depends on renting the right gear and packing for real winter conditions.
What makes this trip interesting is the full rhythm: long driving starts in Arusha, days of climbing with scheduled rest and camp setup, then a summit night that starts around 23:30 with tea and biscuits. If you’re hoping for an organized, professional team and a clear plan toward Uhuru Peak, this Machame itinerary is one of the most tried-and-true ways to do it. Still, it’s a serious climb—expect altitude symptoms (headaches and shortness of breath can show up), and you need to take the guide’s pacing advice seriously.
Key thing I’d keep in mind from the get-go: this is priced as a guided, fully supported camping trek. That’s usually good value on Kilimanjaro, but it also means you’ll want to budget for what’s not included, especially sleeping bag and climbing gear rentals plus personal insurance and tips.
In This Review
- Key highlights to know before you go
- Why the Machame 7-day plan works on Kilimanjaro
- Day 1: Arusha to Machame Gate through montane rainforest
- Day 2: Shira Plateau and the cold shock of 3840m
- Day 3: Lava Tower to Barranco, semi-desert and altitude reality
- Day 4: Great Barranco Wall and Karanga Valley acclimatization
- Day 5: Barafu ridge, last water point, and a short but serious hike
- Day 6: Midnight summit push to Uhuru Peak and Stella Point sunrise
- Day 7: Mweka descent, dancing celebration, and certificates
- Price and value: what $2,200.11 actually covers
- The human side: guides and crew that make the climb feel safe
- What to pack and how to plan your body for the altitude
- Who this trek suits best, and who should think twice
- Should you book this 7-day Machame trek?
- FAQ
- Is pickup from Arusha included?
- What time does the trek start?
- How long is the trek?
- What’s included in the tour price?
- Do I need to bring climbing gear and a sleeping bag?
- Are park admission fees included?
- What certificates do you get at the end?
Key highlights to know before you go
- Machame’s habitat variety: rainforest to moorland to alpine desert, so the “what am I walking through?” question stays interesting.
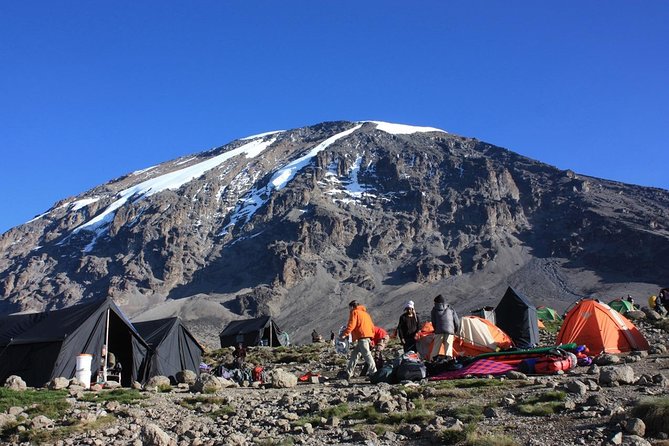
- Shira Plateau views at altitude: camp at 3840m with a view of the Western Breach and glaciers.
- Lava Tower as an acclimatization checkpoint: a chance to push higher (or at least feel the altitude) before the Barranco area.
- Great Barranco Wall for Class 2 confidence: a big-looking obstacle that hikers often find more manageable than expected.
- Barafu ridge realism: exposed wind and rocks, plus the last accessible water point for porters.
- Stella Point sunrise moment: a real milestone at 5685m before the final stretch to Uhuru Peak.
Why the Machame 7-day plan works on Kilimanjaro
The Machame route is the “popular choice” for a reason. It’s long enough to give your body time to adjust, but it’s not the longest route on the mountain. That balance matters because Kilimanjaro isn’t just a hike. It’s an altitude test, and your best weapon is time plus sensible pacing.
In practical terms, this itinerary spreads the work out across days that each have a purpose. Day 1 starts you in montane forest and makes sure you get into the park and moving. Day 2 climbs you into moorland and sets you up for high views. Day 3 and Day 4 keep you gaining altitude while still giving you moments to acclimatize before the summit night. Then Day 6 is the payoff, with a midnight start and the route running northwest toward Stella Point and Uhuru Peak.
I also like that the climb is structured around camps where porters and staff handle setup tasks. You’re still doing the hard part—walking in steep air—but you’re not also trying to run camp logistics while you’re getting tired at 4000m-plus.
You can also read our reviews of more tours and experiences in Arusha.
Day 1: Arusha to Machame Gate through montane rainforest
You start early from Arusha (about 1400m). The drive takes you toward Machame Village, where you can grab mineral water and get a packed lunch. Then you go to Machame Gate (1490m). Depending on road conditions, you might drive a short segment and/or walk part of the way. Once you’re at the gate, staff register you with TANAPA and porters handle the organization of your belongings for the trek.
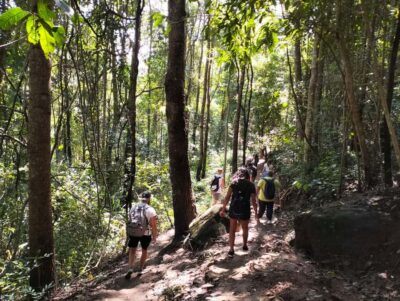
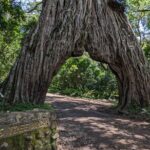
Then it’s into the rainforest. This is a long first hiking day on paper—about 18 kilometers and roughly 7 hours—but the real thing to prep for is the weather. Expect rain, mud, and fog. That combination turns even normal footing into slow work, so think traction and patience rather than speed.
What you’ll probably feel: wet air, slippery trails, and the gradual shift from “road trip tired” to “mountain legs.” Take it easy early. Your goal today is steady effort, not hero miles.
Potential drawback: if you hate getting cold and soaked on day one, this may test your mood. The upside is that the next days feel like a natural change of scenery instead of constant misery.
Day 2: Shira Plateau and the cold shock of 3840m
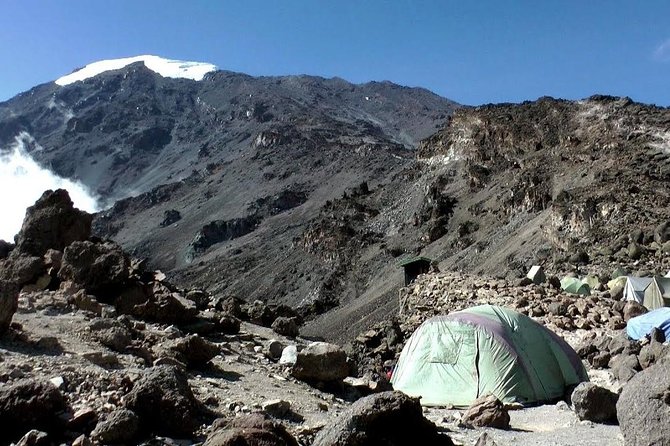
After an early breakfast, you move out of the rainforest into heathland moorland. The day’s hike is about 9 kilometers over roughly 6 hours. You’ll cross streams and walk over a rocky ridge, then the trail opens up onto the Shira plateau.
You finish at Shira Camp (3840m). This is one of the best “you earned this” nights on the trek because you’re set up next to a stream and get a view of the Western Breach and glaciers in the east.
Camp setup is handled before you fully arrive, which is good news when you’re already feeling the altitude. Porters prepare drinking and washing water, then you get evening snacks and dinner cooked for you by the chef.
What to expect: a cold night that can drop below freezing at an exposed high camp. This is where renting the right sleeping bag (if yours is not warm enough) becomes a must, not a maybe.
My practical tip: keep your warm layers where you can reach them fast in camp. When you’re tired, you don’t want to search for gloves in the dark.
Day 3: Lava Tower to Barranco, semi-desert and altitude reality
Day 3 is about 15 kilometers and roughly 7 hours. The habitat shifts to semi-desert and rocky terrain. After about 5 hours walking east, you reach the Lava Tower area at around 4630m.
This is a classic moment on Kilimanjaro: you face the Lava Tower and can choose whether to climb it, weather permitting. Even if you don’t go to the top, you’re near enough to feel how steeped in altitude this route becomes.
Also, pay attention to how your breathing feels. The itinerary specifically notes that headaches and shortness of breath can start showing up at this stage, and that’s common. If that happens, it’s not a sign you failed. It’s a sign you’re on an altitude schedule. Tell your guide quickly and follow their pacing instructions.
After lunch around Lava Tower, you descend to Barranco Campsite at about 3950m. Descending helps your body recover while still keeping you moving in the right direction.
Potential drawback: the altitude can feel like it sneaks up on you. If you push too hard early in the day, it usually comes back to bite you later.
Day 4: Great Barranco Wall and Karanga Valley acclimatization
This is the “confidence day” for a lot of hikers. The hike is shorter—about 5 kilometers—and it takes roughly 4–5 hours. You’re now in alpine desert terrain.
The headline is the Great Barranco Wall. It may look intimidating at first, but this climb is described as Class 2 and often feels easier than expected. At the top, you can see Heim Glacier, and you’ll likely find yourself above the clouds.
Then you drop into the Karanga Valley with trail ups and downs. This day is designed to help you acclimatize without jumping too quickly upward again. If you handle it well, you’ll feel ready (or at least more mentally steady) for the next stages.
What I like: the route uses a “challenge with payoff” approach. You get a big landmark, decent views, then a manageable hiking day afterward.
Day 5: Barafu ridge, last water point, and a short but serious hike
Day 5 is brief on paper: about 4 kilometers and 2–3 hours. But it’s packed with meaning.
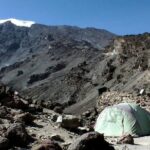
You leave Karanga Camp (about 3959m). The trail intersects with the Mweka Route, the path used for descent on the final two days. Then after around an hour, you reach Barafu Hut. This is an important practical detail: it’s the last water stop accessible for porters. From there, there’s no accessible water at Barafu Camp (around 4550m), so the team plans carefully.
“Barafu” means ice in Swahili, and the camp sits on a rocky, exposed ridge. This is where you need to respect conditions. Tents are exposed to wind and rocks, and it gets dark quickly. Get your bearings early and organize your gear before night.
You’ll have an early dinner so you can rest—because the summit attempt comes soon.
Potential drawback: you might feel fine during the hike and then realize the cold hit you harder once you stop moving. Wind chill matters at 4550m.
Day 6: Midnight summit push to Uhuru Peak and Stella Point sunrise
Day 6 is the big one. Your itinerary calls for about 7 kilometers ascent and around 23 kilometers of descent, with total time roughly 8 hours to reach Uhuru Peak and then 7–8 hours to get down toward Mweka.
You’ll be woken around 23:30 for tea and biscuits. Then you start the summit attempt over stone scree, heading northwest. This is usually the most mentally and physically demanding segment because you’re walking when your body wants to sleep, and oxygen is thin.
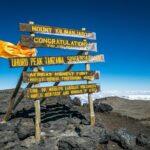
In about 6 hours you reach Stella Point (5685m) on the crater rim. After a sunrise moment there, you continue for about 2 more hours on a snow-covered trail to Uhuru Peak (5895m).
What makes this day special: it’s not just the altitude. It’s the way the mountain changes from “climb” to “survive the cold and keep moving.” When the sunrise hits, it feels like the entire hike turns into one focused task: don’t stop, breathe steadily, and move with your guide’s rhythm.
After the summit, the descent begins. Descents can be as tough as ascents for knees and thighs, especially on scree. Take each step slowly and let your legs do controlled work instead of rushing.
Day 7: Mweka descent, dancing celebration, and certificates
You finish with a well-earned breakfast and a camp celebration with dancing and singing. It’s also when you present tips to the guide, assistant guides, chef(s), and porters.
Then you descend about 3 hours to Mweka Gate. The park requires hikers to sign for their certificates of completion. If you reached Stella Point (5685m), you receive a green certificate. If you reached Uhuru Peak (5895m), you receive a gold certificate.
After certificates, you continue down into the Mweka village for about an hour (around 3 kilometers) and wrap up the trek.
What I value here: the day isn’t just “walk down and go home.” It’s a structured finish that recognizes the people who made the climb possible, especially porters and kitchen staff.
Price and value: what $2,200.11 actually covers
At $2,200.11 per person, you’re paying for a fully supported, multi-day camping trek. In plain terms, this price usually covers the stuff that makes Kilimanjaro logistically workable.
Included items list a lot of big-ticket essentials:
- camping equipment like mess tent, mattress, and cooking gear
- rescue fees and parking fees
- accommodation on the route
- a professional driver/guide
- taxes/VAT
- porterage
- meals: breakfast 6, lunch 7, dinner 6
That’s real value if you don’t want to sort out logistics for tents, cooking, and a team on the mountain.
What’s not included matters because it can change your total out-of-pocket cost:
- climbing gear rentals
- sleeping bag rentals
- personal items like travel insurance and visa fees
- any government-imposed increase in taxes or park fees
- accommodation before and after the trek
- bath towels
- tips
My money advice: if you’re budgeting, don’t only plan for the trek fee. Plan for cold-weather gear, insurance, and the human part of tipping. On Kilimanjaro, those aren’t optional details.
The human side: guides and crew that make the climb feel safe
One of the most praised parts of this experience is service quality: guides who are friendly, kind, and also serious about the mountain. You may meet leaders like Ombeni, Safaeli, Oliver, Mathew, or others, depending on the trip team. You’ll also see names tied to coordination and day-to-day leadership, including Erastus as part of the operator’s team.
What that translates to for you on the mountain is simple: good guidance on pacing, clear instructions when conditions turn foggy or slippery, and camp support that keeps you from falling behind on basics like warm drinks and getting rested.
I also like the way the crew is part of the full experience. The final celebration and tip-giving moment isn’t just tradition. It’s a reminder that porters and kitchen staff are part of your safety system and comfort system.
What to pack and how to plan your body for the altitude
This trek notes you can rent climbing gear and a sleeping bag, so if you’re coming without proper cold protection, plan on renting. High camps and exposed ridges mean wind and temperature swings can be intense.
Bring:
- warm layers for sub-freezing nights
- gloves and a hat that actually fit in a cold wind
- rain gear for the muddy rainforest start
- water-handling basics (you’ll be relying on camp-prepared water, but you still need a workable system)
- a simple daypack for essentials
And for your body:
- keep your effort steady on every day up through Barafu
- tell your guide early if you feel headaches or unusual shortness of breath
- don’t “save energy” by speeding up later. The safe approach is consistent pacing from the beginning
Who this trek suits best, and who should think twice
This is a good fit if you want the Machame route experience with strong support and a clear 7-day rhythm toward Uhuru Peak. Most people can participate, but it’s still a high-altitude trek. You’ll want a reasonable fitness baseline and the willingness to walk in cold, wind, and sometimes foggy conditions.
It’s especially suited to hikers who:
- like structured days with defined camp stops
- want habitat variety more than only “one long grind”
- want an itinerary designed around acclimatization stops
You might reconsider if you’re dealing with medical issues that altitude can worsen and you haven’t talked with a qualified clinician. This isn’t a place to wing it with stubborn pride.
Should you book this 7-day Machame trek?
If your goal is to climb Kilimanjaro on the Machame route with a realistic schedule, this setup is a solid choice. You’re getting a classic itinerary with known acclimatization beats: Shira Plateau for views and altitude context, Lava Tower for that high-tension checkpoint, Great Barranco Wall as a confidence-building challenge, then Barafu ridge as the staging ground for the summit push.
The value equation also looks good because much of the “hard logistics” is handled: camping gear, meals, porterage, and guide support are built in. Your biggest risks are not money—they’re weather exposure and how your body responds to altitude.
If you’re prepared for cold nights, willing to move at the guide’s pace, and ready to follow instructions on summit night, this is the kind of guided trek that can turn a big dream into an organized finish, complete with certificates and a proper celebration.
FAQ
Is pickup from Arusha included?
Pickup is offered from Arusha, and the tour starts back at Arusha. The activity ends back at the meeting point.
What time does the trek start?
The meeting start time is 4:00 am.
How long is the trek?
The duration is 7 days (approximately).
What’s included in the tour price?
Camping equipment (mess tent, mattress, and cooking equipment), rescue fees, parking fees, accommodation during the trek, a professional driver/guide, all taxes/VAT, porterage, and meals (7 lunches, 6 dinners, 6 breakfasts) are included.
Do I need to bring climbing gear and a sleeping bag?
Climbing gear and a sleeping bag are not included, but they are available for rent.
Are park admission fees included?
The itinerary shows admission ticket as free, indicating park admission is included for the days listed.
What certificates do you get at the end?
You sign to receive certificates at Mweka Gate. Reaching Stella Point gives a green certificate, and reaching Uhuru Peak gives a gold certificate.