Kilimanjaro feels real on the first day. This 8-day Lemosho Route from Arusha mixes forest, high-alpine deserts, and a midnight summit bid, with time built in to help your body adjust to low oxygen. You also get the comfort of a true private trek setup (only your group), which matters a lot when you’re climbing for 7–8 days.
What I especially like is the way the route supports acclimatization with deliberate “earn your altitude” days, not just hiking harder. I also like the camp and support approach: waterproof four-season tents, well-run mess tents, and full meals on the mountain so you aren’t spending your brainpower on logistics. The guidance from the team shows up in the details too, with names like Gasto (also shown as Gusto James), Joe, Jeff, and admin support from Rosemary popping up in hikers’ stories about feeling safe and cared for.
One consideration before you commit: the summit night is long and steep on a non-technical path, and Day 7 is the toughest mental and physical stretch of the whole trek. If you’re not ready for a midnight start and heavy scree near the crater rim, you’ll feel it.
In This Review
- Key things that make this Lemosho trek worth your time
- Why the Lemosho Route works (especially if you want a strong acclimatization plan)
- Day 1: Londorossi Gate and the Mti Mkubwa rainforest camp
- Day 2: Shira Ridge—savannah-to-high-altitude change and first big views
- Day 3: Shira plateau exploration, optional Shira cone, and Moir Camp in a gorge
- Day 4: Lava Tower acclimatization, Arrow Glacier junction, and Barranco Camp under the wall
- Day 5: Barranco Valley and Wall to Karanga Camp—where “arctic zone” starts to feel real
- Day 6: Kosovo Camp’s exposed ridge and the summit prep mindset
- Day 7: Midnight summit push—Stella Point at sunrise, Uhuru Peak, then down to Mweka
- Day 8: Mweka Gate finish and the fast return to real-life comfort
- Guides, camps, and food: what support on Kilimanjaro should feel like
- Price and value: what $2,480 does for you on the mountain
- Who should pick this trek, and who should reconsider
- Should you book this 8-day Lemosho Kilimanjaro trek?
- FAQ
- FAQ
- Where is the trek in Tanzania, and what’s the starting point?
- What time does the experience start?
- Is this a private tour?
- How long is the Kilimanjaro trek?
- Which route is included?
- What’s included in the price?
- What’s not included?
- What’s the cancellation timeline for a full refund?
Key things that make this Lemosho trek worth your time
- A Lemosho start from the western side helps you ease into altitude with varied terrain across multiple climate zones
- Acclimatization built into the hike (Shira plateau exploration, Lava Tower day, and the Barranco sequence)
- Midnight summit plan with Stella Point for sunrise and a continued push to Uhuru Peak
- Four-season private sleeping tents plus mess tents with table and chairs
- Support that feels human: professional guides (including Gasto/Gusto James) plus admin help from Rosemary
- All park and rescue fees included, reducing the “hidden paperwork” stress
Why the Lemosho Route works (especially if you want a strong acclimatization plan)
If you’re choosing Kilimanjaro by route name alone, you’ll miss the point. The real value of Lemosho is that it gives you time to adjust while still moving through strikingly different zones—rain forest, savannah, high plateau, alpine desert, and then the harsh cold near the summit. Your body needs time at altitude; this route builds that time into the pacing.
You start on the western side at the Londorossi gate, then gradually step up through the montane forest. From there, the trail opens into higher landscapes where oxygen thins and your breathing changes. Even if you consider yourself fit, you’ll still feel the shift. That’s normal. This trek leans into “slow and steady” rather than treating altitude like a flat road.
Also, because it’s a private experience, your group doesn’t get dragged around by other hikers’ schedules. That’s helpful on mountain timing—especially for summit day, where minutes matter and being rushed is the last thing you want.
You can also read our reviews of more tours and experiences in Arusha.
Day 1: Londorossi Gate and the Mti Mkubwa rainforest camp
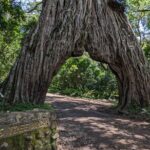
Day 1 is about getting your rhythm and letting the mountain set expectations. After a restful night at your hotel, you begin at the western entrance of Kilimanjaro National Park, checking in at the Londorossi gate. The trail starts with a gentle climb through montane forest, so you can warm up without burning your legs too early.
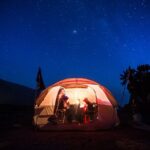
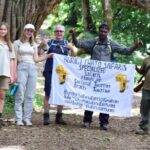
By evening, you’re at camp under the Climb Kili banner, and tents are set up with your personal belongings inside. Tonight’s stop is Mti Mkubwa (Big Tree), in the rainforest area. It’s a good early taste of how fast weather and humidity can switch on this mountain. If you’ve only hiked dry trails at home, the dampness here can feel like extra weight.
What to watch: the first-day pace. Forest hiking can tempt you into moving too fast because it feels easier. Keep it controlled. You’re building endurance for later days when the air thins and your pace naturally slows.
Day 2: Shira Ridge—savannah-to-high-altitude change and first big views
On Day 2 you leave the forest and step into a savannah of tall grasses, heather, and volcanic rock with lichen that looks like beards. This is where you start to “see Kilimanjaro,” not just hike toward it. You’ll follow the Shira ridge, reaching the high-altitude desert plateau where the skyline changes and Kili often appears on the horizon.
Altitude climbs to around 11,500 ft / 3,505 m on this day, and the walk time is typically 5–6 hours. That’s a manageable window, but remember: the air is thinner, and your body will ask for slower steps.
What I like about this day’s setup is the transition. You don’t jump from humid forest to summit cold without a middle step. You get the in-between—exactly what acclimatization needs.
Day 3: Shira plateau exploration, optional Shira cone, and Moir Camp in a gorge
Day 3 is a “take the altitude seriously” day, with a full push across the Shira plateau. You trek east toward Kibo’s glaciated peak, and there’s an option to visit the ancient collapsed Shira cone, described as the oldest of Kilimanjaro’s three volcanoes.
This is also the kind of day where you get more than one type of payoff. Yes, you hike. But you also learn the mountain’s shape—how Kilimanjaro’s volcanic history shows up in the ground you’re walking.
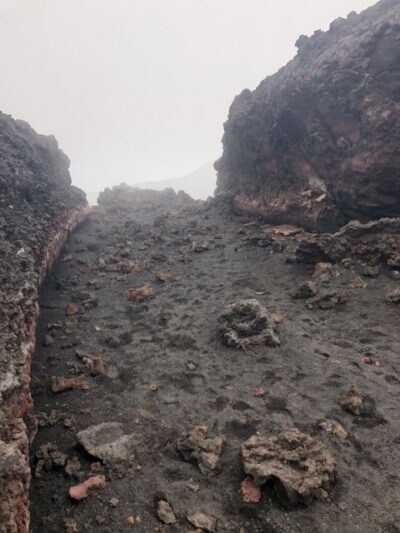
You finish at Moir Camp, around 13,800 ft / 4,206 m, located in a large gorge at the end of a dormant lava flow. Camps in dramatic terrain can be a challenge for your sense of direction and wind exposure, but they also make the day feel bigger and more focused.
Practical note: even though it can feel like a “scenic hike,” don’t treat it casually. You’re still building the base for summit night.
Day 4: Lava Tower acclimatization, Arrow Glacier junction, and Barranco Camp under the wall
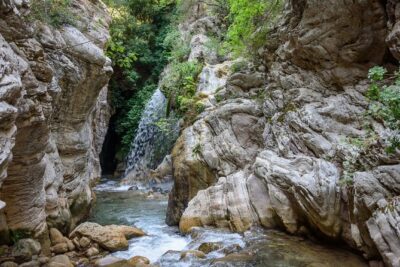
Day 4 is one of the key acclimatization days. You take a hike to Lava Tower, around 15,000 ft / 4,500 m. Shortly after, you come to a junction leading up toward Arrow Glacier. You rest at the tower, then start descending into Senecio forest, with a waterfall along the way, before reaching Barranco Camp.
Barranco is one of the psychological pivots of the climb. The day moves from open altitude areas back into forest, then into camp by the Barranco wall. The air can be cooler and the wind can feel sharp. The breeze may even carry clouds from the Barranco Valley—beautiful, and also a sign that conditions can change quickly.
You’ll likely hike 4–6 hours. The challenge here isn’t just altitude. It’s also the rhythm of going up and down while your lungs are already working overtime.

Day 5: Barranco Valley and Wall to Karanga Camp—where “arctic zone” starts to feel real
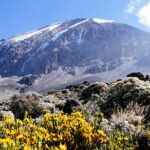
Day 5 is where you climb. You conquer Barranco Valley and then hike up the Barranco wall, including an adventurous section that pushes you toward the colder, thinner-air parts of Kilimanjaro—described as entering the arctic zone.
Then you continue on the South Circuit path, through Karanga Valley, ending at Karanga Camp (around 13,100 ft / 3,992 m). This is a day where legs burn a bit, but the bigger shift is how cold and dry things can feel as altitude rises and you move toward the summit approach.
If you’re carrying a lot in your daypack, this is a good day to keep it tight. Extra weight feels worse at altitude. Keep what you need for comfort. Everything else can wait.
Day 6: Kosovo Camp’s exposed ridge and the summit prep mindset
Day 6 is shorter in distance but serious in feel. You take a slow pace to Kosovo Camp, around 16,000 ft / 4,876 m. Importantly, you pass Barafu Camp on the way—where views of Kibo and Mawenzi can be excellent.
Kosovo Camp sits on an exposed ridge, so you need to be comfortable with terrain and footing as darkness approaches. This is also when your mind should shift from hiking to preparing: hydrate, get your layers arranged, and follow your guide’s plan for the summit push.
You’re looking at about 5–6 hours of walking. The real win of the day is that it gives you time to rest and mentally line up for Day 7. The mountain will still do what it does, but your preparation will determine how efficiently you handle it.
Day 7: Midnight summit push—Stella Point at sunrise, Uhuru Peak, then down to Mweka
Day 7 is the event. You start at midnight for the summit, aiming for Stella Point in time to watch the sunrise. This section is considered one of the steepest non-technical stretches on Kilimanjaro. It’s a 6–7 hour hike to Stella Point, then about one more hour to Uhuru Peak.
The route follows the summit area between the Rebmann and Ratzel glaciers, ascending through heavy scree toward Stella Point on the crater rim. This is where motivation turns into survival skills: small steps, steady breathing, and trusting the pace your guide sets.
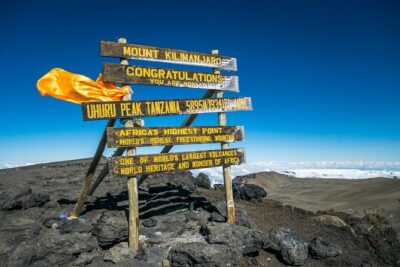
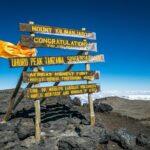
The upside is huge. You’ll see the summit from Stella Point. Then Uhuru Peak is right there—Africa’s highest point. After that, the descent begins to Mweka Camp for dinner and celebration.
What I like about this plan is clarity. You don’t wander. You commit to a time-based summit rhythm: midnight start, sunrise moment, then top and down.
What can trip people up: altitude exhaustion. Even if your legs feel okay early, your brain may lag later. That’s normal on summit night. Your guides’ role—keeping you moving and grounded—matters a lot here.
Day 8: Mweka Gate finish and the fast return to real-life comfort
Day 8 begins with a morning walk down to Mweka gate (about 6.4 mi / 10.3 km and 3–4 hours). It’s not a difficult hike compared to earlier days, but it can still feel emotional. After days of strict pacing, you finally get to finish the story.
Once you reach the gate, your Climb Kili vehicle is waiting to transfer you back to your hotel. The best part is usually the simplest thing: a warm shower and a change of clothes.
This is also a nice moment to let your body unwind. Your breathing will normalize in stages, not instantly. If you can, take the slow route for recovery—hydrate, eat, and let the post-mountain soreness do its job.
Guides, camps, and food: what support on Kilimanjaro should feel like
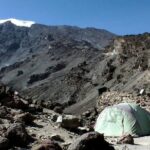
This trek is run with professional mountain guides and a camp setup designed for cold nights. You get quality, waterproof, four-season private mountain sleeping tents and quality mess tents with table and chairs. Those “small” details add up. When weather turns and you’re tired, having a real place to sit and eat is the difference between miserable and manageable.
Meals are a big part of keeping you going. You’ll get all meals while on the mountain, including lunch and dinner days along the route, plus breakfast during the trekking period. The food is described as large portions of fresh, healthy, nutritious meals, which is exactly what you need when you’re burning calories at altitude.
On the human side, hikers’ feedback highlights safety and positive team energy—names like Gasto (also written as Gusto James), plus Joe and Jeff, come up in guidance stories. Admin support from Rosemary is also mentioned, which matters because the quiet behind-the-scenes work reduces stress before you ever start walking.
One more practical point: because this is private, you’re more likely to get a consistent guiding style and pacing for your group. That’s useful if someone needs extra encouragement or if you want your acclimatization pace tuned to how you feel that morning.
Price and value: what $2,480 does for you on the mountain
At $2,480 per person, this isn’t a budget climb. But the price makes more sense when you look at what’s included.
Included items that protect your time and reduce friction:
- All park fees and rescue fees
- Professional, experienced mountain guides
- All meals while on the mountain
- Private waterproof four-season tents and camp mess setup
- Airport transfers
- Pickup offered and a mobile ticket
Not included:
- Tips
- Tanzania visa
- Person gear for climbing (your personal climbing equipment)
So the value here is mostly “less worrying.” You’re paying for a system: permits, logistics, camp infrastructure, and food. If you’ve tried planning a multi-day high-altitude trek yourself, you know how quickly that becomes a full-time job. This package aims to handle that for you.
The one thing to watch is your personal gear. Because climbing gear isn’t included, you’ll want to budget time and money for the right kit—especially cold-weather layers and proper footwear.
Who should pick this trek, and who should reconsider
This route is described as suitable for both beginner and advanced climbers, with a key requirement: moderate physical fitness. That doesn’t mean “easy.” It means you can handle 4–7 hour hiking days, then flip into summit night with a midnight start.
If you do well with structure—clear goals each day, planned acclimatization, guides who keep a steady pace—this is a strong match. It’s also a great fit if you want a small-group feel without mixing your schedule with lots of strangers.
Who should think twice:
- If you’re anxious about long, steep climbs and cold nighttime conditions, Day 7 will push you.
- If you don’t already have or plan to get proper personal climbing gear, you’ll likely feel uncomfortable even if the guiding and tents are excellent.
Should you book this 8-day Lemosho Kilimanjaro trek?
I’d book this if you want a route that takes acclimatization seriously, plus the comfort of a private tent setup and full meal support. The combination of Lemosho’s gradual altitude progression and a well-defined summit plan (Stella Point sunrise, then Uhuru Peak) is exactly what you want when your body is adapting minute by minute.
Skip it if summit night would scare you more than it motivates you. The mountain doesn’t care about confidence. You need the stamina for the steep scree push and the will to keep stepping when it’s cold and your lungs feel tight.
FAQ
FAQ
Where is the trek in Tanzania, and what’s the starting point?
The trek is around Arusha, Tanzania, and it begins from the western side at the Londorossi gate after pickup.
What time does the experience start?
The start time is 7:30 am.
Is this a private tour?
Yes. It’s described as private, and only your group participates.
How long is the Kilimanjaro trek?
It’s an 8-day trek (approximately).
Which route is included?
This trek is via the Lemosho route.
What’s included in the price?
Included items list quality waterproof four-season private tents, professional mountain guides, all park fees and rescue fees, all meals on the mountain, mess tents with table and chairs, and airport transfers.
What’s not included?
Not included are tips, the Tanzania visa, and personal gear for climbing.
What’s the cancellation timeline for a full refund?
You can cancel up to 6 days in advance of the experience for a full refund, and you must cancel at least 6 full days before the experience start time.