REVIEW · RISHIKESH
9 Days Bali Pass Trek
Book on Viator →Operated by Himalaya Shelter · Bookable on Viator
A hard pass with lake breaks beats boredom. This 9-day Bali Pass trek mixes 4900m altitude strain with views of Swargarohini and nearby Kalanag peaks for much of the walk. It’s also a route that feels different from a typical saddle pass.
I love how the itinerary gives you both effort and payoff, from high trails to a calm day by Ruinsara Lake. I also like the camp setup and “real trek” gear: sleeping bags and mats, A-shaped/dome tents, and gaiters plus microspikes included.
One drawback to plan for: Bali Pass is rated difficult for a reason, with a big altitude push and a technical-style pass climb. If you’re not training now, it can feel longer than the 66 km on paper.
In This Review
- Key highlights you’ll feel on the ground
- Why Bali Pass feels like a summit, not a quick crossing
- The Numbers: altitude, distance, and why this trek is truly difficult
- From Taluka to Janki Chatti: a practical walkthrough of the trek rhythm
- Ruinsara Lake day: the one time the trek breathes
- Devsu Thatch and Thanga meadows: where the air gets thin and the views get loud
- The Bali Pass crossing: microspikes, mindset, and steady breathing
- Bandarpunch Glacier and Saptrishi Kund: the ending that still feels alpine
- Yamunotri temple visit: spiritual stop without the tourist sheen
- Guides, camp life, and food: where the real value hides
- What you carry (and what it costs when you don’t pack light)
- Price and value: what $374 covers, and what you must add
- Who this Bali Pass Trek suits best
- Should you book this trek or skip it?
- FAQ
- What is the highest altitude on this Bali Pass trek?
- How many kilometers do you hike on the trek?
- How much altitude do you gain on average?
- Where does the trek start and when?
- What meals are included?
- What camping gear and trekking gear come with the tour?
- Is insurance included?
- How big is the group?
Key highlights you’ll feel on the ground
- A peak-like pass finish: Bali Pass rises like a peak, so the top feels summit-ish, not just a crossing.
- Real altitude math: max 16,080 ft / 4,900m, with net gain of 9,250 ft over about 5 days.
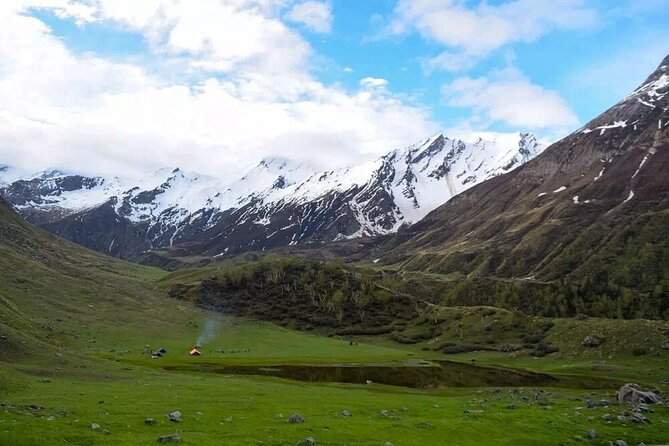
- Mountain “walls” most days: you’re surrounded by the Swargarohini or Bandarpunch ranges much of the time.
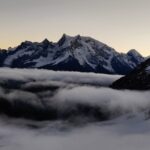
- Kalanag and Swargarohini peaks up close: you get to see Kalanag (Black Peak) around 6,387 m and Swargarohini peaks.
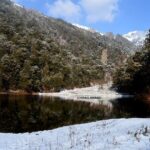
- A lake day break: you spend time beside Ruinsara Lake, not only on the move.
- Small-group feel: the trek runs with a maximum of 11 people.
Why Bali Pass feels like a summit, not a quick crossing
Bali Pass is often described as a “pass,” but the big emotion is that it climbs like a summit stretch. Instead of a simple saddle dip between ridges, the route rises into a peak-like opening. That change in shape matters when your legs are already tired.
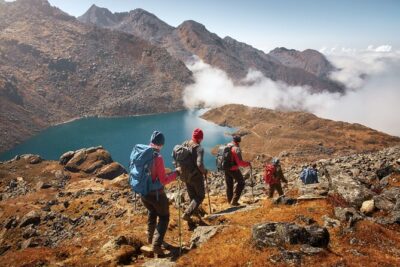
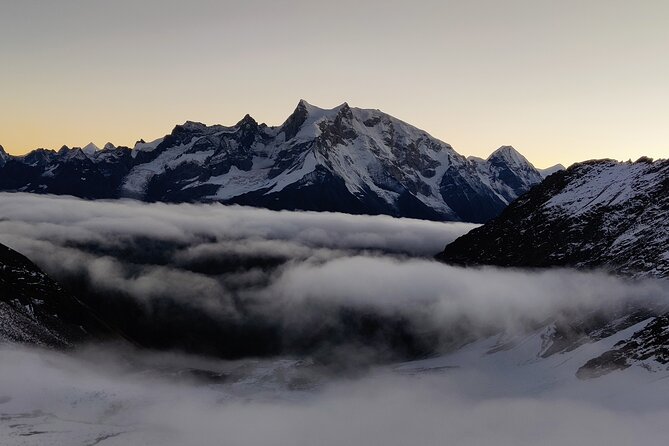
You’ll keep getting strong alpine views while you walk, with the Swargarohini or Bandarpunch ranges around you for much of the trek. That constant framing makes the days feel purposeful, not like endless uphill grind.
You can also read our reviews of more tours and experiences in Rishikesh.
The Numbers: altitude, distance, and why this trek is truly difficult
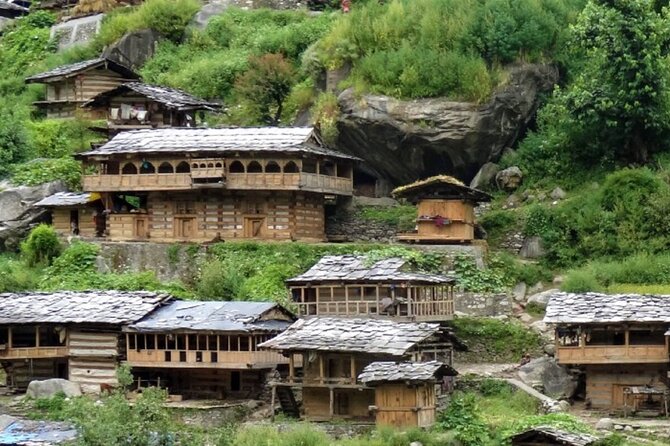
Let’s talk facts you can plan around. You’re looking at a max altitude of 16,080 ft / 4,900 m. The total trekking distance is about 66 km, done in roughly 6 to 7 days on foot. That usually works out to around 10 km per day on average.
Now add the altitude profile. The trek starts around Taluka at 6,825 ft / 2,080 m. Over about 5 days, you gain a net 9,250 ft / 2,820 m, averaging around 550 m per day. That’s the kind of climb rate that punishes slow pacing, weak breathing control, and heavy loads.
This is why the trek is categorized as Difficult. It’s not just the height. It’s the combination of height, steady gain, and a pass crossing that feels technical in the final push.
Practical takeaway: if you only train for endurance on flat ground, you’ll still suffer. You want training that includes hills, stairs, or treadmill incline so your body learns to handle sustained uphill effort.
From Taluka to Janki Chatti: a practical walkthrough of the trek rhythm
Your route is from Taluka to Janki Chatti, and the itinerary runs about 9 days total (with about 6 to 7 days of actual walking). Your starting point is in the Dehradun area at 7:00 am from Dehradun Train Station, Lakkhi Bagh.
From there, the trek follows the classic flow of Himalayan high-trail trekking: hike, camp, recover, then climb again. What makes this trek feel “full” is that you’re not only moving upward. You also get scenic anchor moments built in—like the Ruinsara Lake day and the meadow walking segments.
While you’re on the move, you’ll spend time with views of the Kalanag (Black Peak) and Swargarohini peaks up close. You’ll also see how the trail system divides: there’s a southward pull toward Yamunotri after Ruinsara Lake, and there’s mention of an eastward path toward Dhumdhar Kandi and onward country toward Harsil.
Even if you don’t take every possible side route, learning this from your guide helps you understand what you’re seeing on the ridges and how the valley lines connect.
Ruinsara Lake day: the one time the trek breathes
One of the best balance points on this trek is that you spend a day beside Ruinsara Lake. Days like this matter because they change your body’s rhythm. After sustained walking and altitude work, you get a calmer setting where your pace doesn’t feel like a deadline.
In practical terms, this lake day gives you time to:
- settle your breathing and check how your acclimatization is going
- take a slower stroll and still get big views
- enjoy the emotional shift from climb mode to landscape mode (yes, literal views)
A small warning: lake and meadow zones can mean damp ground or chilly air depending on season. Pack smart layers, and don’t plan to stay in wet socks longer than you have to.
Devsu Thatch and Thanga meadows: where the air gets thin and the views get loud
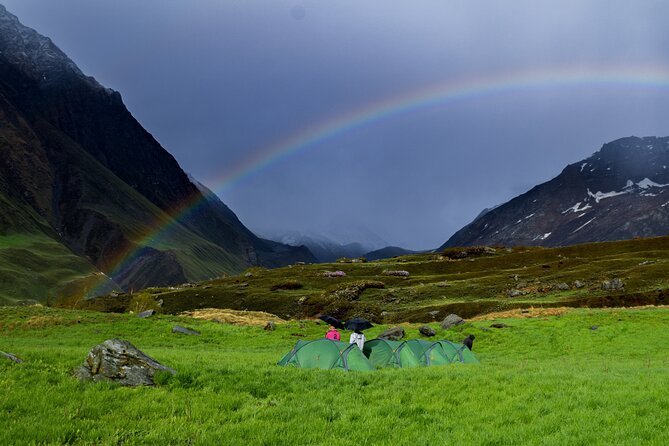
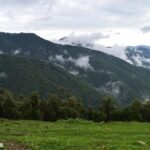
The trek includes a walk across two meadows: Devsu Thatch and Thanga. Meadows at altitude can feel like a reward, but they’re still high country. If your pace slows, it’s not because the trail becomes easy. It’s because your body is adjusting to oxygen levels while you’re on open ground.
This is also where you tend to feel the sky and the mountain scale most clearly. Those meadows sit with the surrounding ranges in your frame, so you get a “big picture” view without needing a long detour.
Practical tip: open meadow terrain can trick you into walking faster than you should. I’d keep your effort steady rather than chasing distance. Saving energy for the later pass push will make the difference.
The Bali Pass crossing: microspikes, mindset, and steady breathing
Your pass max is 4,900 m, and the crossing is the defining moment of the trek. Bali Pass rises like a peak, so when you start the summit-like stretch, you’ll feel it in your calves and lungs before you fully see the finish.
This is exactly where the included gear earns its keep. You’ll have gaiters and microspikes provided as part of the trek setup. Even when conditions look manageable, microspikes can help you stay confident on icy or hard-packed sections.
Mindset helps too. A pass crossing isn’t the time to win a personal speed record. It’s the time to use:
- small, consistent steps
- pauses that are short and frequent
- breathing that stays controlled rather than forced
If you’ve trained for at least a month before the trek, this part becomes challenging instead of scary. If you haven’t, your pace will suffer and fatigue will hit earlier.
Bandarpunch Glacier and Saptrishi Kund: the ending that still feels alpine
Toward the end of the trek, you see the Bandarpunch Glacier and Saptrishi Kund. This matters because it closes the story with something distinctly high and cold-looking, not just tired trails and camp chores.
When you’re near the end, it’s tempting to treat everything as a finish line. Don’t. Enjoy this part for what it is: you’re walking through the visible edge of glacier-fed terrain, so the air can feel harsher even if your legs are ready to be done.
A practical note: glacier regions can mean uneven footing or patches of ice, depending on conditions. Microspikes and trekking discipline are still relevant late in the trek.
Yamunotri temple visit: spiritual stop without the tourist sheen
An opportunity included near the end is a visit to the holy temple of Yamunotri. That stop changes the emotional tone. After days of physical focus, it gives your mind a different kind of rest.
You shouldn’t expect it to replace recovery or sleep, but it can help you process the trek as something more than miles and altitude. If you appreciate pilgrimage culture, you’ll likely find this part meaningful.
Guides, camp life, and food: where the real value hides
The biggest strength of this trek isn’t only the geography. It’s the people running your days and your meals.
The guide leadership names that show up in the team include Rana (often as a trek lead figure) and Suresh Chauhan. There’s also mention of Bachan Rana as a key team presence. These are not small details, because on a high pass trek, your guide’s ability to read weather, pace, and group energy determines how hard the trek feels.
The food support stands out too. Ustad Vijay is specifically called out for cooking. That’s a big deal at altitude. When you’re climbing and sleeping cold, calories and warm meals aren’t a luxury. They’re logistics for survival and morale.
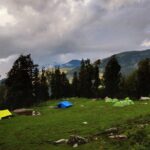
Camp life is also set up for comfort. You’ll sleep on clean sleeping bags and mats, and you’ll use good quality A-shaped or dome tents. There’s a kitchen tent and dining tent, plus camping stools, which sounds minor until you’ve lived the mud-and-dusk reality.
One more value point: porter and mule support carry camping equipment, not your personal luggage. So you’ll still carry your own pack, but the heavy camp stuff won’t crush you.
What you carry (and what it costs when you don’t pack light)
Here’s the reality check. Porter support is for camping equipment only, so your personal items are on you. That’s normal for Himalayan treks, but it matters because the pass crossing amplifies every extra kilo.
The trek also mentions personal baggage offload charges at INR 450 per bag per day (up to 12 kg). Translation: if your pack is too heavy, the solution may not be free.
So I’d pack like this:
- keep your day-to-day layer system simple
- bring only what you can use every day
- avoid carrying extra “just in case” gear that you won’t touch
If you want to feel good on the pass, you’ll want your pack to feel boring and light.
Price and value: what $374 covers, and what you must add
The listed price is $374.00 per person for about 9 days. That includes a lot that would cost real money in a do-it-yourself plan: a professional guide, cook and support staff, tents and mats, meals through most of the trek, and porter/mule support for camp gear.
Meals included are:
- 8 breakfasts
- 7 lunches
- 8 dinners
- tea and snacks (8 times mentioned)
But not everything is included. Breakfast and lunch on Day 1 are not included, and lunch and dinner on Day 9 are not included. Plan for those gaps in your food budget.
Also budget the compulsory extras:
- Insurance is compulsory at INR 1,050 per person
- Forest entry charges are included for Indian nationals, but non-Indian nationals pay INR 1,000
- If a buffer day is used, it’s an additional INR 2,000 per person
Value verdict: the price makes sense if you want a guided, camp-supported high pass trek without the planning burden. It’s less of a bargain if you’re the kind of hiker who already has your own systems and equipment and prefers solo routes. For most people, though, the included structure and support bring the cost down compared to piecing it together.
Who this Bali Pass Trek suits best
This trek is best for hikers with strong fitness and comfort at altitude. The trek description calls for physical preparation and regular exercises starting at least 1 month prior. Given the average 550 m/day climb rate and the 4,900 m pass altitude, you shouldn’t treat this as a casual challenge.
You’ll likely be a good fit if:
- you’ve done multi-day hikes with elevation before
- you can manage your pace when the air feels thin
- you pack lightly and follow guide instructions
You should think twice if:
- you struggle with stairs or sustained uphill effort
- you’ve had altitude issues in the past (even if they were mild)
- you plan to rely on porters for personal gear (they won’t carry that)
Also, the group size is capped at 11 people, so the trek can feel personal rather than chaotic.
Should you book this trek or skip it?
Book it if you want a high-altitude Himalayan trek with a real pass crossing and enough structure to keep you focused. The combination of Bali Pass’s peak-like finish, a Ruinsara Lake breathing day, and the guided camp setup makes this feel like a complete adventure, not a rushed checkpoint hike.
Skip it or postpone if your training timeline is short or you’re chasing views only. This trek demands endurance and altitude readiness first, scenic moments second.
If you’re ready to put in the month of prep and you like the idea of climbing to a pass near 4,900 m with supportive guides, this one is a strong choice.
FAQ
What is the highest altitude on this Bali Pass trek?
The maximum height is 16,080 feet (4,900 meters).
How many kilometers do you hike on the trek?
The trek covers a total of 66 km, typically completed on foot in 6 to 7 days.
How much altitude do you gain on average?
Starting from Taluka at 6,825 feet (2,080 meters), the trek has a net altitude gain of 9,250 feet (2,820 meters) over about 5 days, averaging around 550 meters a day.
Where does the trek start and when?
You start at Dehradun Train Station, Lakkhi Bagh, Dehradun, Uttarakhand at 7:00 am. The activity ends back at the same meeting point.
What meals are included?
Included meals are 8 breakfasts, 7 lunches, 8 dinners, plus tea and snacks. Breakfast and lunch on Day 1, and lunch and dinner on Day 9 are not included.
What camping gear and trekking gear come with the tour?
You get clean sleeping bags and mats, A-shaped or dome tents, a kitchen tent and dining tent, plus gaiters and microspikes.
Is insurance included?
No. Insurance is compulsory and listed as INR 1,050 per person.
How big is the group?
The trek has a maximum of 11 travelers.