REVIEW · PARO
Druk Path Trek: Discover The Raw Natural Beauty of Bhutan
Book on Viator →Operated by Bhutan Best InBound Tour · Bookable on Viator
Bhutan’s trail days start with a plan. The Druk Path Trek connects the arid Paro valley to the greener country above Thimphu, and it lets you begin hiking right from Damchena near your entry point instead of burning days on long road transfers. Paro to Thimphu also makes the trip feel logical, like the scenery is changing for a reason, not just because time passed.
I really like the mix of hiking and culture here, with museum-and-fortress history in Paro, plus monastery stops that fit naturally into the route. I also appreciate how well the trekking logistics are handled, including camping equipment (sleeping, dining, and toilet tents), and even ponies for luggage, so you spend your energy on the trail.
The main consideration is physical effort and altitude. You’ll tackle a steep Tiger’s Nest hike for acclimatization, and the trekking days climb up to around 3,900m, so you’ll want moderate fitness and solid hiking shoes. Also, a sleeping bag is not included, so plan that piece early.
In This Review
- Key things you’ll notice on the Druk Path Trek
- Why the Druk Path Trek starts in Paro and ends in Thimphu
- Day 1 in Paro: National Museum in a watchtower and Rinpung Dzong
- Tiger’s Nest on Day 2: the steep acclimatization hike that sets you up
- Day 3: Damchena to Jela Dzong and the shift from valley to ridge
- Day 4: Tshokam (3,770m) to Jigmelangtsho (3,900m) through dwarf rhododendron country
- Day 5: Janetsho Lake, yak herder camps, and more rhododendron trails
- Day 6: sunrise at Phajoding, then the walk down toward Thimphu
- What camp life feels like on this trek
- Price and value: what you pay, and what you still need to budget
- Getting the most from the route: practical tips before you go
- Who should book the Druk Path Trek (and who might want a different option)
- Should you book the Druk Path Trek?
- FAQ
- How long is the Druk Path Trek experience?
- Where does the trek start and where does it end?
- What’s included in the trek package?
- Is pickup included?
- What about meals during the trip?
- Do I need to bring a sleeping bag?
Key things you’ll notice on the Druk Path Trek
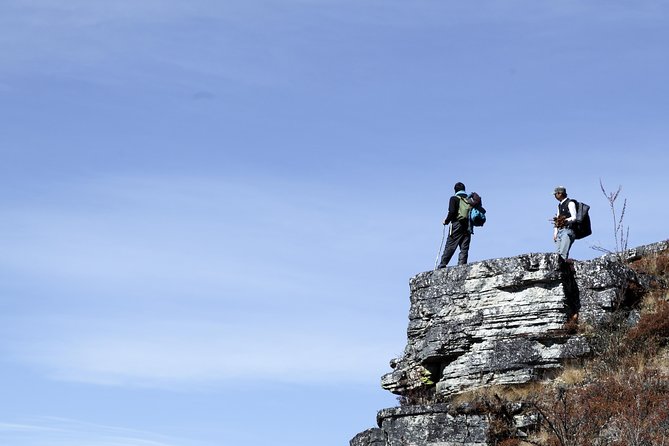
- Paro-to-Thimphu route: less back-and-forth, more time watching the country change.
- Tiger’s Nest on Day 2: a built-in acclimatization hike with big views and a teahouse stop.
- Real camp support: sleeping, dining, and toilet tents plus food and ponies for luggage.
- Monasteries along the climb: Jela Dzong and other spiritual stops shape the pacing.
- High points near 3,900m: shorter days than some treks, but still serious altitude.
- Comfort-focused return to Thimphu: a sunrise moment at Phajoding before the descent.
Why the Druk Path Trek starts in Paro and ends in Thimphu
This is one of the smartest parts of the Druk Path concept. You begin the trek in the Paro area (starting at Damchena, near Paro), and you work upward toward Thimphu rather than spending the whole trip on transfers.
That matters because Bhutan is a place where time is precious. Instead of losing days to getting to trailheads, you put your hours into hiking, village life, and viewpoints that actually earn their spot on the itinerary.
It also keeps the story simple: start dry and valley-hugging around Paro, then move into cooler, higher terrain. The trail is often described as the bridge between those worlds, and the day-by-day plan supports that idea.
You can also read our reviews of more tours and experiences in Paro.
Day 1 in Paro: National Museum in a watchtower and Rinpung Dzong
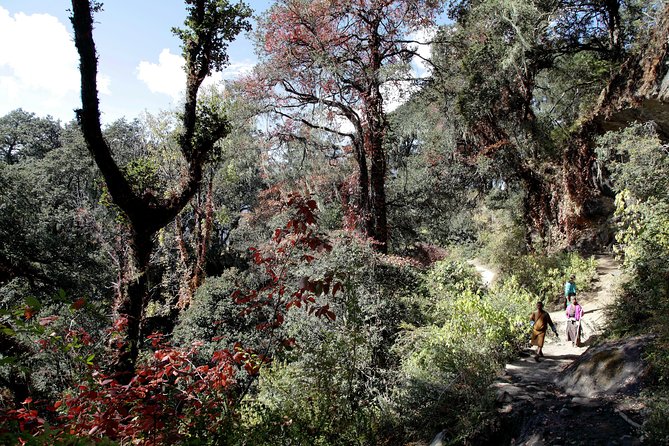
Day 1 is gentle by design. You start with the National Museum in an old watchtower above Paro Dzong, which gives you a quick cultural orientation before you head out for serious walking.
You’ll see Thangkas (religious scroll paintings), bronze statues, and other Bhutanese art and heritage highlights. It’s a good way to get your eye in, because later on you’ll be looking at temples and monastic architecture with more context.
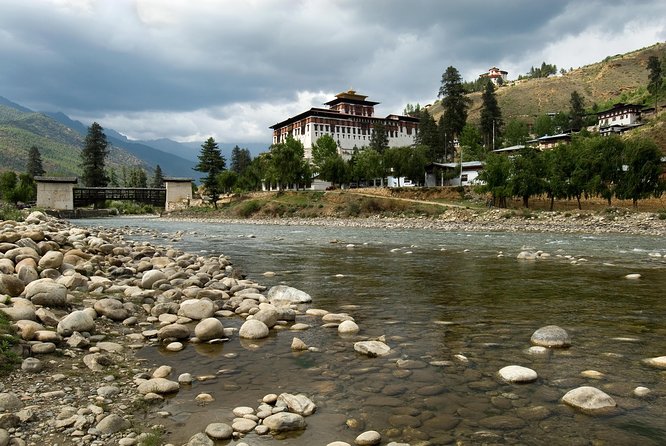
Then you have time, depending on the schedule, to visit Rinpung Dzong, the fortress built in 1644 by Shabdrung Ngawang Namgyal. This kind of stop helps the trip feel anchored in place, not just like a string of scenic checkpoints.
If you’re the type who dislikes sitting around waiting, the upside is that Day 1 is short and structured. The downside is you may feel you want more Paro time afterward, especially if you arrive early and are eager to explore beyond the planned sights.
Tiger’s Nest on Day 2: the steep acclimatization hike that sets you up
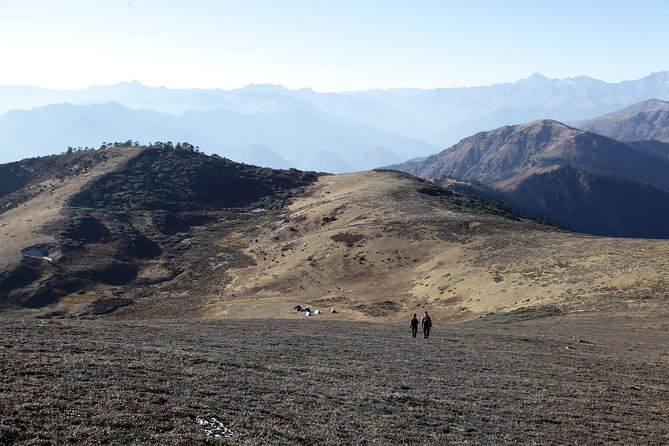
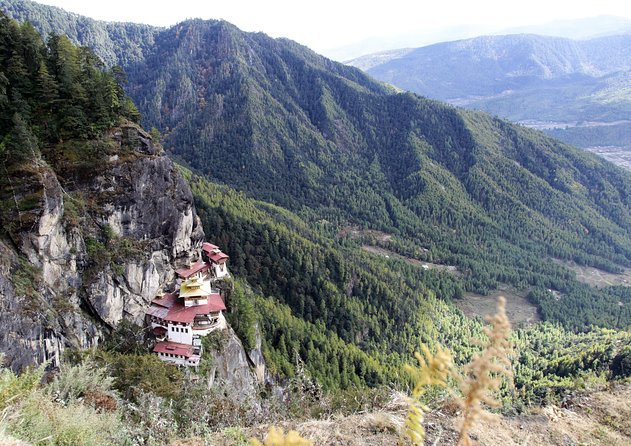
On Day 2, you take on Paro Taktsang, commonly called Tiger’s Nest. The plan includes a steep hike of about 1.5 hours up to a teahouse, with the full outing clocking in around 4 hours.
That teahouse stop is more than a rest break. It’s also where you can judge your pace and breathing before the trek days begin for real. Since the trek later climbs to higher elevations (with points listed at 3,770m and 3,900m), this kind of acclimatization is practical.
The route quality is part of why this day lands well for many people. You’re moving through mountain air, and Taktsang is perched dramatically above the valley floor—so you’re rewarded while still working.
The main catch is the steepness. If your legs aren’t used to climbing, start the hike with patience, take short pauses, and don’t let the cliffside views tempt you into racing.
Day 3: Damchena to Jela Dzong and the shift from valley to ridge
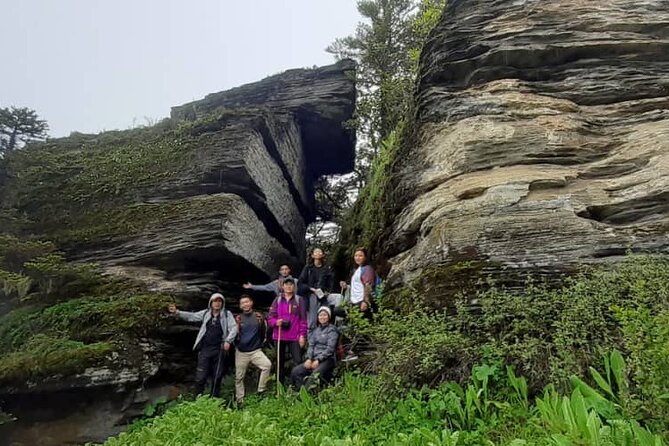
Day 3 is your first real trekking day, starting at Damchena (2,900m). From there, the route leads you to Jela Dzong, a quiet, small monastery perched on a lush hill.
This is the kind of stop that changes how you experience the walking. Instead of only thinking about distance, you start measuring time by landmarks: forest edges, changing terrain, and then that monastery view.
The day is listed at about 7 hours, so you’ll likely feel it by evening. The good news is that monasteries and vistas give you natural “checkpoints” for morale, and the overall pacing includes enough structure that you’re not constantly guessing what comes next.
If you prefer long, fast hikes, you might wonder why the days don’t feel more aggressive. But this route’s design is about building you gradually into altitude and terrain rather than turning Day 3 into a grind.
Day 4: Tshokam (3,770m) to Jigmelangtsho (3,900m) through dwarf rhododendron country
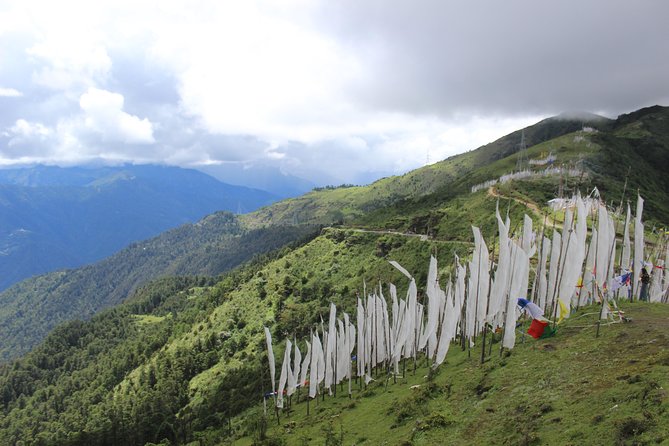
Day 4 climbs further, moving from Tshokam (3,770m) up to Jigmelangtsho (3,900m). This is where the scenery description gets specific: you’ll pass through alpine forests and dwarf rhododendron trees, and the tree line feeling changes as you gain elevation.
The day is listed at around 6 hours, but with altitude, that can still feel like a full day. The rhythm here is likely to be steady: walk, pause, breathe, and keep your steps controlled.
You’re also building toward the idea of alpine Bhutan—less farmland, more high-country plant life. Even if you’re not a plant person, you’ll feel the difference in the air and the way the trail carries you.
A practical note: at 3,900m, temperature shifts can hit quickly. Bring warm layers you can actually hike in, and plan on wind.
Day 5: Janetsho Lake, yak herder camps, and more rhododendron trails
Day 5 is about trail beauty with a human rhythm. You continue through dwarf rhododendron trees and reach Janetsho Lake, with stops along the way that may include cozy camps of yak herders.
This is one of those days where “scenery” is really about texture: the quiet of a higher trail, the way water shows up after sustained uphill, and the presence of people living close to the land.
The day is listed at about 5 hours, which can feel like a gift after the previous climb days. It also gives you better energy for camp life that night.
You’ll want to keep your expectations realistic about lakes in the mountains. It’s not a beach day. It’s a still, high-altitude moment where the route earns the view, and you can take your time.
Day 6: sunrise at Phajoding, then the walk down toward Thimphu
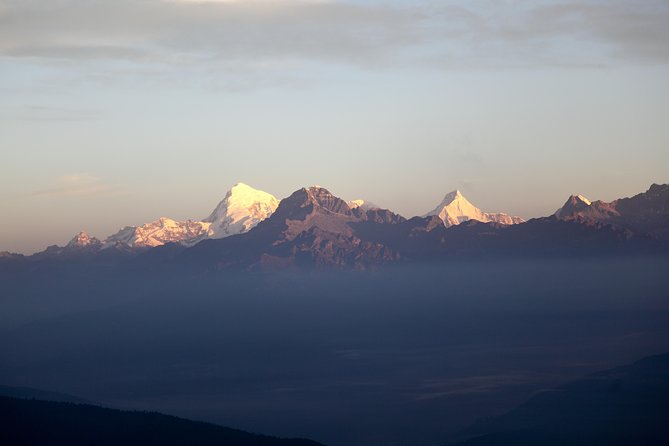
Day 6 starts with a special idea: a sunrise treat from Phajoding. The plan then has you descend toward the Thimphu valley with a walk of about 3 hours through a calm landscape.
This day is listed around 5 hours total, which helps you land in Thimphu without feeling wrecked. After several days of hiking and camping, the goal here is to return to real town life at a comfortable pace.
You’ll also visit Buddha Dordenma at Kuensel Phodrang, where a huge sitting Buddha statue rises to 51.5 meters. It’s the kind of modern monument that gives Bhutan’s spiritual focus a strong, visible anchor.
This pairing works well: you get the sunrise quiet first, then you get a large-scale cultural site afterward. It’s an effective transition from trail mind to city mind.
What camp life feels like on this trek
A lot of treks sell scenery and forget comfort details. Here, the support is part of the value: you get sleeping tents, dining tents, and toilet tents, plus all necessary food items.
The trek also includes ponies for luggage, which matters more than many people expect. If you’ve ever carried a heavy pack uphill, you know how much it affects your pace and joint comfort. Using ponies keeps your day focused on your own pack and your own breathing.
From the feedback shared with this tour, people often highlight how comfortable the camping was and how good the food tasted. That’s not a small thing in Bhutan, where a trek can easily make meals feel like a victory rather than a chore.
One more practical point: a sleeping bag isn’t included. That means you should either bring your own or plan how you’ll handle it before you go.
Price and value: what you pay, and what you still need to budget
The price is listed at $2,200 per person for the 7-day experience (approx.), with a 4-day trek component. For Bhutan, that’s a strong all-in structure because it includes certified guiding, private transportation, internal taxes, Bhutan visa support, and the trekking and camping setup.
What’s included also covers things that add up fast on your own: tents (sleeping and dining), toilet tents, ponies for luggage, and meals (with 6 lunches, 6 breakfasts, and 6 dinners listed).
It also includes the government SDF of USD 100 per person per night. Since that fee can be a surprise on trips, it’s helpful when it’s already accounted for in the package.
What’s not included is where you should plan carefully:
- Airfare (international and domestic)
- Travel insurance
- Single supplement of USD 500
- Sleeping bag
There’s also a firm policy on changes: the trip is non-refundable and can’t be changed for any reason. That doesn’t mean it’s risky; it just means you should book when your dates feel solid.
If you value comfort logistics and guided structure more than raw independent adventure, you’re likely getting good value here. If you want to travel ultra-light or you already have a sleeping setup and want to self-coordinate, you might feel the package is pricier than you expected.
Getting the most from the route: practical tips before you go
This trek lists moderate physical fitness as the target level. That’s not vague fluff. With a steep Taktsang hike early on, then altitude work from 2,900m up to around 3,900m, you’ll want a baseline of regular walking and an ability to climb.
A few practical things you can do that make the biggest difference:
- Start Taktsang at a slow, controlled pace so you don’t burn your legs early.
- Bring layers for cool air changes as you climb, especially above the tree line feel.
- Plan for altitude by taking short breaks and drinking water steadily.
- Bring your sleeping bag since it’s not included.
Timing also matters. This trek is feasible from late February to May and from September to December. If you’re flexible with months, you can pick the season that best matches your tolerance for cooler conditions and the kinds of trail days you want.
One more value tip: this is a private tour/activity, so the schedule should feel more adjustable to your group. You’ll still be on the planned route, but your guide can manage pacing and timing day-to-day.
Who should book the Druk Path Trek (and who might want a different option)
Book this if you want a Bhutan hike that’s intense enough to feel like a trek, but supported enough that you don’t have to worry about tents, toilets, meals, or luggage.
You’ll likely love the blend of:
- monastery moments (like Jela Dzong and other spiritual viewpoints),
- a big-name acclimatization day (Paro Taktsang),
- and a strong finish in Thimphu, including Buddha Dordenma.
Choose another option if you’re looking for a flat walk, or if you want a trek with minimal logistical support. Also, because you’ll be camping and moving between elevations, people who dislike cold nights or steep hikes may find this less comfortable.
If you want one “check your fit” question: can you handle a steep climb early in the trip, and can you keep walking steadily at altitude even when you’re a little tired? If yes, this route matches your interests.
Should you book the Druk Path Trek?
If you’re weighing whether to spend on Bhutan’s Druk Path Trek, I’d frame it like this: you’re paying for guided safety, a well-supported camping setup, meals, and transportation, plus the cultural stops that make the trek feel like more than exercise.
The itinerary also has a clear rhythm. Day 1 orients you in Paro. Day 2 builds your hiking readiness with Tiger’s Nest. Days 3 to 5 do the real trekking work with monastery and lake moments. Day 6 brings you back to Thimphu with sunrise and a major cultural landmark.
Just make sure you’re ready for the physical side: steep parts, altitude around 3,900m, and camping nights. Bring a sleeping bag, pace yourself on Day 2, and you’ll get a trek that feels both wild in the mountains and well-managed on the ground.
FAQ
How long is the Druk Path Trek experience?
The overall experience is listed as 7 days (approx.). The trek itself is described as a 4-day trek that connects the Paro area (starting at Damchena) with Thimphu.
Where does the trek start and where does it end?
The trek starts at Damchena in Paro and ends at Thimphu or vice versa, depending on the direction of the itinerary. The provided day-by-day route goes from Paro toward Thimphu.
What’s included in the trek package?
The package includes trekking equipment and camping equipment (including sleeping tents, dining tents, and toilet tents), ponies for luggage, and all necessary food items. It also includes a certified guide and private transportation, internal taxes, and Bhutan visa support.
Is pickup included?
Yes. Pickup is offered, and the meeting point listed is Paro International Airport in Paro.
What about meals during the trip?
Meals are included, with 6 breakfasts, 6 lunches, and 6 dinners listed as included in the package.
Do I need to bring a sleeping bag?
Yes. A sleeping bag is listed as not included, so you should plan to bring your own.