REVIEW · DHARAMSALA
7 Days Dharamsala – Dalai Lama home Trek
Book on Viator →Operated by India Trekking Tours · Bookable on Viator
Seven days, stars, and Himalayan temples. This is a private guided Dharamsala trekking route that starts with time to visit the Dalai Lama temple and turns into day-after-day hiking through pine and rhododendron forests. I also like that accommodation and permits are built into the price, so you’re not constantly chasing extra bookings. One thing to plan for: you must bring your own sleeping bag, since it isn’t included.
The schedule starts early (6:00 am) and it mixes easier walking with a couple of more demanding climbs. If you enjoy real village-life trails and want the views without guessing your way, this one makes a lot of sense.
In This Review
- Key highlights worth your attention
- Dharamsala First Night: Dalai Lama Temple and a Real Start in Town
- Day 2 to Satobari Village: Pine Forest Descent and Your First Trail Rhythm
- Day 3 Under the Stars: Gradual Climb Through Villages and Open Meadows
- Day 4 Bridge, Rhododendron, and a Chai Stop That Actually Breaks Up the Work
- Day 5 Kunal Pathri Devi Temple: The Big View Day Toward Triund and Kangra Valley
- Day 6 Grassy Ridge Peaks and the Bahgsu Nallaha Descent
- Day 7 Easy Finish: Transfer Back to Dharamsala Airport or Bus Station
- Price and What You Actually Get for $381.30 Per Person
- Guide Power: English Support and How the Team Affects Your Trek
- What to Pack for This Trek (Without Guessing)
- Who This Dharamsala Trek Fits Best
- Should You Book This 7 Days Dharamsala Trek?
- FAQ
- How long is the 7 Days Dharamsala trek?
- What time does the trek start?
- Where do I get picked up?
- Is this tour private?
- What kind of guide will I have?
- Are accommodation and permits included?
- What meals are included?
- Do I need to bring a sleeping bag?
- What if the weather is bad?
- Is free cancellation available?
Key highlights worth your attention
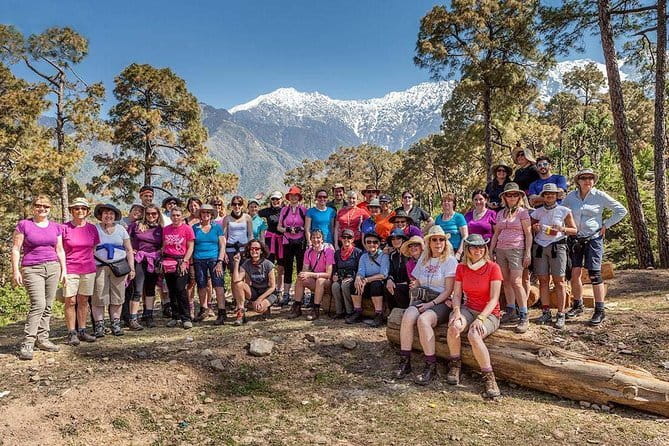
- Private English-speaking guide to keep the trail, pacing, and temple visits smooth
- Dharamsala start with Dalai Lama temple time before you move to the mountains
- Camping nights plus included lodging across the trek days
- Temple payoff on Day 5 at Kunal Pathri Devi with wide views toward Triund and Kangra Valley
- Pine, rhododendron, and ridge scenery with rest points like a local chai stop
- Most meals included (breakfast nearly every day, plus lunch and dinner on trek days)
Dharamsala First Night: Dalai Lama Temple and a Real Start in Town
Your trek begins in Dharamsala with a morning pickup from the airport or bus station, then a transfer to your hotel. You get some free time to explore town before meeting up later, and that’s a smart window to get your bearings without rushing.
This is also where you spend time at the Dalai Lama temple area. It sets a calm tone right away, especially because the rest of the week shifts from religious landmarks to forest trails and mountain camps. If you’re the type who likes seeing both the spiritual and the practical sides of a destination, this first day hits both.
One detail I’d treat as a plus is the way the experience has been organized by named staff in past groups. In one case, Sachin handled coordination efficiently, and that kind of smooth communication matters when you’re leaving on a 6:00 am start. Lodging has been reported as comfortable too, with Sky Heaven Resort coming up as the stay for at least one group.
Practical note: you won’t get meals at the hotel as part of the package, so use that free time to eat well before you head out to meet your guide later. Once you start trekking, you’ll be glad you’re not hungry.
You can also read our reviews of more tours and experiences in Dharamsala.
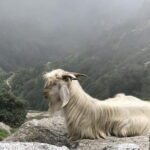
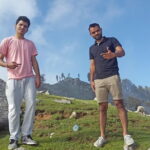
Day 2 to Satobari Village: Pine Forest Descent and Your First Trail Rhythm
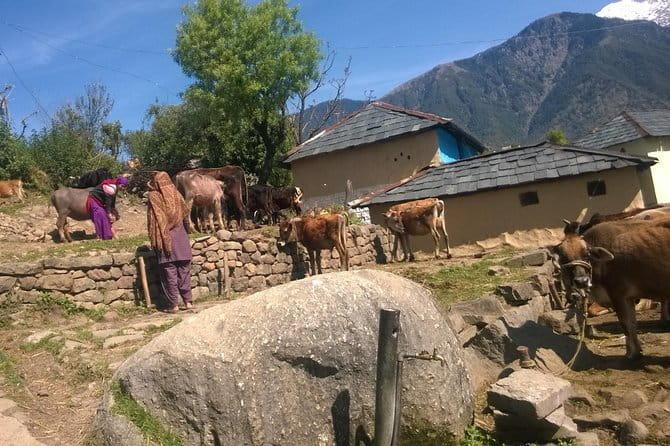
After breakfast, you’ll transfer to the trek start point and begin walking. The first stretch is undulating, not a straight push up, which helps you find your walking rhythm before the terrain turns more serious.
You’ll pass through Satobari Village, then start descending through pine forests toward the Ghe area (the route notes it starts downhill after Satobari). That pine-forest descent is the kind of transition day that makes the mountains feel real: the air changes, the trail narrows, and village life becomes part of the scenery instead of just background.
This is also the day to watch your pace. When a route starts with ups and downs and then moves into a descent, it’s easy to go too fast on feel-good momentum. You want steady effort so your legs aren’t complaining on the following climb.
If you’re a first-time Himalayan trekker, day 2 is a good “learning day.” You’ll feel the basics of how the guide handles route direction, breaks, and timing, and you’ll know what to adjust before the longer days.
Day 3 Under the Stars: Gradual Climb Through Villages and Open Meadows
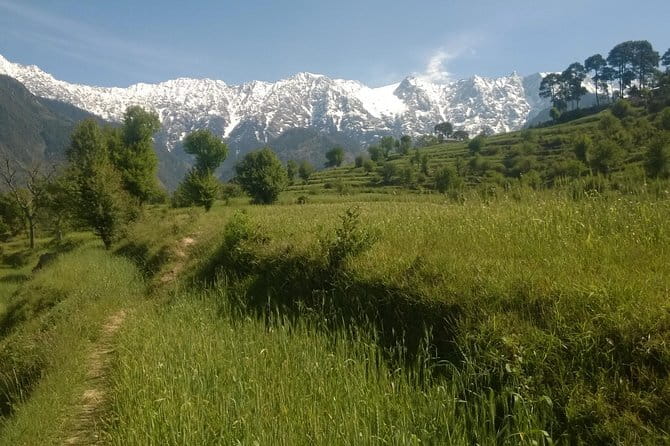
Day 3 starts after your first night under the stars, and it’s all about moving upward again. The route describes a gradual ascent along a trail that passes through charming villages, plus open meadows and pine forests.
That mix matters. Forest sections give you shade and a break from sun fatigue. Village passages remind you that these paths aren’t “tourist-only”—they’re part of local movement and daily routines. Then the meadows help you read the terrain and get those horizon moments.
You’ll also take a short descent before reaching your next overnight spot. For many hikers, this kind of alternating profile is mentally easier than a single long grind. You’ll still be working, but you won’t feel stuck in one gear for the entire day.
What I like about this design is that it builds confidence. By day 3, you know how your body handles walking time, how your pack feels, and what kind of break cadence works for you. That makes Day 4 and Day 5 less intimidating.
Day 4 Bridge, Rhododendron, and a Chai Stop That Actually Breaks Up the Work
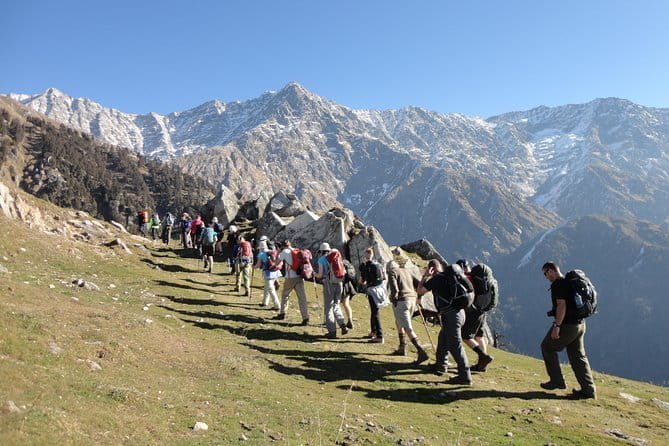
On Day 4, you cross a bridge and then head uphill through rhododendron and pine forests for about two hours. This is one of those trail sections where the forest type is the story. Rhododendron periods can change what you see dramatically through the year, and even when blooms are not the focus, the undergrowth and shade patterns keep things interesting.
After the climb, you’ll come to a local chai shop where you can rest. That pause is more than a snack stop; it’s a planned moment to reset—drink something hot or sweet, then get back into trekking without letting fatigue take over.
If you’re used to doing long treks with no breaks, you’ll probably appreciate that the route includes these small “time anchors.” It’s easier to stay present and not constantly negotiate with yourself about when you’ll stop next.
Day 4 is also a helpful lead-in to the more demanding Day 5 ascent. If you feel strong on Day 4, you can use that energy carefully so you’re not spent when the trail starts looking steeper ahead.
Day 5 Kunal Pathri Devi Temple: The Big View Day Toward Triund and Kangra Valley
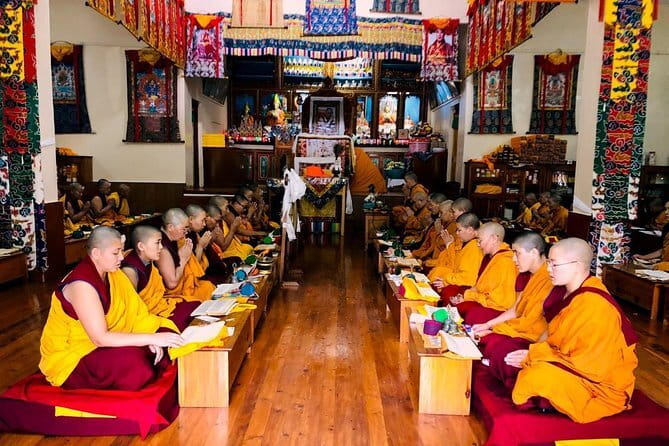
Day 5 is described as a challenging ascent to Kunal Pathri Devi Temple. For me, that’s a big deal because the route doesn’t treat sightseeing as an add-on. It builds a climb around a destination that has real spiritual meaning and real payoff.
After reaching the temple area, you’re rewarded with stunning views of Triund and Kangra Valley beside Dharamsala. The notes also point out that you feel Dhauladhar Mountain very close here. That’s the kind of perspective change you can’t fake with a viewpoint bus stop.
This is the day to be honest with your body. “Challenging ascent” is the key phrase, so go slow and steady, and let the guide handle the pacing. If you’re the type who pushes hard to “finish strong,” you might feel great at the start and then pay for it later. Better to save your legs.
Also, temple areas can have crowds on certain days, and they can be quiet and contemplative on others. Either way, you’ll get the best experience when you treat it like a place you’re visiting, not a photo spot you race through.
Once the route continues after Sno… (the endpoint is cut off in the notes you provided), you’re still moving toward your next overnight. Keep your focus on what comes next, not just what you already achieved at the temple.
Day 6 Grassy Ridge Peaks and the Bahgsu Nallaha Descent
After your last breakfast in the campsite, you begin trekking over a grassy ridge. This is the memory-maker section: it’s described as offering lasting views of snow-capped peaks that surround the area.
That ridge walking changes the feel of the trek. Instead of constantly turning through forest, you get more open sky and more exposure to wind and sun. It’s a good day for good weather, because visibility is what makes “snow-capped peaks” feel close rather than distant.
Then comes a steep descent to Bahgsu Nallaha. Descents are where tired legs show up first. Short steps help, and you’ll want to stay light on your feet. This is also a day where your hydration and snack habits matter, because once the trail gets steep, you can lose track of how long you’ve been working.
Even with the steep down portion, Day 6 is valuable because it balances your week: ridge views up top, then trail legs tested downhill. That makes Day 7 feel like a true finish instead of another grind.
Day 7 Easy Finish: Transfer Back to Dharamsala Airport or Bus Station
Morning after breakfast brings the end of the trek. You’ll be transferred to the Dharamsala airport or bus station, so you don’t have to plan your own exit logistics after a week on foot.
This “graceful landing” is underrated. Trekking routes are often exhausting enough that the last-day transport details become the stress you didn’t need. Here, the transfer is handled as part of the experience.
Take a slow pace on Day 7. Your legs may feel surprisingly stiff once you stop, and you’ll want to keep it comfortable on the ride out of town.
Price and What You Actually Get for $381.30 Per Person
At $381.30 per person for about 7 days, this is not a budget trek, but it also isn’t a luxury price tag. The value comes from what’s included: private transportation, an English-speaking guide, trekking and camping/lodging arrangements, permits, and most meals.
Meal coverage is a big part of the math. You get breakfast on 6 days, and lunch and dinner on 4 days each. Since meals at the hotel aren’t included, you’re effectively eating mostly on the trek plan once you’re outdoors. For you, that reduces daily decision fatigue and helps you keep consistent energy.
The biggest “hidden” cost for many trekkers is gear. Here, the notes are clear: you have to bring your own sleeping bag. That one requirement is the main extra expense or preparation you should account for in advance. If you don’t already own one, factor in the cost or plan to borrow/rent locally.
Group discounts and the fact that it’s private for only your group can matter for value, especially if you’re traveling with friends or family. Private guidance isn’t just comfort—it’s also about getting the route matched to your group and not waiting on strangers.
Guide Power: English Support and How the Team Affects Your Trek
This is a private tour, so it’s only your group. That’s a real quality-of-life upgrade on a multi-day trek, because you can keep a consistent pace without constantly negotiating with different walking speeds.
The guide is English speaking, and that helps with everything from trail navigation to explaining cultural stops. In past experiences, the communication and organizing side included Sachin, described as easy to communicate with and efficient. On the trek, Anil has been named as a great guide, with a reputation for leading well through the route.
Even if your guide is different, the structure still matters: you aren’t just following a track. You’re being guided through villages, temple areas, and forest sections with an explanation layer that makes the walk feel less like exercise and more like understanding.
What to Pack for This Trek (Without Guessing)
The tour notes specifically say you need to bring your own sleeping bag. That’s the non-negotiable item you should plan for.
Beyond that, think practical. You’ll be walking through pine and rhododendron forests, crossing bridges, making a couple of longer climbs, and doing a steep descent. You’ll also be camping, which means you’ll want layers that work for cooler mountain evenings and a daypack setup you can handle through long walking hours.
If you tend to pack too much, remember the tradeoff: the route includes lodging and meals, so you can keep your personal load lighter by focusing on what you truly need—sleeping comfort gear and weather-ready clothing.
Also, the experience requires good weather. You won’t control the sky, but you can control how ready you are. If conditions aren’t right, the tour can be adjusted (you’ll be offered a different date or a full refund).
Who This Dharamsala Trek Fits Best
This is for you if you want a mix of temples + trekking, not just one or the other. It’s also a good match if you prefer a private setup with an English-speaking guide rather than joining a larger group.
It’s likely ideal for hikers who are comfortable with a challenging ascent on Day 5 and a steep descent on Day 6. It can still work for many people because the route is structured with gradual segments and rest breaks like the chai stop, but you shouldn’t pretend it’s a casual walk.
If you’re traveling solo but want a guide-led experience with no sharing with strangers, private can be a strong option. And if your favorite part of trips is understanding local context while moving through real places, the temple-focused stops make the trek feel more meaningful.
Should You Book This 7 Days Dharamsala Trek?
If you want a trek that gives you both the Dharamsala spiritual start and a multi-day mountain route with camping, this is a strong choice. The value is driven by private guiding, permits, lodging, and most meals, so your trip planning stays simple.
I’d only hesitate if you don’t want to deal with the steep work of Day 5 and Day 6, or if you’re missing a sleeping bag and don’t want to source one. If you’re ready to walk, climb, and enjoy the view rewards at Kunal Pathri Devi and along the ridge, book it and let the guide handle the hard parts.
FAQ
How long is the 7 Days Dharamsala trek?
It runs for 7 days (approximately).
What time does the trek start?
The start time is 6:00 am.
Where do I get picked up?
There is morning pickup from the airport or bus station, then transfer to your hotel in Dharamsala.
Is this tour private?
Yes. It’s a private tour/activity, and only your group participates.
What kind of guide will I have?
You’ll have an English-speaking guide.
Are accommodation and permits included?
Yes. Accommodation is included in the price, and trekking/camping/lodging arrangements including permits are included.
What meals are included?
Breakfast is included on 6 days, and lunch and dinner are included on 4 days each. Meals at the hotel are not included.
Do I need to bring a sleeping bag?
Yes. You have to bring your own sleeping bag.
What if the weather is bad?
The experience requires good weather. If it’s canceled due to poor weather, you’ll be offered a different date or a full refund.
Is free cancellation available?
Yes. You can cancel for a full refund up to 24 hours in advance of the experience’s start time.