REVIEW · GILI TRAWANGAN
Rinjani Trekking 2D1N Senaru crater rim
Book on Viator →Operated by Senaru Adventures · Bookable on Viator
If you like big views with real effort, this one delivers. This Rinjani crater rim trek from Senaru is built for beginner hikers who still want that dramatic high-altitude payoff, and I really like how the route breaks the climb into manageable chunks. The other big plus is the included setup: guide, porters, camping gear, and meals all handled for you. One thing to consider: it’s a steep altitude hike (Senaru starts around 601m and you camp at about 2,641m), so you’ll want solid walking stamina and a calm approach if your breathing feels slower up high.
The first day is all about transition: humid forest, then shelters and lunch, then the final push toward the rim. You’ll also get a proper night at the top area, with sunrise and sunset aimed at the Bali horizon and the volcanic activity around the lake. If you hate uncertainty, note that the experience needs good weather, so schedules can shift.
In This Review
- Key things that make this trek worth your time
- The big picture: what you’re really signing up for
- Price and value: what $285 actually covers
- Day 0: arriving in Senaru and getting ready
- Day 1: the climb from Senaru to the crater rim
- Forest walking, flora, and the first real rhythm
- Post 2 Montong SATAS shelter (1,500m): tea break with a purpose
- Post 3 Mondokan Lolak (2,000m): lunch and a breather
- The final push to Senaru crater rim (2,641m): sunset time
- Night at the rim: camping that’s handled for you
- Day 2: sunrise, descent, and back to Senaru
- Who this trek fits best (and who should think twice)
- Guide and porters: why the team changes your experience
- What to bring (so the included gear still works for you)
- Weather and route reality: why flexibility helps
- Should you book this Rinjani 2D1N Senaru crater rim trek?
- FAQ
- How long is the Rinjani Trekking 2D1N Senaru crater rim experience?
- Where does the trek start and end?
- What time does the experience start?
- What is the main trekking route like?
- At what elevations do you take breaks on Day 1?
- What’s included in the camping setup?
- Are meals included?
- Do you get transport to and from the trek?
- Is the Mount Rinjani entrance ticket included?
- Is this tour private?
Key things that make this trek worth your time
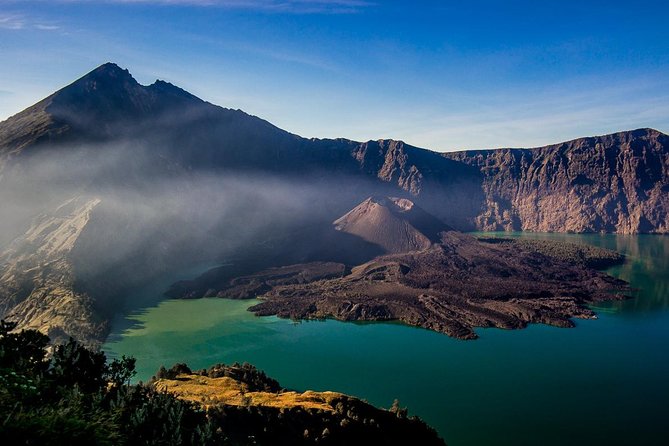
- Crater-rim camping at 2,641m for sunrise and sunset from the highest viewpoint on the route
- Clear step-by-step route with set breaks at Post 2 (1,500m) and Post 3 (2,000m)
- Dense tropical forest walking with bird life and butterflies early in the hike
- All camping equipment and toilet tent included, so you travel lighter
- Transport coverage across Lombok points plus an extra night in Senaru before the trek
The big picture: what you’re really signing up for
This is a straightforward 2D1N plan: day 1 hikes from Senaru up to the Senaru crater rim, you camp for one night, and day 2 you descend back to Senaru. The whole thing is designed to feel accessible without turning it into a casual stroll.
Starting in Senaru matters. You don’t begin at sea level, and you don’t jump instantly to the highest altitude. Instead, you climb through tiers of the mountain’s environment. Early on, it’s tropical forest—think birds, butterflies, and thick greenery—then you gradually trade that for cooler air and wider views.
You’re also not just hiking for exercise. The real purpose is the rim. That’s where you’ll get the best sunset view over Mount Agung in Bali, plus the smoke activity tied to the volcanic zone near the lake. If you want dramatic scenery without a complicated multi-day itinerary, this is a clean choice.
Price and value: what $285 actually covers
At $285 per person, the question isn’t just whether the trek is expensive. It’s what you would otherwise need to arrange on your own. Here, a lot of the costly moving pieces are bundled:
- Mountain guide and local porters
- Camping gear: tent, sleeping bag, sleeping mat
- Toilet tent, cooking gear
- Three meals per day for the trip (as stated: three-time daily meals during the trek days)
- One night accommodation in Senaru before the trek starts
- Pickup and return transport from the Lombok points listed (airport, Mataram, Senggigi, Bangsal, or other Lombok location)
- Entrance ticket to Mount Rinjani (150,000 IDR per person)
Personal expenses and tipping for your guide and porters aren’t included, which is normal on treks. But if you’ve ever tried to price out gear rental, food, permits, and a guide separately, you’ll see why this package can feel fair. You’re paying for coordination as much as you’re paying for the hike.
Also, it’s a private tour/activity, meaning it’s just your group. That usually helps the schedule stay smooth and keeps the experience from feeling crowded.
Day 0: arriving in Senaru and getting ready
This trek starts before the first step on the mountain. After pickup in Lombok (from the airport or other listed spots), you transfer to a hotel in Senaru. Then you get one night accommodation in Senaru before the trek begins.
Why that matters: Rinjani treks can feel heavy if you’re rushing from a far-away island or a long travel day. A night in Senaru helps you get your bearings, confirm your gear situation, and rest your legs. It also sets you up for an early start without waking up at an absurd hour.
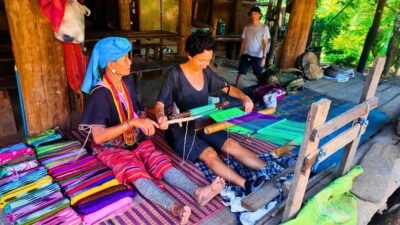
Some people also enjoy the Senaru village atmosphere during this stay, since it’s not just a place where you sleep. You might find a more local, village-style experience in the Senaru area instead of a generic city hotel feel—useful if you want the trekking days to feel connected to culture, not isolated from it.
Day 1: the climb from Senaru to the crater rim
Your start time is listed as 7:00 am, and the trek itself begins after registration at the Rinjani Trek Center Senaru—around 8:00 am.
Forest walking, flora, and the first real rhythm
You begin in dense tropical forest at about 601m above sea level. This is a good warm-up environment for a few reasons. First, the ground is naturally shaded and humid, so you’re not immediately fighting intense sun. Second, you can settle into steady walking while watching for bird life and butterflies rather than staring only at your feet.
The main mental trick here is pacing. You don’t win the day by sprinting early. You want legs that still feel okay once the climb steepens.
Post 2 Montong SATAS shelter (1,500m): tea break with a purpose
At Post 2 (Montong SATAS shelter) around 1,500m, you stop for a cup of tea with biscuits. This isn’t just a snack stop. It’s where the trek starts to feel organized into segments, and it gives your body a chance to reset before the next push.
If you’re new to high hikes, take the tea break seriously. Warm fluids help, and it also gives you a moment to breathe, hydrate, and think about the next stretch.
Post 3 Mondokan Lolak (2,000m): lunch and a breather
After continuing up, you reach Pos 3 Mondokan Lolak at about 2,000m for a break and lunch. This is a key checkpoint on this route because it’s roughly where the climb transitions from “forest hike” into “real mountain climb.”
Lunch here is also where you want to eat enough. You’ll still have a couple hours to go to reach the rim, and trekking on a half-empty stomach at altitude is not fun.
The final push to Senaru crater rim (2,641m): sunset time
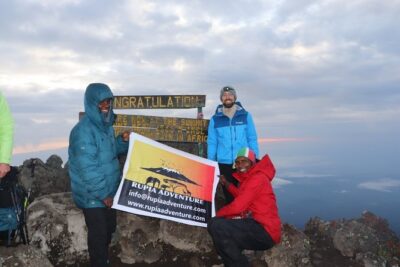
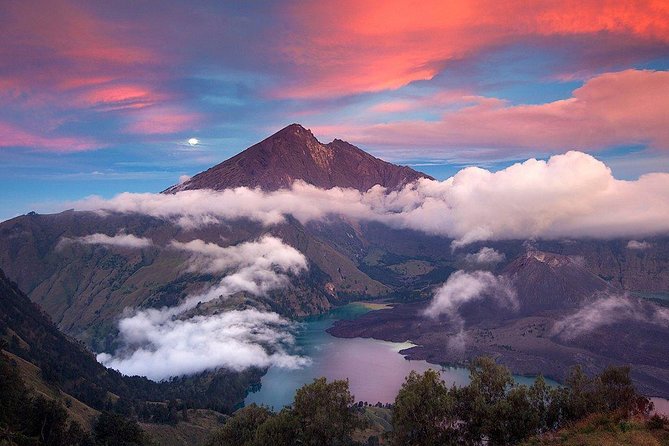
After lunch at Pos 3, you continue up for about 2 hours to the crater rim at 2,641m. This final section is the payoff moment. Senaru crater is described as having the most spectacular view after the peak, and that matches what many people chase on Rinjani.
You’ll camp there overnight. And you’re timed for sunset—specifically over Mount Agung in Bali—plus the volcanic activity visible near the lake edge, including smoke from a new volcano area.
This is also the part of the trek where you’ll notice temperature change. Even if the morning felt warm, the rim can cool off quickly once the sun goes down. Bring layers you can actually use, not just things you hope will be enough.
Night at the rim: camping that’s handled for you
You’ll camp at the crater rim for one night. The good news is you’re not DIY-ing this. The package includes tents, sleeping bags, and sleeping mats, plus a toilet tent and cooking gear.
That’s important because it affects how you judge the experience. If you show up expecting rough camping where you also have to juggle gear rental, the whole plan can feel stressful. Here, the stress level drops.
Practical thought: even with provided gear, altitude and wind can make the air feel colder than you expect. Keep your sleeping bag and layers organized so you can get comfortable fast after sunset.
Day 2: sunrise, descent, and back to Senaru
Day 2 begins with breakfast alongside a beautiful sunrise. Then you leave Mount Rinjani and descend to Senaru village.
This day is usually the hardest on the body in a different way. Walking up uses breath and legs. Walking down uses knees, ankles, and the small muscles that help control your stride. Take the descent seriously. Move slowly on uneven ground and don’t treat it like a race to be done.
Once you arrive back at Senaru, transport takes you to your next destination.
If you’re linking this trek with a beach break afterward (many people do), plan for a little recovery time. Your body will likely feel it even if the second day is shorter on the page.
Who this trek fits best (and who should think twice)
This trek is described as suitable for beginner hikers, and it’s also clear the route is paced with set stops at Post 2 and Post 3. If you’re comfortable with a structured multi-hour hike and you can handle steep sections, you’re a good match.
It’s also well-suited if you care about a high viewpoint more than you care about technical climbing. This is hiking and camping, not scrambling.
But here’s the honest caution: altitude at 2,641m means you should respect your limits. If you get winded easily, plan to walk slower than your ego wants. Bring patience and focus on steady movement.
Guide and porters: why the team changes your experience
You’ll have a mountain guide and local porters as part of the included package. That matters more than people think.
First, the guide keeps the trek moving in a safe rhythm and helps manage timing between posts. Second, the porters help handle heavy carrying loads, which makes the hike feel more like a hike and less like a gear test. Third, a good guide helps you stay calm at the rim, where it can get chilly and the views can make it hard to focus.
One highlight from past experiences: guides like Yantoo have been praised for making the trek feel fun and supportive. That kind of energy matters, especially on a first big trek.
What to bring (so the included gear still works for you)
The tour includes major camping gear, but you’ll still want the right personal items. The trek climbs from warm forest into cold rim conditions, and you’re out for multiple meals and a night outdoors.
Bring:
- Good hiking shoes or boots with grip
- A rain layer (weather is a key factor here)
- Warm layers for the rim evening and early sunrise
- A small daypack and a water bottle you can access while walking
- Sunscreen and a hat for the lower stretches
If you’re unsure, prioritize footwear and layers. Those two things can make you feel comfortable instead of just tolerating the climb.
Weather and route reality: why flexibility helps
This experience requires good weather. If it’s canceled due to poor weather, you’re offered a different date or a full refund. That’s one of those annoying-but-fair realities of mountain trekking.
If your trip dates are fixed and non-negotiable, think carefully. A little flexibility gives you a better shot at actually reaching the rim and camping there as planned.
Also, on the mountain, conditions can change quickly. Fog, wind, or rain can make visibility and comfort different than you hoped. Going in with flexibility helps you enjoy the experience you actually get.
Should you book this Rinjani 2D1N Senaru crater rim trek?
Book it if you want:
- A structured 2 days 1 night plan with clear stops at Post 2 and Post 3
- Camping with the big pieces handled for you (tent, sleeping bag, mat, toilet tent)
- A true high viewpoint goal: the Senaru crater rim at 2,641m with sunrise and sunset
- Transport support across Lombok so you’re not piecing together logistics
Don’t book it if:
- Your schedule has zero flexibility and you can’t handle weather-based changes
- You’re not comfortable with steep walking and altitude discomfort risk
- You expect this to be a casual hike without a real physical demand
If you’re a first-time trekker who still wants that Rinjani moment—forest-to-rim, camp under the high sky, then down again—this Senaru crater rim route is a very sensible bet. It’s not trying to be something it isn’t. It’s just a great mountain hike with the planning done for you.
FAQ
How long is the Rinjani Trekking 2D1N Senaru crater rim experience?
It’s described as about 3 days, with a 2 days 1 night hike from Senaru to the crater rim and then back.
Where does the trek start and end?
The trek starts in Senaru village and returns to Senaru village.
What time does the experience start?
Start time is listed as 7:00 am.
What is the main trekking route like?
Day 1 walks from Senaru to the Senaru crater rim at about 2,641m, camping there overnight. Day 2 descends back to Senaru village.
At what elevations do you take breaks on Day 1?
The itinerary includes breaks at Post 2 Montong SATAS shelter (1,500m) and Post 3 Mondokan Lolak (2,000m).
What’s included in the camping setup?
All camping equipment is included: tent, sleeping bags, sleeping mats, a toilet tent, and cooking gear.
Are meals included?
Yes. Meals are included for the trip with three time daily meals.
Do you get transport to and from the trek?
Yes. Pickup and return transport are included from the airport, Mataram, Senggigi and Bangsal (or other location in Lombok).
Is the Mount Rinjani entrance ticket included?
Yes. The entrance ticket is included at 150,000 IDR per person.
Is this tour private?
Yes. It’s listed as a private tour/activity, with only your group participating.