REVIEW · KILIMANJARO
6 Days Machame Route Kilimanjaro Trekking
Book on Viator →Operated by Mafie Adventures · Bookable on Viator
Kilimanjaro starts right in the rainforest. I love the Machame route for its changing habitats and consistently photogenic ridgelines, and I like that the trip is run with tight coordination from Erastus and a strong guide team. The only real drawback is that a 6-day schedule is hard to slow down on, so if you hike at an easy pace, you may feel rushed.
You’ll also appreciate the practical support built into the experience: porters, camp setup, and meals are part of the deal, not a last-minute add-on. Still, you should plan to rent key gear like a sleeping bag and climbing items, and bring your own “small stuff” like personal expenses and tips.
In This Review
- Key highlights worth getting excited about
- Why the Machame Route works for most hikers
- Price and what you really get for $1,930 per person
- Getting to the park gate: Moshi transfer and Day 1 momentum
- Day 2 to Shira Camp: moorland heather and a steady climb
- Day 3 to Barranco Hut: Lava Tower and the acclimatization trick
- Day 4 to Barafu Hut: South Circuit vibes and the long day before summit night
- Summit Night (Day 5): midnight ascent, Stella Point, and sunrise
- Final descent (Day 6): Mweka Gate, mud, and certificate time
- Guides, porters, and why the team matters on Kili
- What to pack (based on what’s actually covered)
- Who should choose this 6-day Machame trek
- Should you book Mafie Adventures for the 6-Day Machame Route?
- FAQ
- How long is the 6 Days Machame Route Kilimanjaro Trekking experience?
- Where does the trek start and end?
- Is pickup included?
- What’s included in the trekking package?
- Is the park admission covered?
- What gear do I need to bring versus rent?
- Is the booking refundable if I cancel?
Key highlights worth getting excited about
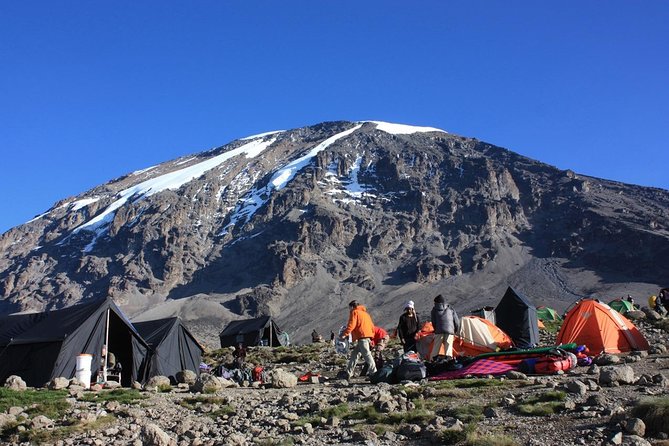
- Machame Route variety: Rain Forest to Moorland to Semi Desert to Alpine Desert, with huge changes in scenery day to day
- Sunrise payoff at Stella Point: Early summit push with a short stop at Stella Point (18,600 ft)
- Built-in acclimatization: You go up to high points and come back down (notably on day 3) to help your body adjust
- Strong on-the-ground teams: Multiple guides listed in reviews, including Matthew, Joshua, Oliver, and Benjamin
- Meals and camping support included: Camp gear, cooking setup, and food are handled for you
- Park entry covered: Admission tickets listed as free each trekking day, plus parking and rescue fees included
Why the Machame Route works for most hikers
The Machame Route is a popular choice for a reason: it gives you a steady feed of views while moving through several distinct ecosystems. This matters more than it sounds. When your brain gets bored, fatigue feels worse. On Machame, the environment changes enough to keep you mentally engaged as the altitude starts taking its toll.
It’s also one of the more common routes chosen by both large percentages of climbers and many seasoned hikers. That usually translates to two good things for you: established logistics and a route profile that many people are familiar with. In plain terms, this is a proven path with a solid balance between distance, elevation gain, and time on the mountain.
The other big reason people like it is access and itinerary length. A shorter itinerary can feel attractive when you’re juggling vacation days, but it also means you need to show up fit and follow pacing instructions. If you expect a slow, casual stroll, Machame can feel intense in 6 days.
Price and what you really get for $1,930 per person
At $1,930.42 per person, you’re paying for a package that covers the heavy lifting: camping gear, meals, guides, porters, park-related costs, and safety support. That’s where the value sits. A Kilimanjaro trek is expensive partly because of logistics—getting you carried, fed, and safely moving between camps—so it helps when those pieces are bundled.
Here’s what’s included based on the provided details:
- Camping equipment, including a mess tent, mattress, and cooking setup
- All accommodation while trekking
- Porterage
- A professional driver/guide
- Parking fees and rescue fees
- All taxes/VAT
- Meals: breakfast (5), lunch (5), dinner (5)
What’s not included (and you should budget for):
- International flights and accommodation before/after the trek
- Climbing gear (available for rent)
- Sleeping bag (available for rent)
- Bath towels
- Personal items and travel insurance
- Visa fees
- Tips
- Possible government-imposed increases in taxes or park fees
Also, you get admission tickets listed as free each day, which is nice because park fees can be one of those invisible cost traps when you compare packages.
Getting to the park gate: Moshi transfer and Day 1 momentum
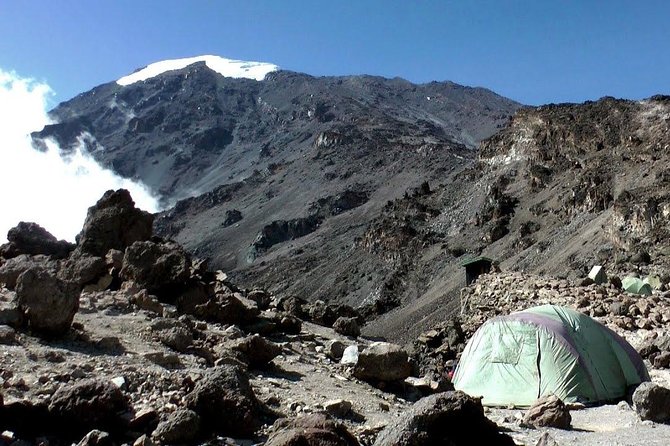
You’ll start with travel into Kilimanjaro National Park. The drive from Moshi to the park gate takes about 50 minutes, passing through the village of Machame on the lower slopes. That little transition matters: you go from town life into the mountain rhythm fast, so your body has less time to debate whether it’s really doing this.
Day 1 runs from about 5,400 ft to 9,400 ft, covering 11 km over 5–7 hours through Rain Forest. This is a classic “warm-up that isn’t easy” day. Even though you’re not yet at the high-altitude strain point, the trail can be muddy and slippery. Gaiters and trekking poles are called out as useful here, and I agree—this is where people twist an ankle while thinking about the scenery.
Expect a winding trail up a ridge from the gate area until you reach Machame Camp. Lower down, footing is the main challenge. Once you’re moving steadily, the rainforest also gives you a more forgiving temperature feel than exposed ridges later on.
Day 2 to Shira Camp: moorland heather and a steady climb
Day 2 shifts you up from about 9,400 ft to 12,500 ft for a 5 km trek lasting roughly 4–6 hours. This day is in Moorland, and the route description shows a pattern you’ll keep seeing on Kilimanjaro: short segments of steep walking, a few transition points, then a change in scenery that signals you’ve reached a new altitude band.
You leave the rainforest glades and head along an ascending path that crosses a little valley and a steep rocky ridge covered with heather. Then the route turns west onto a river gorge.
You’ll end in camp at Shira campsite for dinner and overnight. This is one of those days where you don’t just want to get through it—you want to get through it calmly. If your heart rate is already spiking on day 2, that’s a sign to slow down early.
Day 3 to Barranco Hut: Lava Tower and the acclimatization trick
Day 3 is where Machame starts to feel like a real expedition. You’ll go from around 12,500 ft to 13,000 ft over 10 km with 6–8 hours of hiking in Semi Desert.
From Shira Plateau, you continue on a ridge and pass junctions that relate to Kibo, then your direction turns south east toward the Lava Tower, sometimes called the Shark’s Tooth. That name fits because the feature sticks out visually on the ridge line.
After Lava Tower, there’s another junction up to Arrow Glacier at about 16,000 ft. Then you descend again to Barranco Hut around 13,000 ft.
The key point for you: the day ends near where it started, but the work you did above it is the acclimatization method. You’re training your body to cope with altitude by giving it a high-altitude stimulus, then letting it rest lower. That is why this day is described as important even if the numbers look similar at the end of the day.
Day 4 to Barafu Hut: South Circuit vibes and the long day before summit night
On Day 4 you move from 13,000 ft to 15,000 ft over 9 km, with 8–10 hours of hiking through Alpine Desert. This is a big day. It’s not just a climb; it’s a mental marathon.
You leave Barranco and continue on a steep ridge, passing the Barranco Wall. Then you head into Karanga Valley campsite. After that, you connect with the Mweka Trail via a junction and continue up to Barafu Hut.
This is the day where you’re effectively doing part of what’s described as the South Circuit. The payoff is that you get views of Mawenzi and Kibo from Barafu. When you reach camp, you’re also shifting into summit mode: rest, dinner, and preparation.
Practical advice: treat the evening at Barafu like the start of a job. Get warm, follow pacing guidance, and don’t spend your energy on rushing around. Summit night punishes wasted effort.
Summit Night (Day 5): midnight ascent, Stella Point, and sunrise
Day 5 is the make-or-break push. You start very early, between midnight and 2 a.m., and the trek covers a 5 km ascent plus a 12 km descent. Total time listed is about 7–8 hours ascent and 4–6 hours descent. The habitat is described as Arctic, which is a reminder that this is cold enough to matter.
You ascend through heavy scree toward Stella Point on the crater rim. The description notes the most mentally and physically challenging portion happens here. That’s exactly when you want your breathing controlled and your pace consistent.
At Stella Point (18,600 ft), you stop briefly and get one of Kilimanjaro’s best rewards: the chance at an unforgettable sunrise (weather permitting). Even if you’ve seen sunrise elsewhere, this one has a different feel because you’re earning it while tired, cold, and fully committed.
From there, you continue toward the summit and then descend to around 10,000 ft by the end of the day. You’ll want to be realistic about energy here: you may feel relief, but you’ll still be low on stamina for the next morning’s descent.
Final descent (Day 6): Mweka Gate, mud, and certificate time
After the summit night and recovery, Day 6 is shorter but still not a walk in the park. You start around 10,000 ft and descend to about 5,400 ft over 10 km in about 3–4 hours, moving through Rain Forest.
You’ll hike down to Mweka Park Gate where you receive your summit certificates. It’s a real moment—because the trail is behind you and the paperwork is proof that your body and mind pulled it off.
Lower down, it can be wet and muddy, and the advice is consistent: bring gaiters and use trekking poles if you can. For clothing, the guidance says shorts and t-shirts will probably be enough at lower elevations, but you should still keep rain gear and warmer clothing handy. That’s smart because mornings and rainforest wind can still feel colder than you expect after the summit day.
Guides, porters, and why the team matters on Kili
This trip’s success usually comes down to the team doing small things right. The reviews strongly emphasize coordination and communication, which you’ll feel during the hard parts when you need clear guidance.
One coordinator named Erastus shows up in multiple accounts, including organizing everything and pairing climbers with a strong crew. Lead guides named include Matthew and Oliver, and support names include Joshua. Another guide repeatedly credited is Benjamin.
The themes are practical:
- Guides spoke great English and communicated effectively
- Pacing felt adapted to individuals
- Porters were described as excellent, with good camp support and equipment handling
- Food and facilities were described as up to standard, including praise for a chef who kept meals consistent
- On-trail support included help for small bags when needed
I also like that the group format is private. That means you’re not squeezed into a giant crowd where you lose the chance to slow down or ask questions. It still doesn’t remove altitude risk, but it does make the experience feel more controlled and personal.
What to pack (based on what’s actually covered)
Because camping and cooking equipment is included, you’re mainly packing for safety, comfort, and warmth—especially for summit night and the wet sections.
From the tour details, here’s what you should plan on providing yourself:
- Gaiters and trekking poles (specifically recommended for muddy/slippery rainforest parts)
- Rain gear
- Warmer clothing, kept handy even if lower levels feel warm
- Personal items and the small stuff that isn’t included (plus tips, since tips are not covered)
And here’s what you may need to rent:
- Climbing gear (available for rent)
- Sleeping bag (available for rent)
Also note that bath towels aren’t included. It sounds basic, but it’s the kind of detail that turns into a headache if you forget.
One more practical note: the trek starts at 12:00 am. Even if you’re not driving at that exact moment, your summit routine has to start early. Pack in a way that keeps your layers and small essentials reachable without unpacking everything.
Who should choose this 6-day Machame trek
This is a solid fit if you want the Machame route’s mix of habitats and views in a manageable time window. The route is popular, and the overall structure is designed around acclimatization days and a summit push with a clear cold-weather plan.
It’s also a good match if you value strong support. Reviews highlight guides handling communication well and getting people safely to the summit. That kind of operational competence matters on Kilimanjaro because you can’t simply muscle your way through altitude.
The main caution is pacing. One review specifically said that if you hike a lot and walk fast, 6 days can be enough, but if you walk slowly, you should consider 7 days. I’d treat that as a real signal: your body needs time, and 6 days is not automatically “easy” even if it’s labeled as shorter.
Should you book Mafie Adventures for the 6-Day Machame Route?
If you’re looking for value and support, I think this is a strong option to consider. The package includes porters, camp setup, and meals, which removes a lot of the hassle that normally makes Kili planning stressful. The reviews also point to consistent team quality, including credited guides like Matthew, Joshua, Oliver, and Benjamin, with coordinator Erastus showing up repeatedly.
Just go in with eyes open:
- You’ll likely need to rent gear (climbing gear and sleeping bag)
- You’ll still have costs for flights, visa, personal items, and tips
- Summit success depends on your health and acclimatization, not only the itinerary
- The hike is hard enough that pace matters, and 6 days may feel tight if you move slowly
If that sounds like your kind of challenge—and you’re willing to prepare for cold nights, mud, and early starts—this trip checks many practical boxes. If you’re expecting an easy stroll, or you’re not sure about your fitness, you’ll want to plan smarter with your timing before you commit.
FAQ
How long is the 6 Days Machame Route Kilimanjaro Trekking experience?
It runs for about 6 days.
Where does the trek start and end?
The experience starts at Kilimanjaro International Airport (Kilimanjaro Airport Rd, Tanzania) and ends back at the meeting point.
Is pickup included?
The tour info says pickup offered.
What’s included in the trekking package?
Included items list camping equipment, all accommodation during the trek, porterage, professional driver/guide, parking fees, rescue fees, all taxes/VAT, and meals (5 breakfasts, 5 lunches, 5 dinners).
Is the park admission covered?
The trekking days list admission ticket free, and the inclusions also mention parking fees and rescue fees.
What gear do I need to bring versus rent?
Climbing gear is not included but is available for rent. A sleeping bag is also not included but is available for rent.
Is the booking refundable if I cancel?
The experience is listed as non-refundable and cannot be changed for any reason.